
Issue:
You would like to create a deployment for Autodesk products.
Solution:
Use the new “Custom Install” at https://manage.autodesk.com/ to create your Autodesk deployments.
- Go to https://manage.autodesk.com/ and login with an admin account.
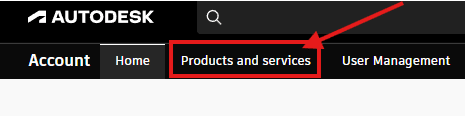
- Click on "Products and services" at the top of the page.
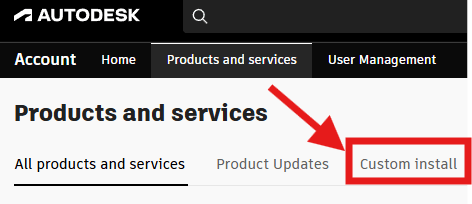
- Choose Custom Install from the menu list at the top of the page.
- A Custom Install page will appear. Choose + Create package

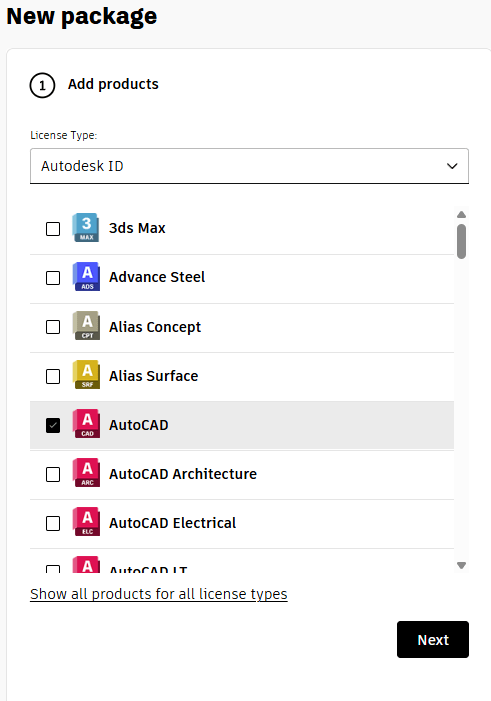
- Choose your “License Type” at the top. License type could either be Autodesk ID, or Network. Then check the box next to the product for which this deployment will be created.
- A new window will appear to the right of the “new package” window. At the top, you can click on “Specific version” to choose an older version or a version with or without updates. The default version will be the newest version with the updates.
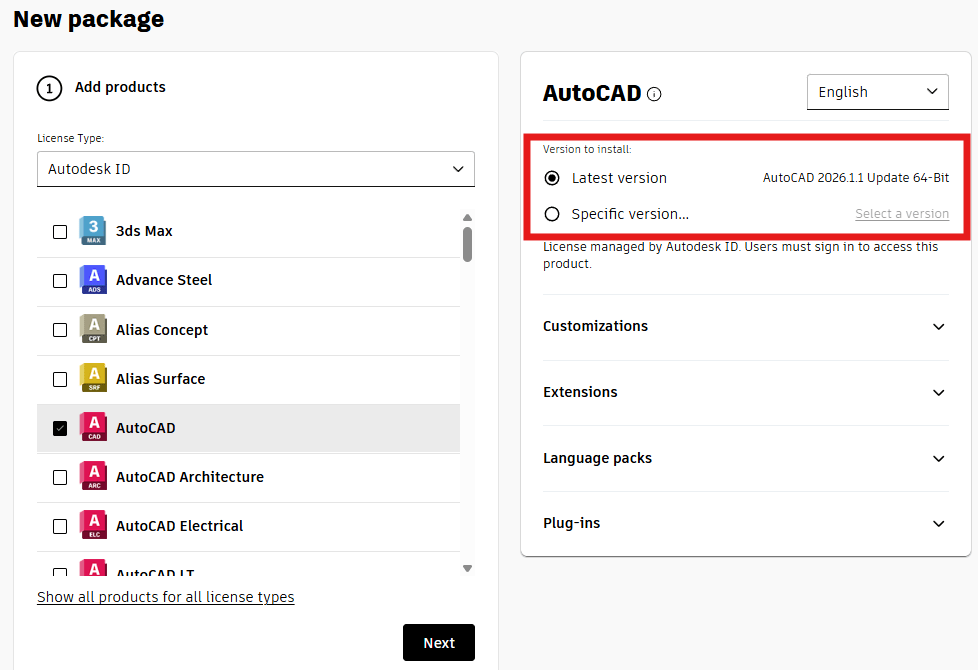
- You can click on the buttons “Customizations” and or “Extensions”. Each Autodesk product will have available customizations and extensions for the product.

- Click “Next” to move to Step 2 Install settings.

- Create a package name and description.
- You will be presented with this screen if you choose “Autodesk ID” from step 4. Fill in a package name. Choose “Deploy”. Add a “Deployment image path.” This is where the deployment will be created. Use a network shared directory URL or use a local drive. You can also use map drives, but keep in mind that the drive mappings must be consistent on all machines.

- Check the “I agree to the Terms of Use” box and choose download.
- If you chose “Network” from step 4 we will have to Specify a license server name.

- Choose your license server model and enter the name of the license server that will run the “Network License Manager” Click save, then choose Download from the next screen.

- An exe file will download into your download folder. This file will be named after what you entered as the “Package name” from step 9. Click this file to start the creation and download of your deployment.
About the Author
Follow on Linkedin More Content by Ken Williams


