
Applies to:
All AutoCAD-based Products
Issue:
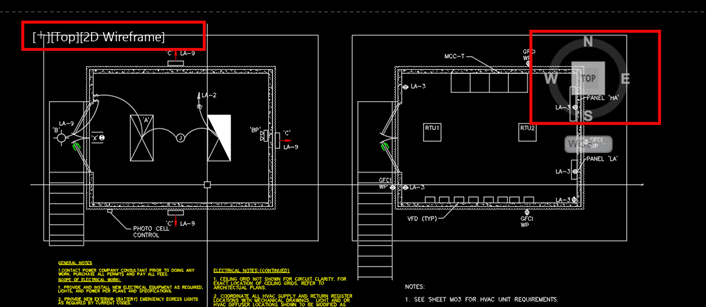
You have multiple viewports in a layout tab and some of them overlap others so you cannot seem to get to the correct viewport.
Causes:
This is typically caused by an unnecessary viewport or a default viewport that is present inside the entire border.
Solution:
Here’s how we fix the viewport issue
1. Make paper space active and double click in the viewport you want to save (if possible) to make Model space active, you can use CTRL + R to cycle through all viewports until the one you want to save is active:
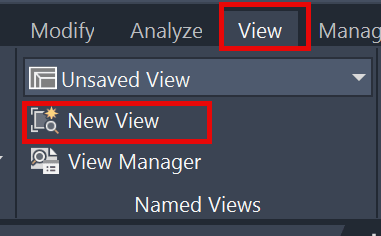
2. Go to the View Tab and click New View
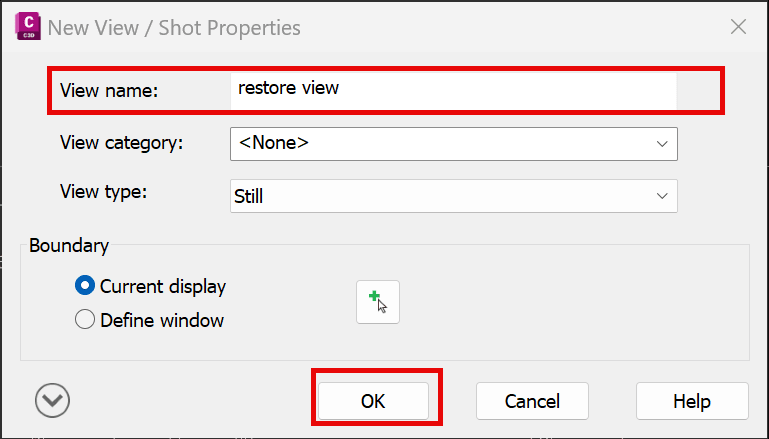
3. Give it a name that makes sense and click OK
4. Go back to paper space (double click on paper space or click the Model button to change to paper space).
![]()
5. Type in QSELECT and set the Object Type to Viewport and the Operator to Select All, then click OK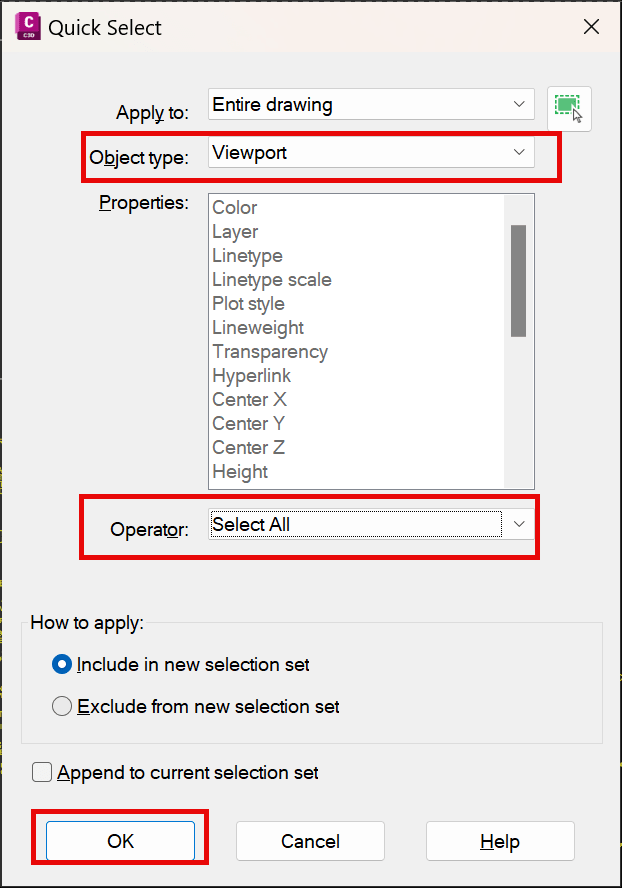
6. Once selected, hit the delete key on the keyboard or use the erase command to erase all selected viewports
7. Now in the Layout Tab in the ribbon, find the Insert View button, click the down arrow and select the view we saved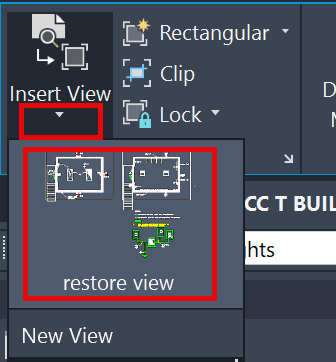
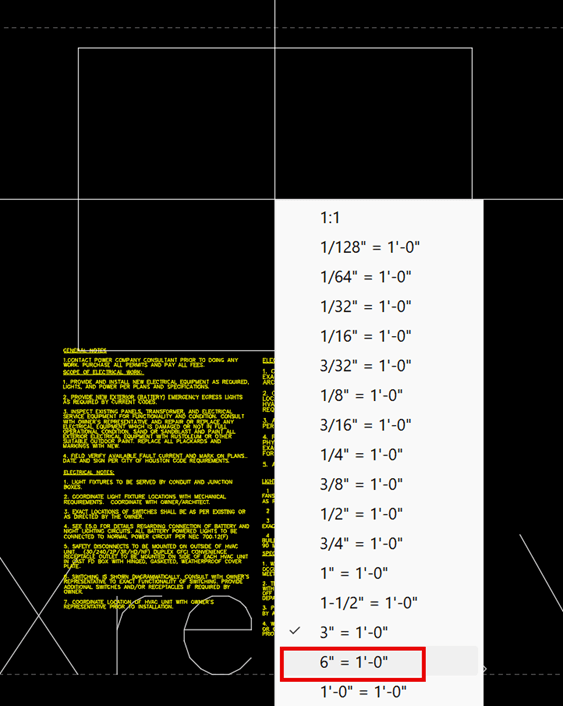
8. It will be too small, so right mouse click and change to the next higher scale (it’s inserting at 3” = 1’-0”, and we want 6”= 1’-0”
9. Left mouse click to place the viewport and now you can select it and move it to the location needed. Remember to select the viewport and move it to your preferred viewport layer.
About the Author
Follow on Linkedin More Content by Ryan Wunderlich


