
Info:
The hanger command can be used on any pipe service in fabrication. When using the attacher or the multi-point fill method they are not automatically added, this is where the HANGERCOMMAND comes in. There is some initial set up prior to using the command.
Steps:
- Add Support Specification – Edit Main Database > Take Off > Support Specifications > New:

Name the specification, set the group, and give it a button code. Then double click to edit and add the dimensions (sizes), straight spacing and fitting distance.

End result:

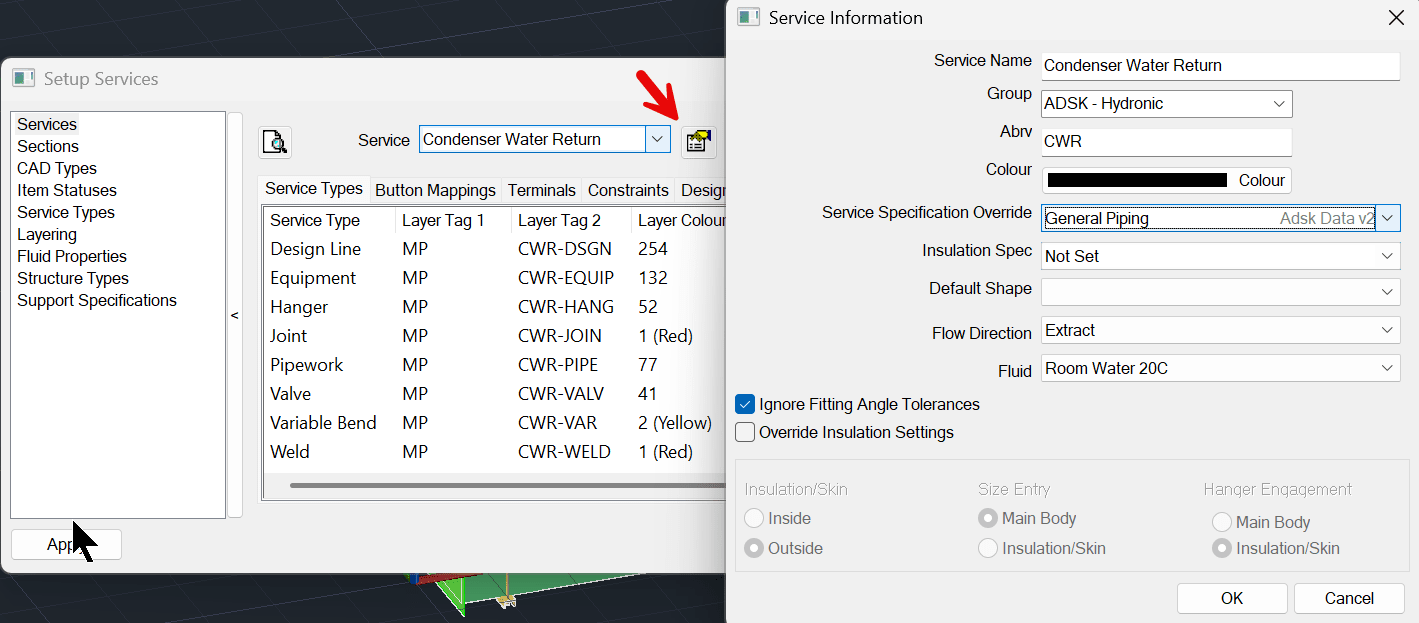
- Add a Hanger layer - Edit Service Database > Select service > Service Type’s tab > add hanger layer.

- Set Service Specification – Edit Service Database > Select service > Service Specification.
- Set Support Specification – Edit Service Database > Select service > Edit Service Template > Set supports:

Double click on one of the line items under “Supports” to edit:

- Set Support Positions - Edit Service Database > Select service > Edit Service Template > Support Positions. Set these according to the support specification being used.

- Set Button Code – Edit Service Database > Select service > Edit Service Template > Select Hanger and Right Click > Select Button Properties.
Set the button code for the hanger and select ok. This example is CH for Clevis Hanger.

- To close and save all changes in the database, select OK until all the way out.
- Start command: Type in HANGERCOMMAND and select ENTER. Select objects/ pipe and select ENTER to finish. Finished result:

Conclusion:
The HANGERCOMMAND is a great option to add hangers quickly when not using the Design line.
About the Author
More Content by Heather Volk


