
Welcome back to my continuing series on IMAGINiT’s Utilities for Revit. In this chapter of the series, we are delving deeper into the versatile 'Renumber' toolset with Part 3, focusing on the powerful Element Renumber utility.
The Element Renumber utility is a game-changer for Revit users, offering the ability to seamlessly renumber or insert various element types into a specific sequence. This flexibility is crucial for maintaining organized and efficient project data, especially in complex models where precise numbering is essential.
Understanding the Element Renumber Utility
The Element Renumber utility stands out for its capability to handle a wide range of elements, from generic components to more specific architectural and structural elements. Here are some key features and benefits:
- Versatile Renumbering: Whether you need to renumber doors, windows, walls, or any other element, this utility allows you to do so with ease. It ensures that all elements follow a coherent sequence, which is vital for project documentation and coordination.
- Sequential Insertion: Beyond just renumbering, you can insert new elements into an existing sequence without disrupting the overall order. This feature is particularly useful during the iterative design process where elements are frequently added or modified.
- Integration with Door Mark Update: One of the standout applications of the Element Renumber utility is its integration with the Door Mark Update utility. This pairing ensures that door numbering remains consistent and up-to-date, significantly reducing errors and enhancing the clarity of construction documents.
- Collaboration and Coordination: In multidisciplinary projects, clear and consistent element numbering aids in communication between teams. It ensures everyone is on the same page, reducing the risk of costly errors and rework.
How to Use the Element Renumber Utility
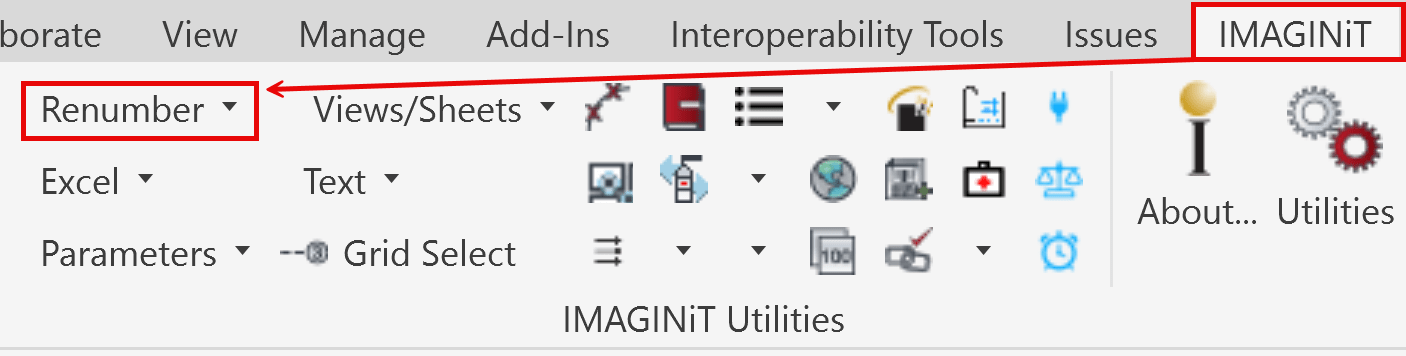
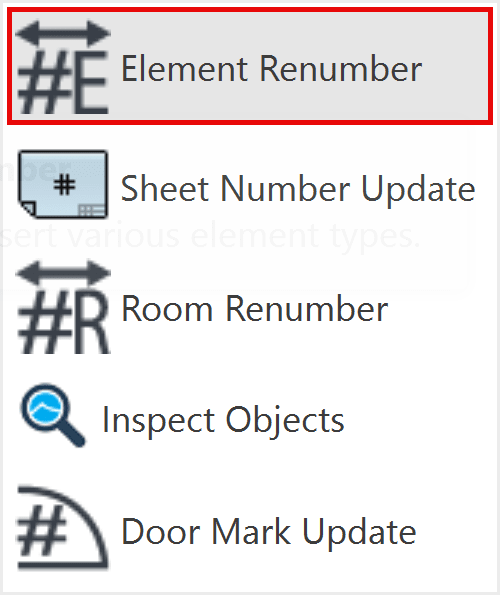
- Access the Tool: Navigate to the IMAGINiT Utilities for Revit tab and select the Element Renumber utility.
- Select Elements: Choose the elements you wish to renumber. You can filter by category to streamline the selection process.
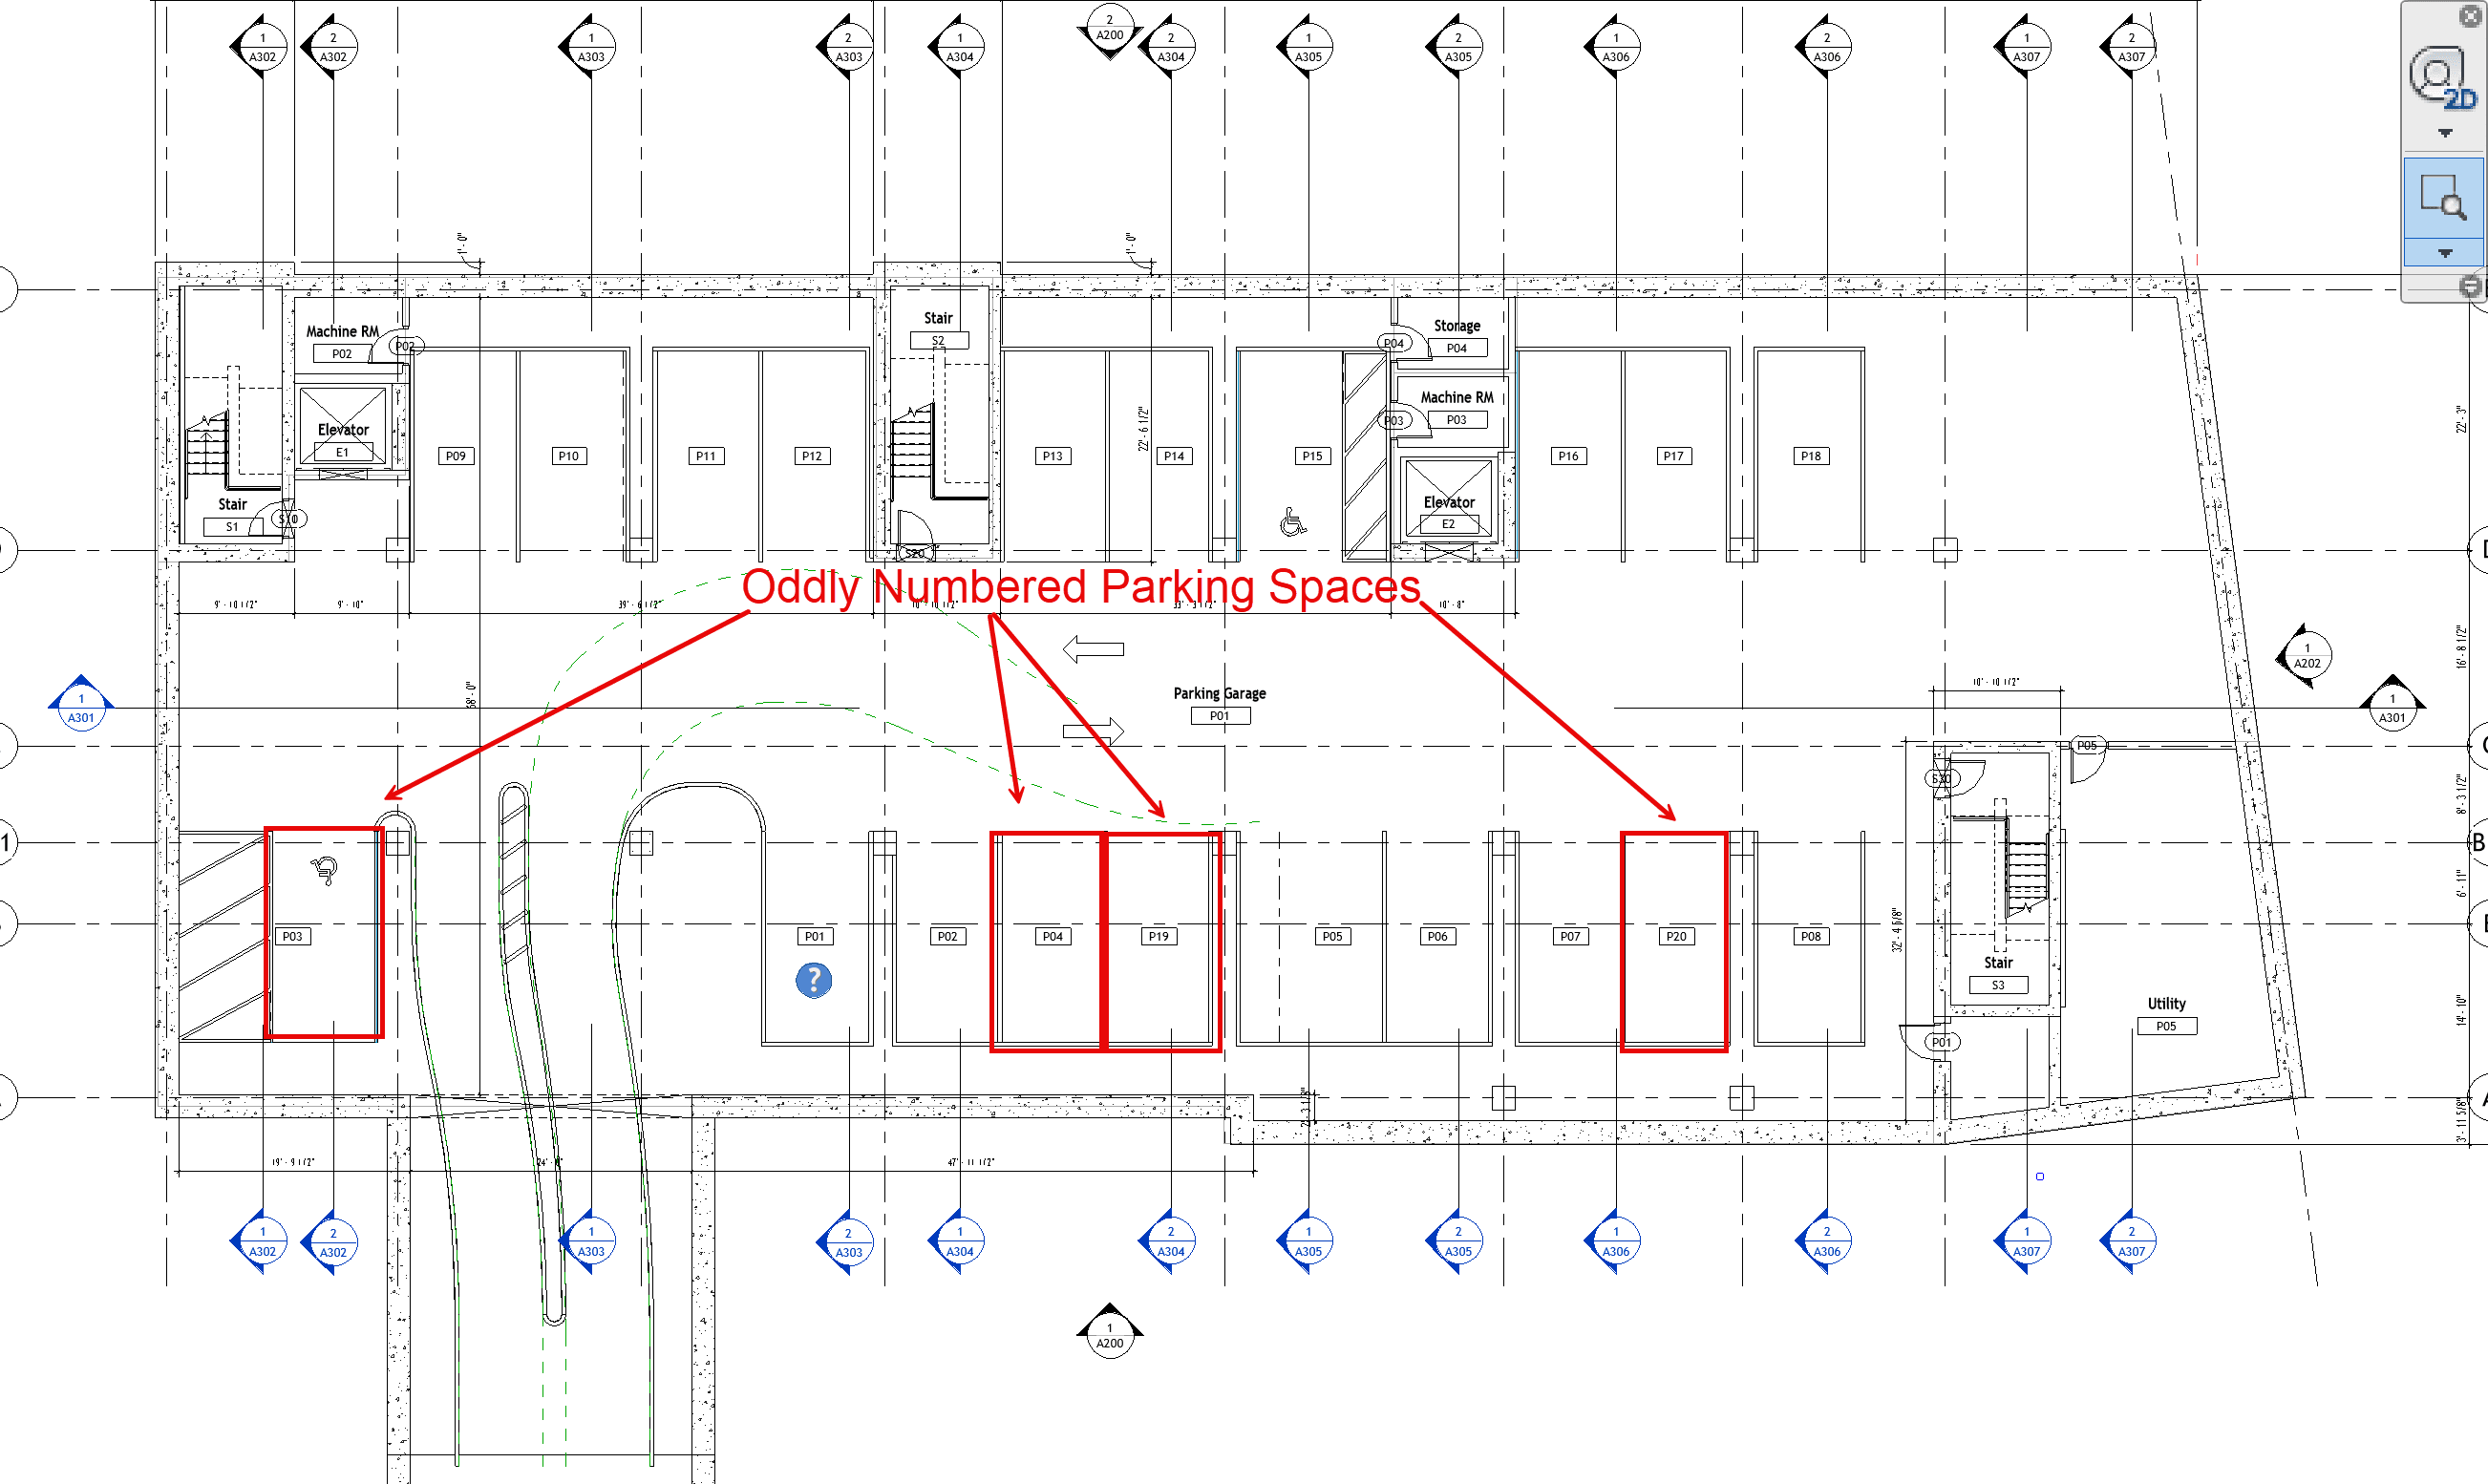
Oddly numbered Parking Spaces on a Revit Floor Plan.
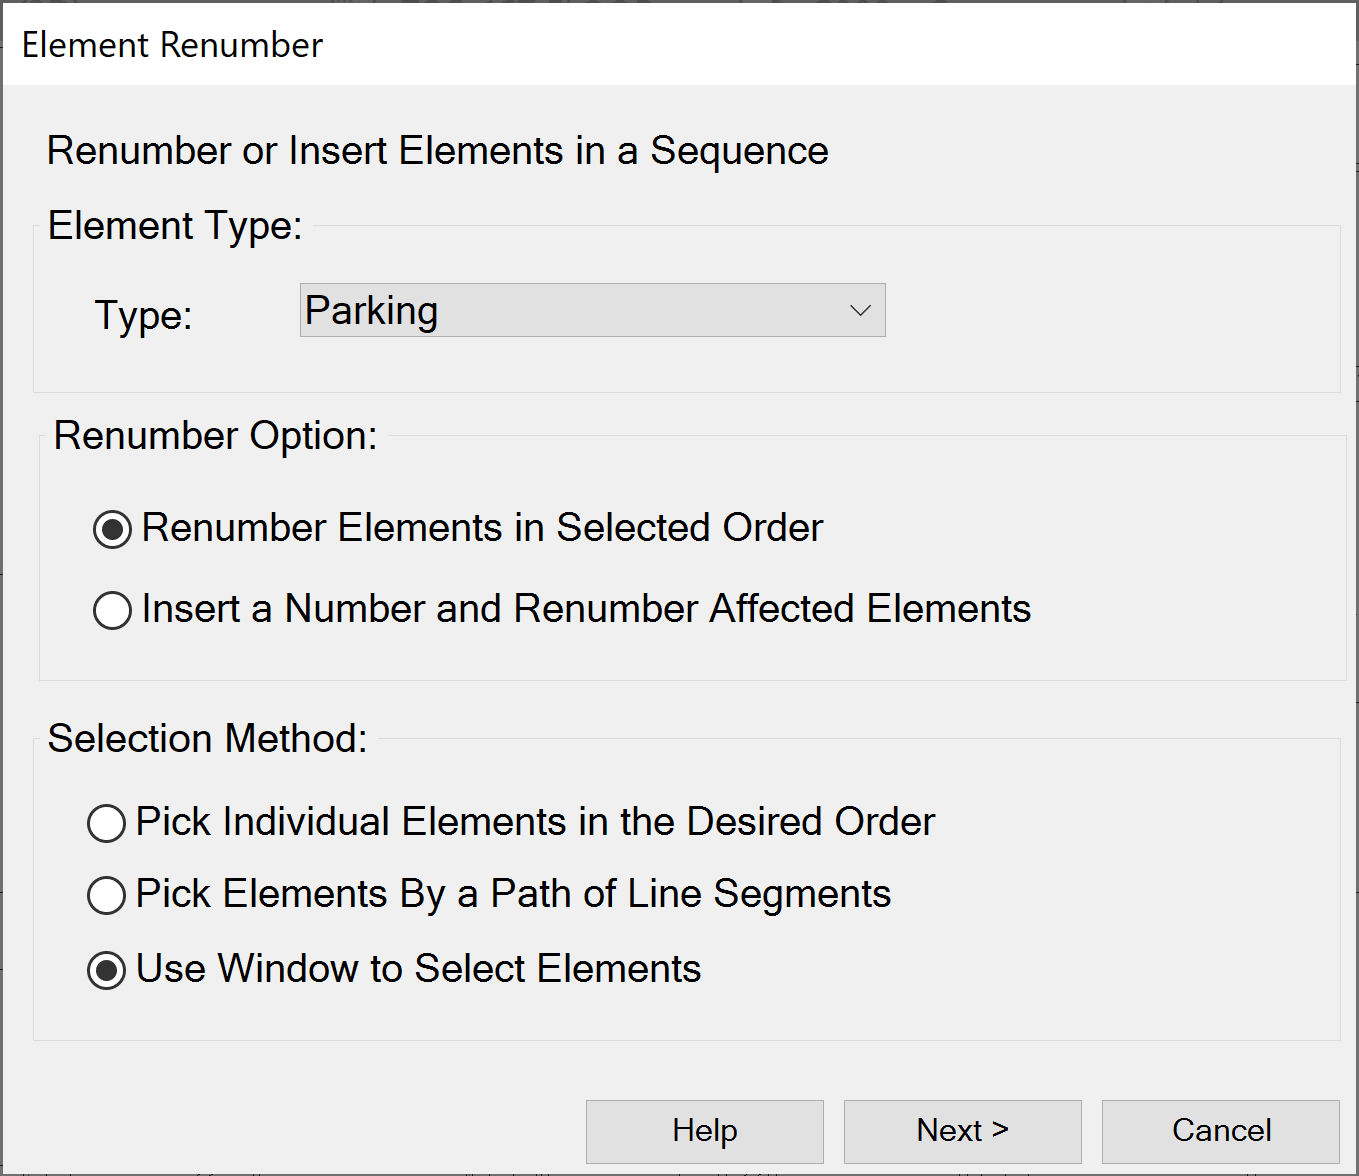
Choose the renumbering option and selection method to best fit what element type you are working with.
- Define the Sequence: Input the desired numbering sequence. You can set starting numbers, increments, and any specific prefixes or suffixes required.
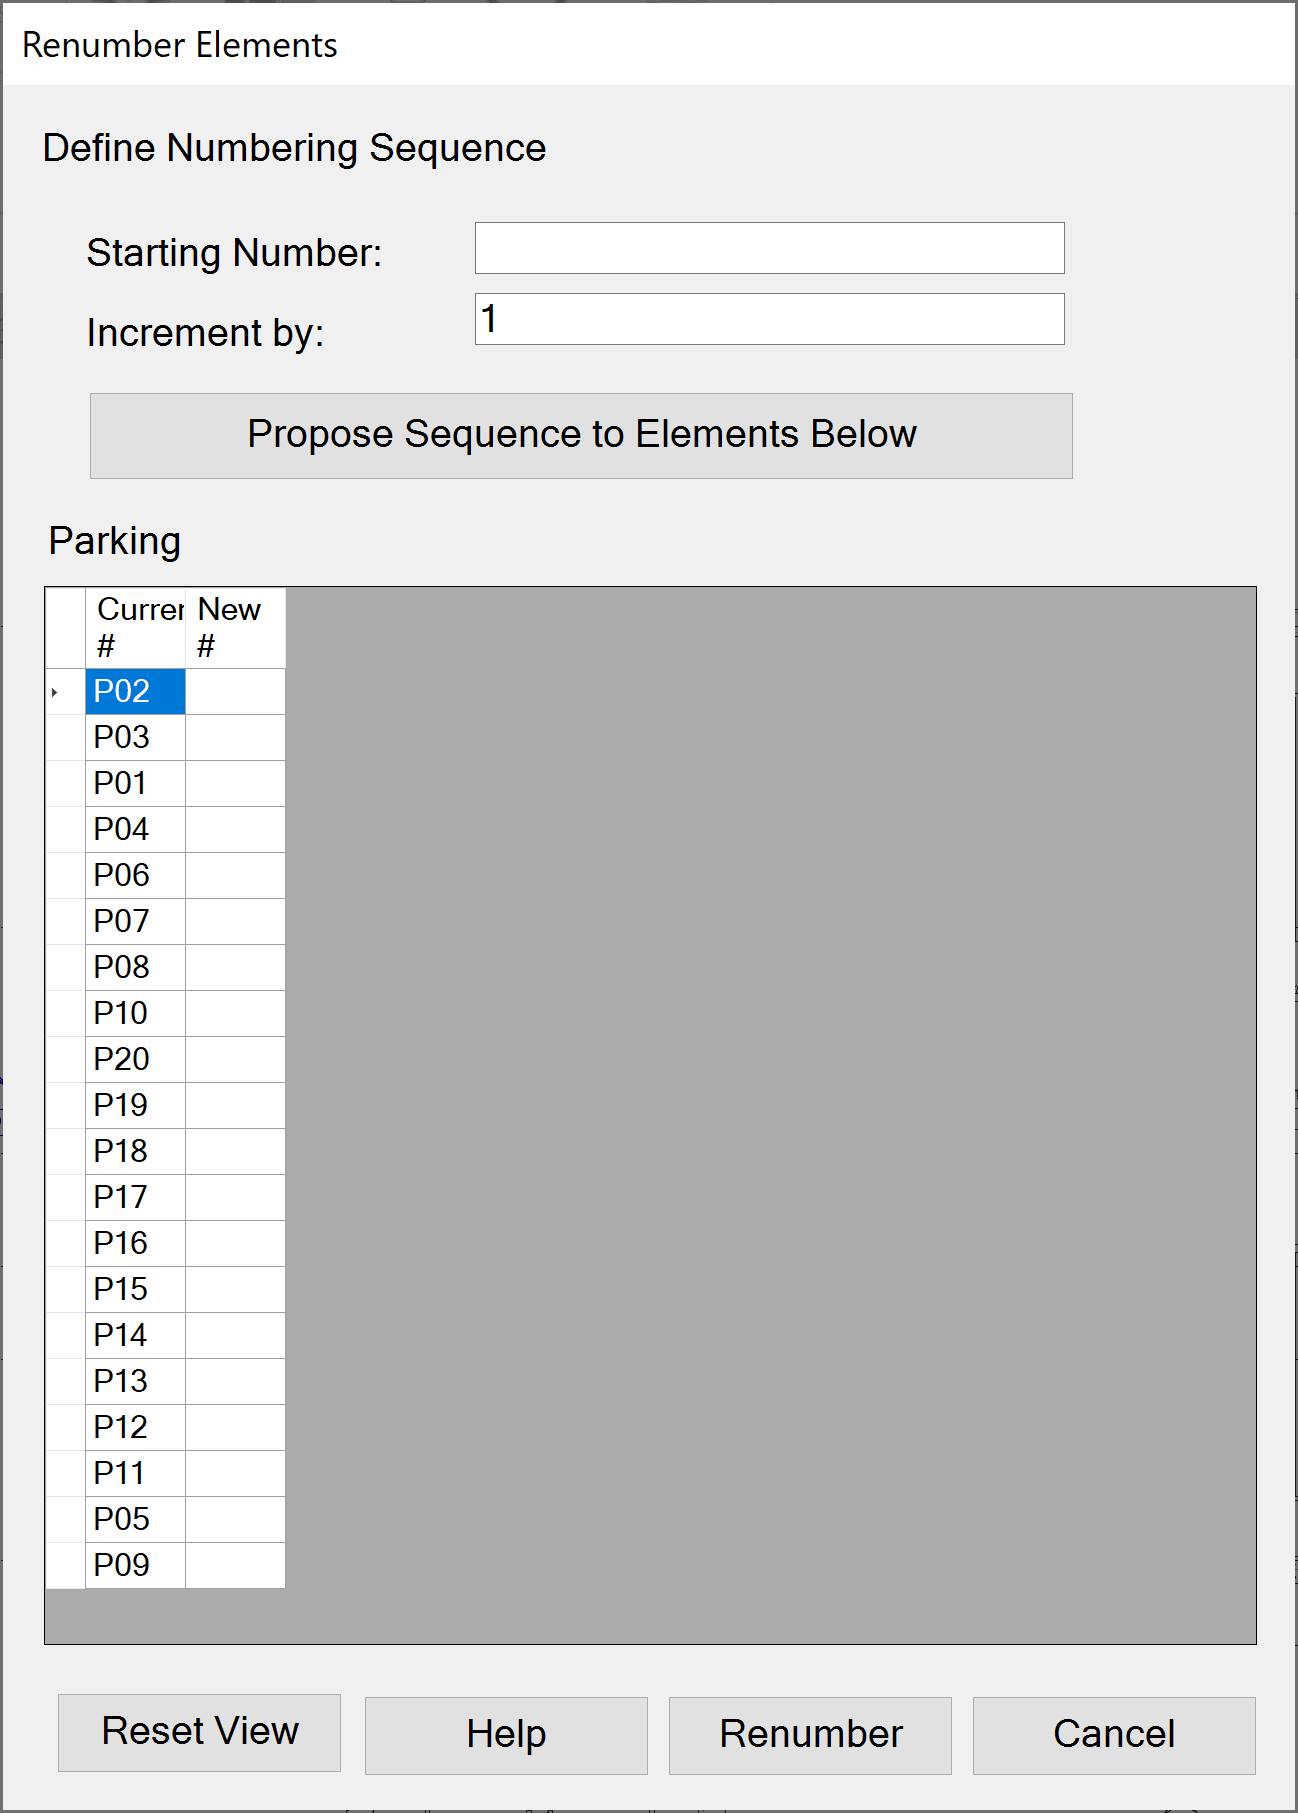
Once your selection is made, you can setup how you want the numbering to be formatted and what the new numbering order will be.
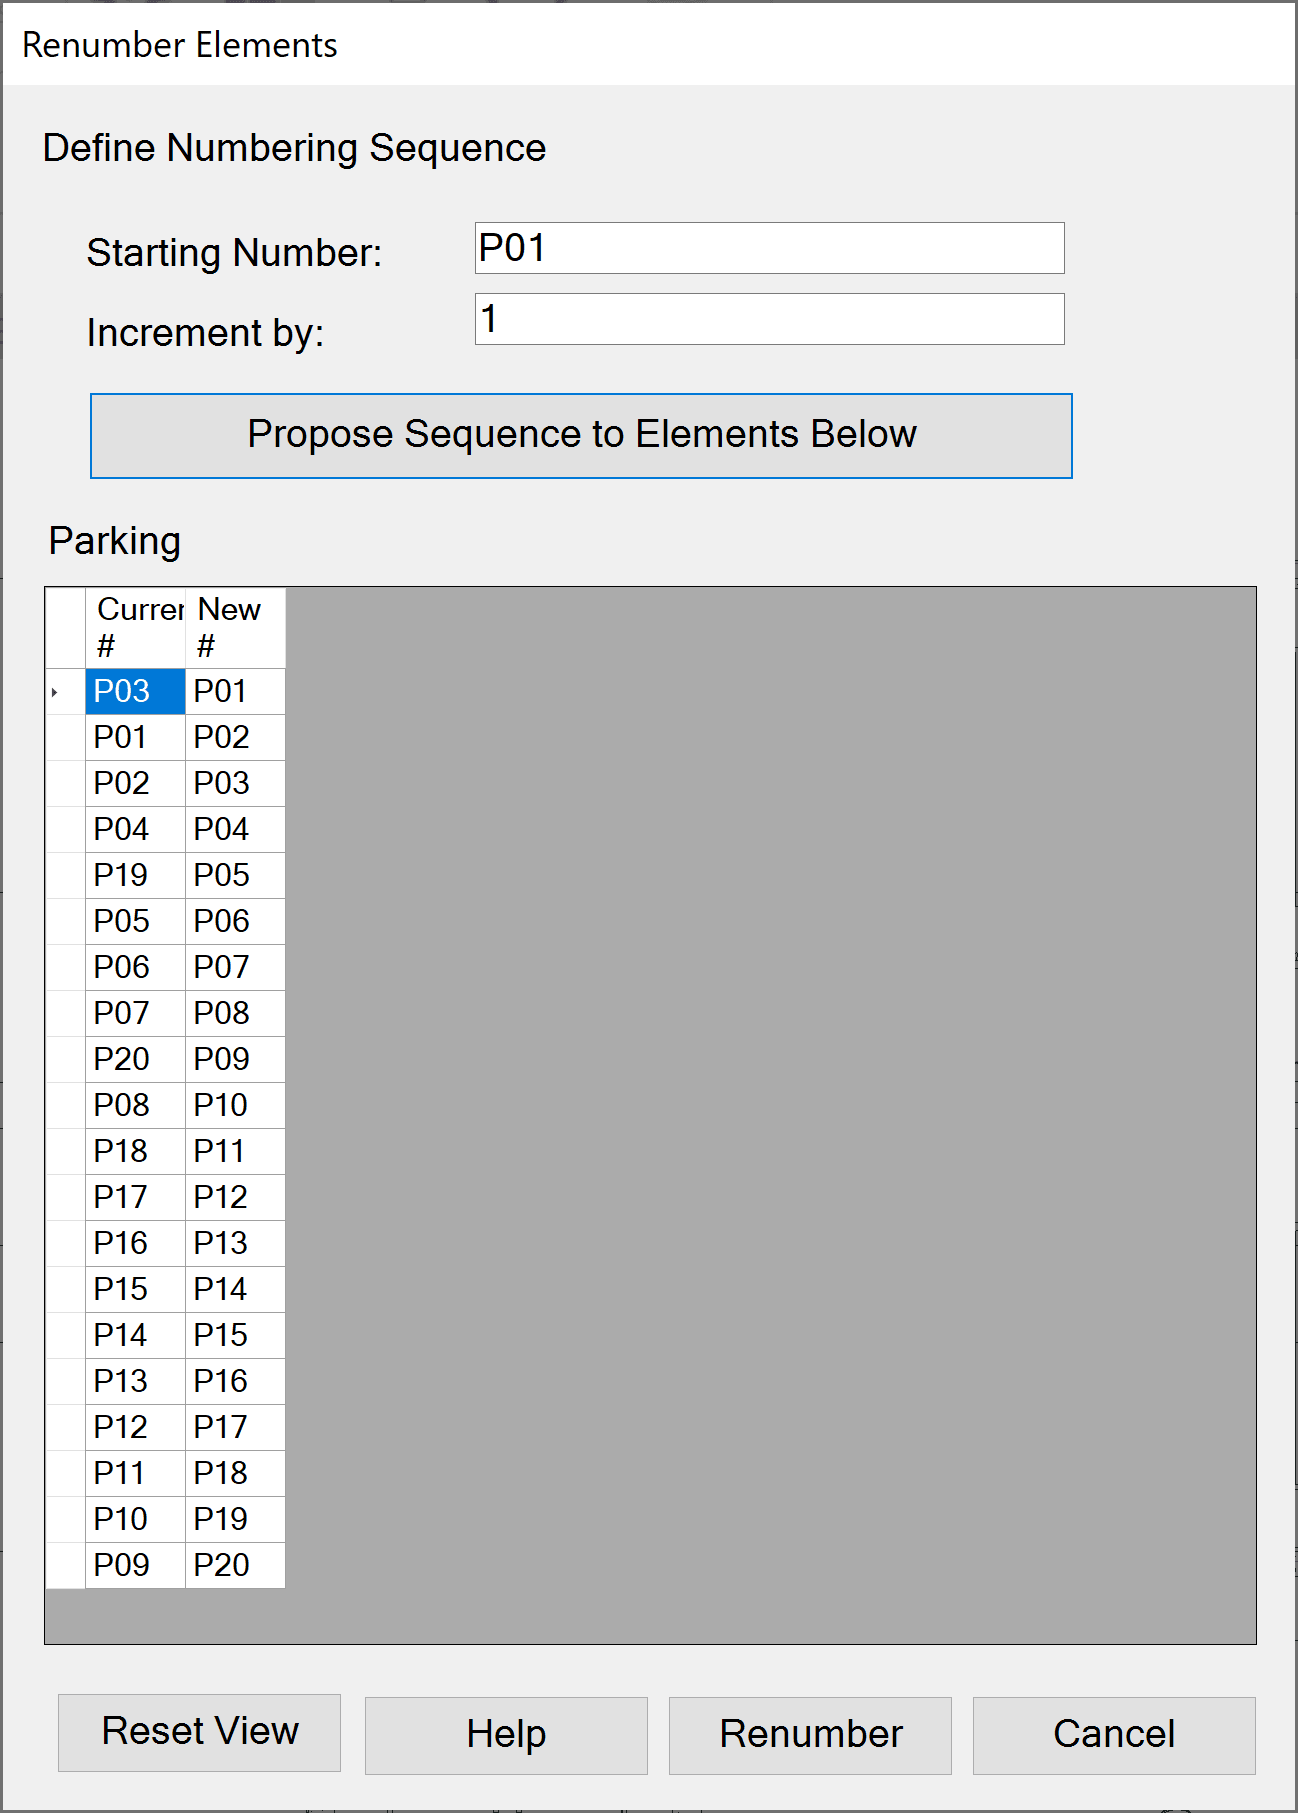
After picking the formatting and numbering options, your new numbering order will be displayed.
- Apply and Review: Apply the changes and review the updated numbering to ensure it meets your project requirements. Make any necessary adjustments for optimal results.
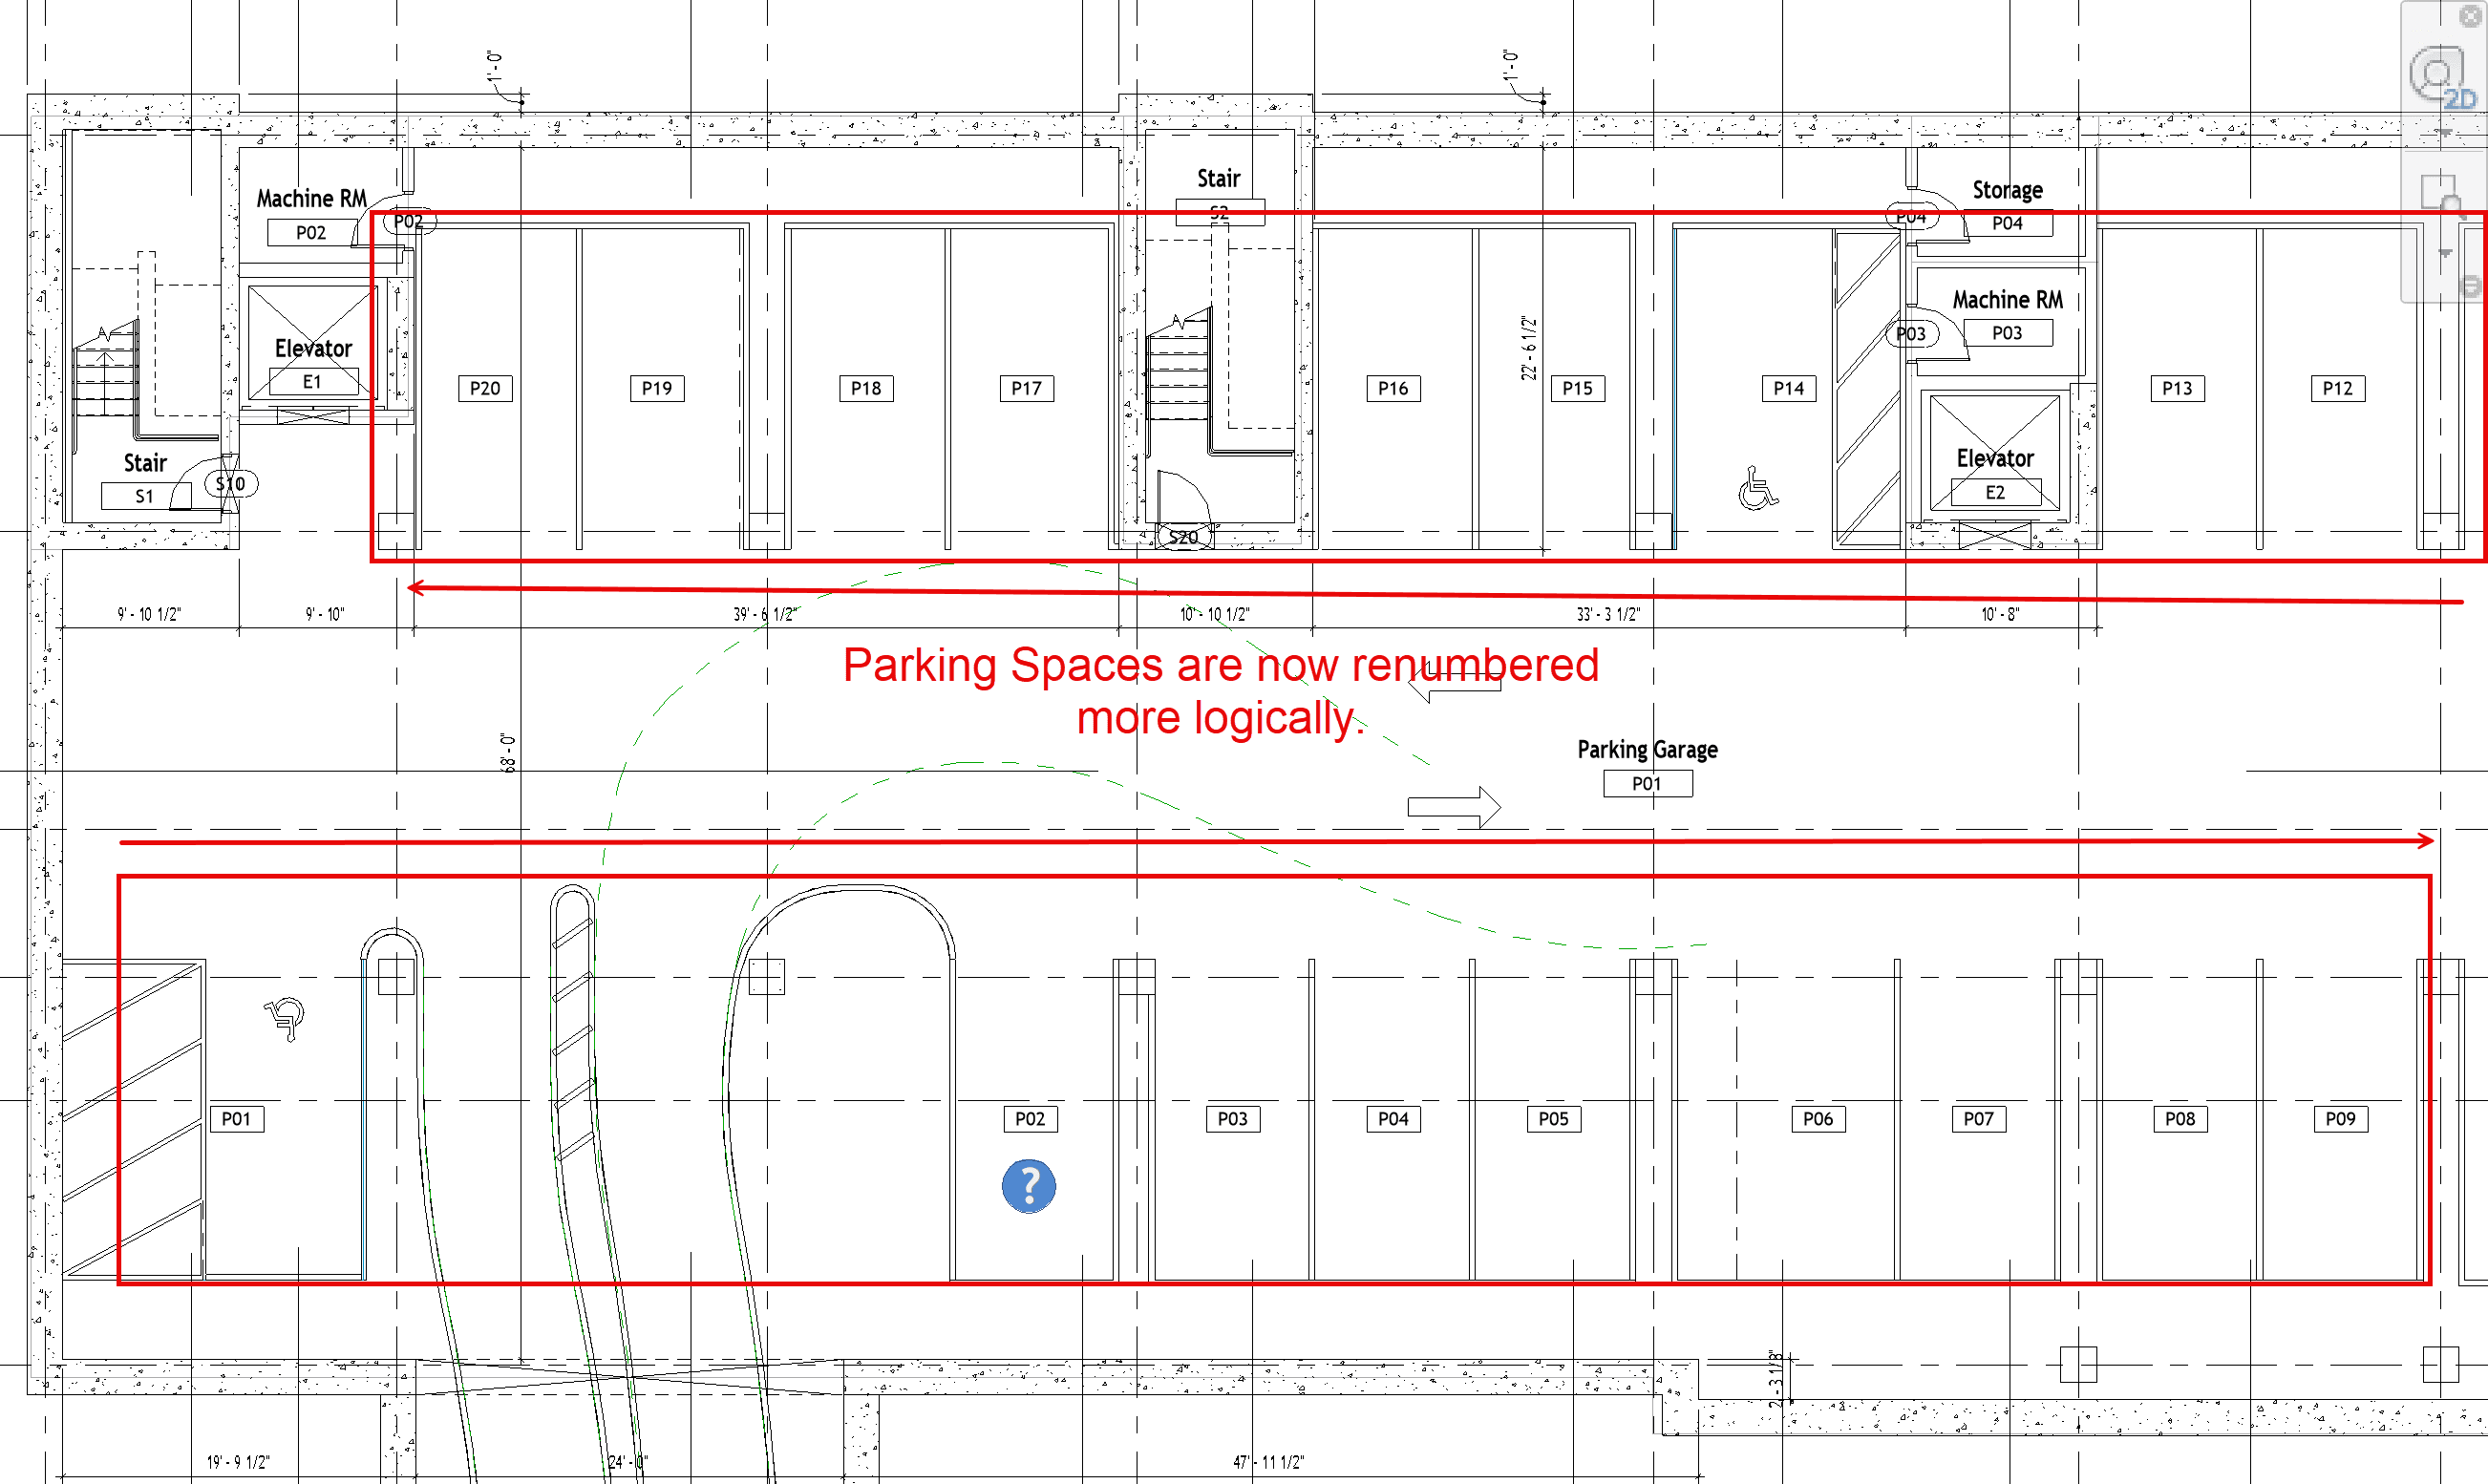
After renumbering, the parking spaces are ordered in a more logical order.
Practical Applications and Benefits
Let’s explore some practical scenarios where the Element Renumber utility can be a real asset:
- Project Setup: At the start of a project, establish a clear numbering system for all elements. This sets a strong foundation for project organization and simplifies future revisions.
- Design Iterations: As the design evolves, elements are often added or reconfigured. The Element Renumber utility allows for these changes without disrupting the overall sequence, maintaining consistency throughout the project lifecycle.
- Collaboration and Coordination: In multidisciplinary projects, clear and consistent element numbering aids in communication between teams. It ensures everyone is on the same page, reducing the risk of costly errors and rework.
The Element Renumber utility is an indispensable tool for any Revit user aiming to maintain a well-organized and efficient project environment. By leveraging its capabilities, you can enhance the accuracy of your models, improve team collaboration, and streamline your workflow.
Stay tuned for the next installment in our series, where we will continue to explore more tools and utilities that can transform your Revit experience. As always, feel free to reach out with any questions or share your experiences with the Element Renumber utility.
About the Author
Follow on Linkedin More Content by Scott Green


