
Welcome back to my series on IMAGINiT’s Utilities for Revit. In this installment, we continue our exploration of the ‘Renumber’ toolset with Part 2: the ‘Door Mark Update’ utility. This utility complements the Room Renumber utility perfectly, providing a way for users to update door tags to match their renumbered rooms. The Door Mark Update utility ensures that each door tag/mark for the selected doors accurately reflects the room it swings into. Let’s investigate this powerful tool and explore how it can enhance your Revit workflow.
Overview of the Door Mark Update Utility
The Door Mark Update utility is designed to simplify the process of synchronizing door tags with room numbers. This is particularly useful in maintaining consistency and clarity in your project documentation. By automatically updating door marks to match the numbers of the rooms they lead into, this utility helps eliminate errors and saves time that would otherwise be spent on manual updates.
Key Features of the Door Mark Update Utility
1. Automatic Door Tag Update:
- The utility automatically updates the door tags to match the room numbers of the rooms they swing into. This ensures that door marks are always consistent with room numbers.
2. Batch Processing:
- Update multiple door tags simultaneously, significantly speeding up the process for large projects with numerous doors and rooms.
3. Integration with Room Renumber:
- Seamlessly integrates with the Room Renumber utility. After renumbering rooms, use the Door Mark Update utility to ensure door tags reflect the new room numbers.
4. Customization Options:
- Offers customization options for the door mark format, allowing you to include prefixes, suffixes, or other identifying information as needed.
How to Use the Door Mark Update Utility
Let’s walk through the steps to utilize the Door Mark Update utility effectively:
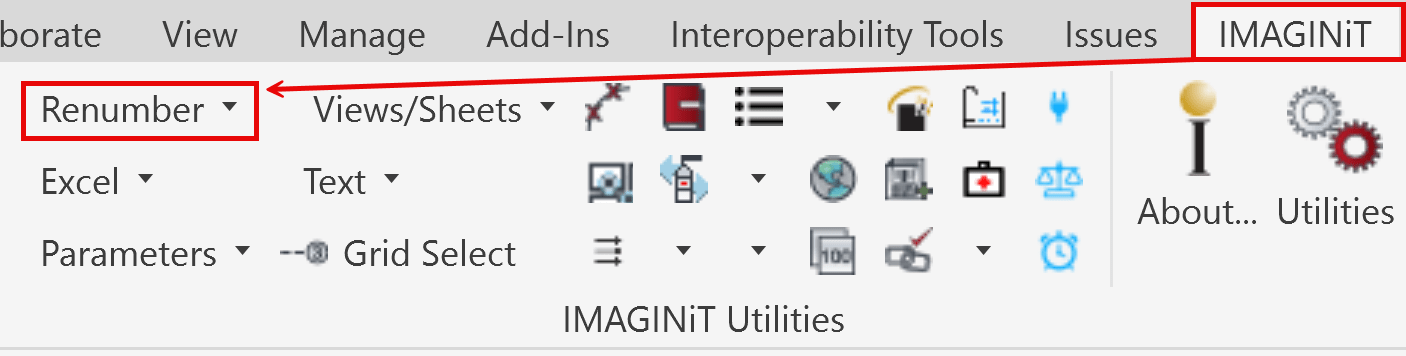
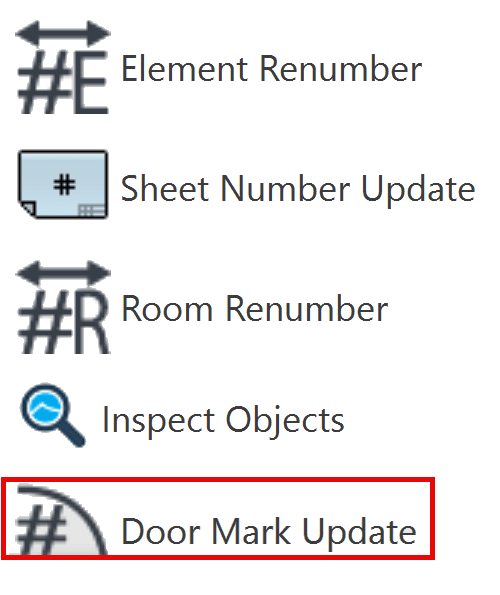
1. Access the Utility:
- Open your Revit project and navigate to the IMAGINiT Utilities tab on the ribbon. Select the Door Mark Update utility from the list of available renumbering tools under ‘Renumber’.
2. Select Doors:
- Choose the doors you want to update. You can select individual doors using a window selection, multiple doors (also by window selection), or all doors within a specific area, or level, including by phase.
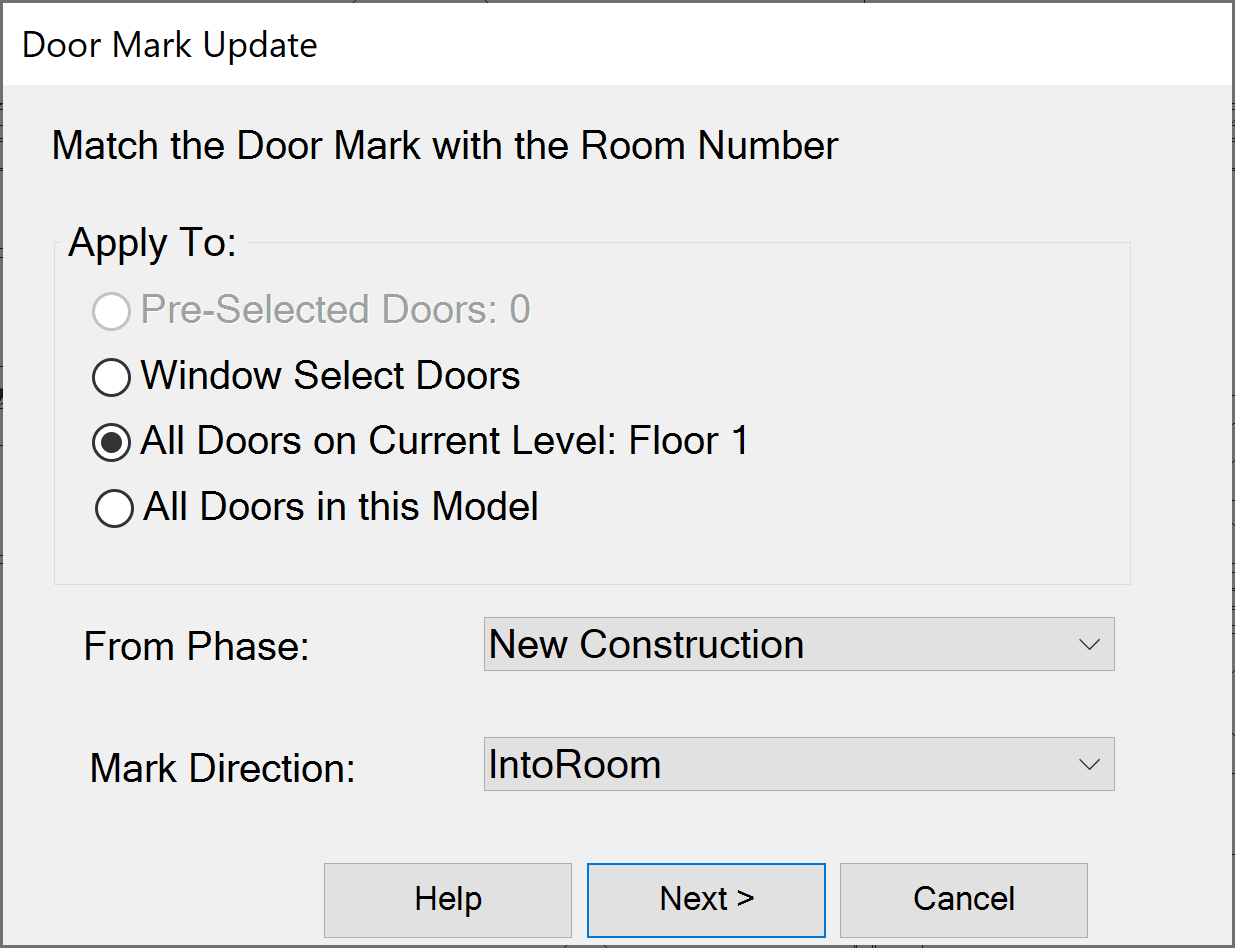
3. Define Update Parameters:
- Set your desired format for the door marks under the ‘proposed’ column. This might include specifying a standard format that matches your project requirements, such as including a room number prefix or suffix (example: 102A, 102B).
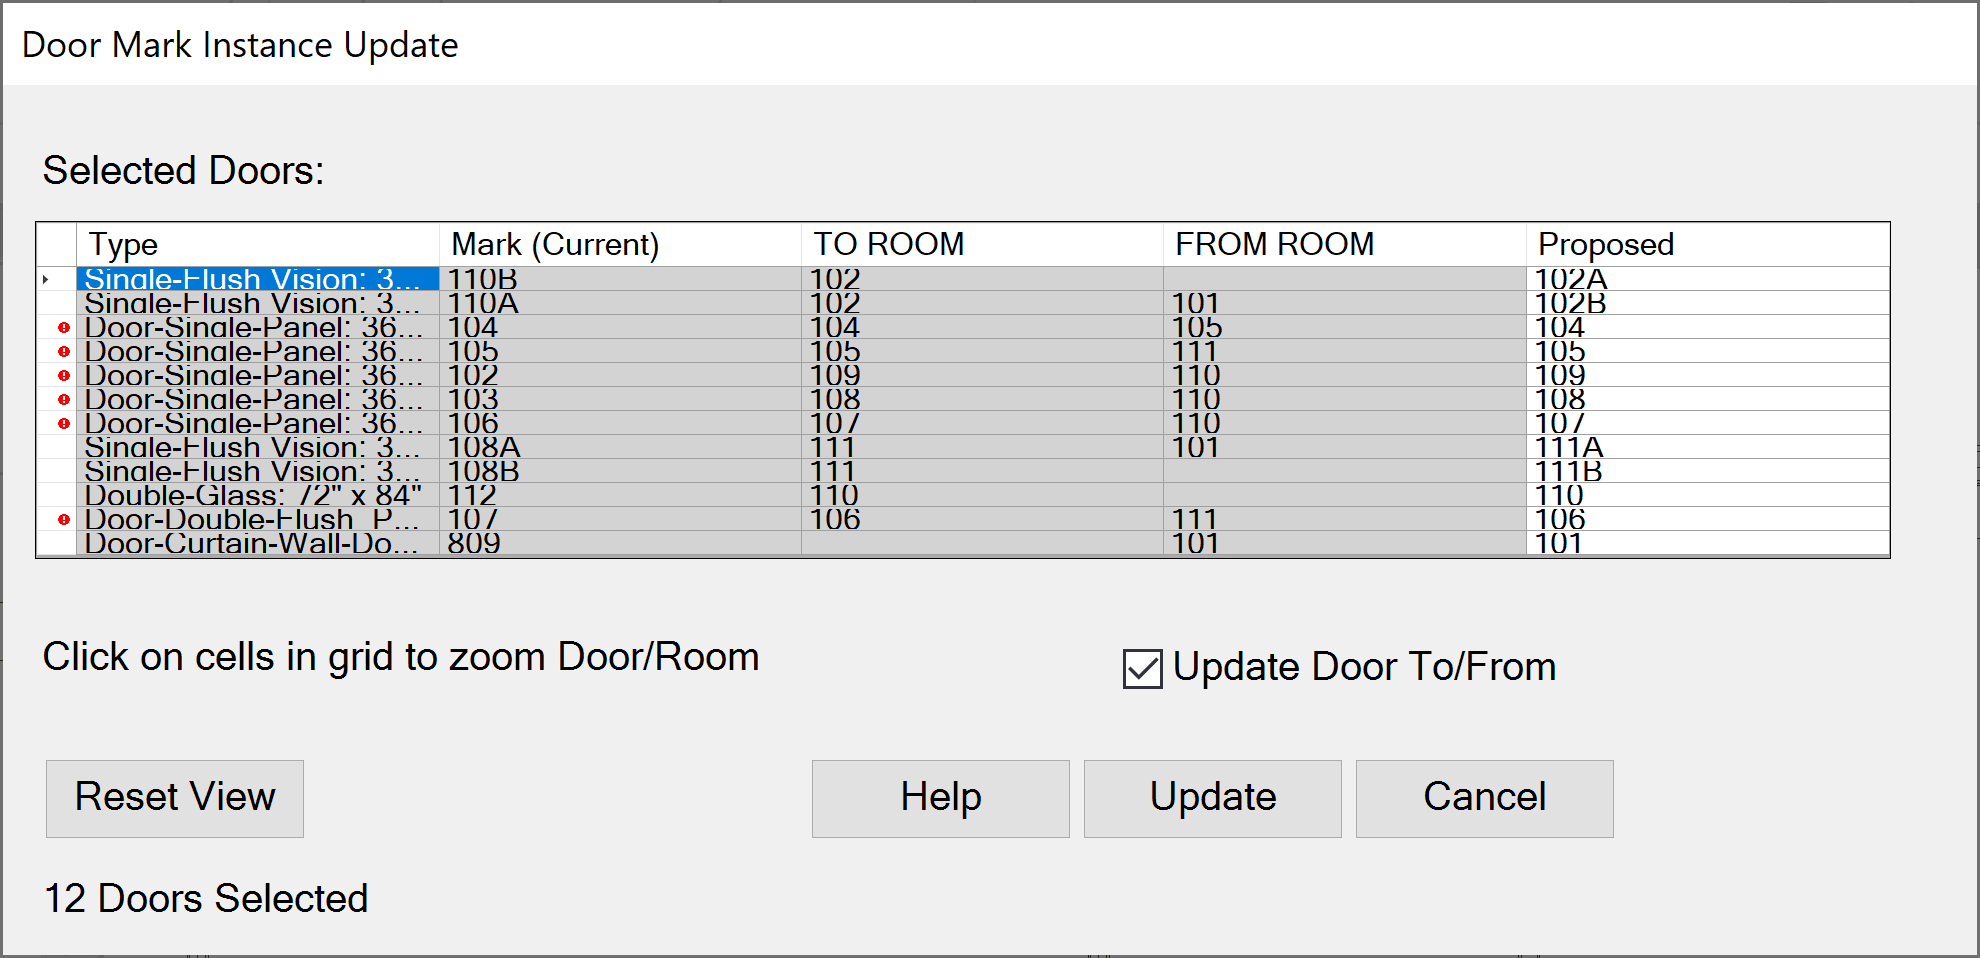
Confirming the selected door tag updates in the ‘Door Mark Instance Update’ dialog. Once configured as desired, select ‘Update’ to update the changes to the door tags.
4. Execute the Update:
- Run the utility to update the door tags by selecting ‘Update’ from the ‘Door Mark Instance Update’ dialog. The utility will automatically adjust the door marks to match the room numbers they swing into.
5. Review and Adjust:
- After the update, review the door tags to ensure accuracy. Make any necessary adjustments to align with your project’s standards and requirements.
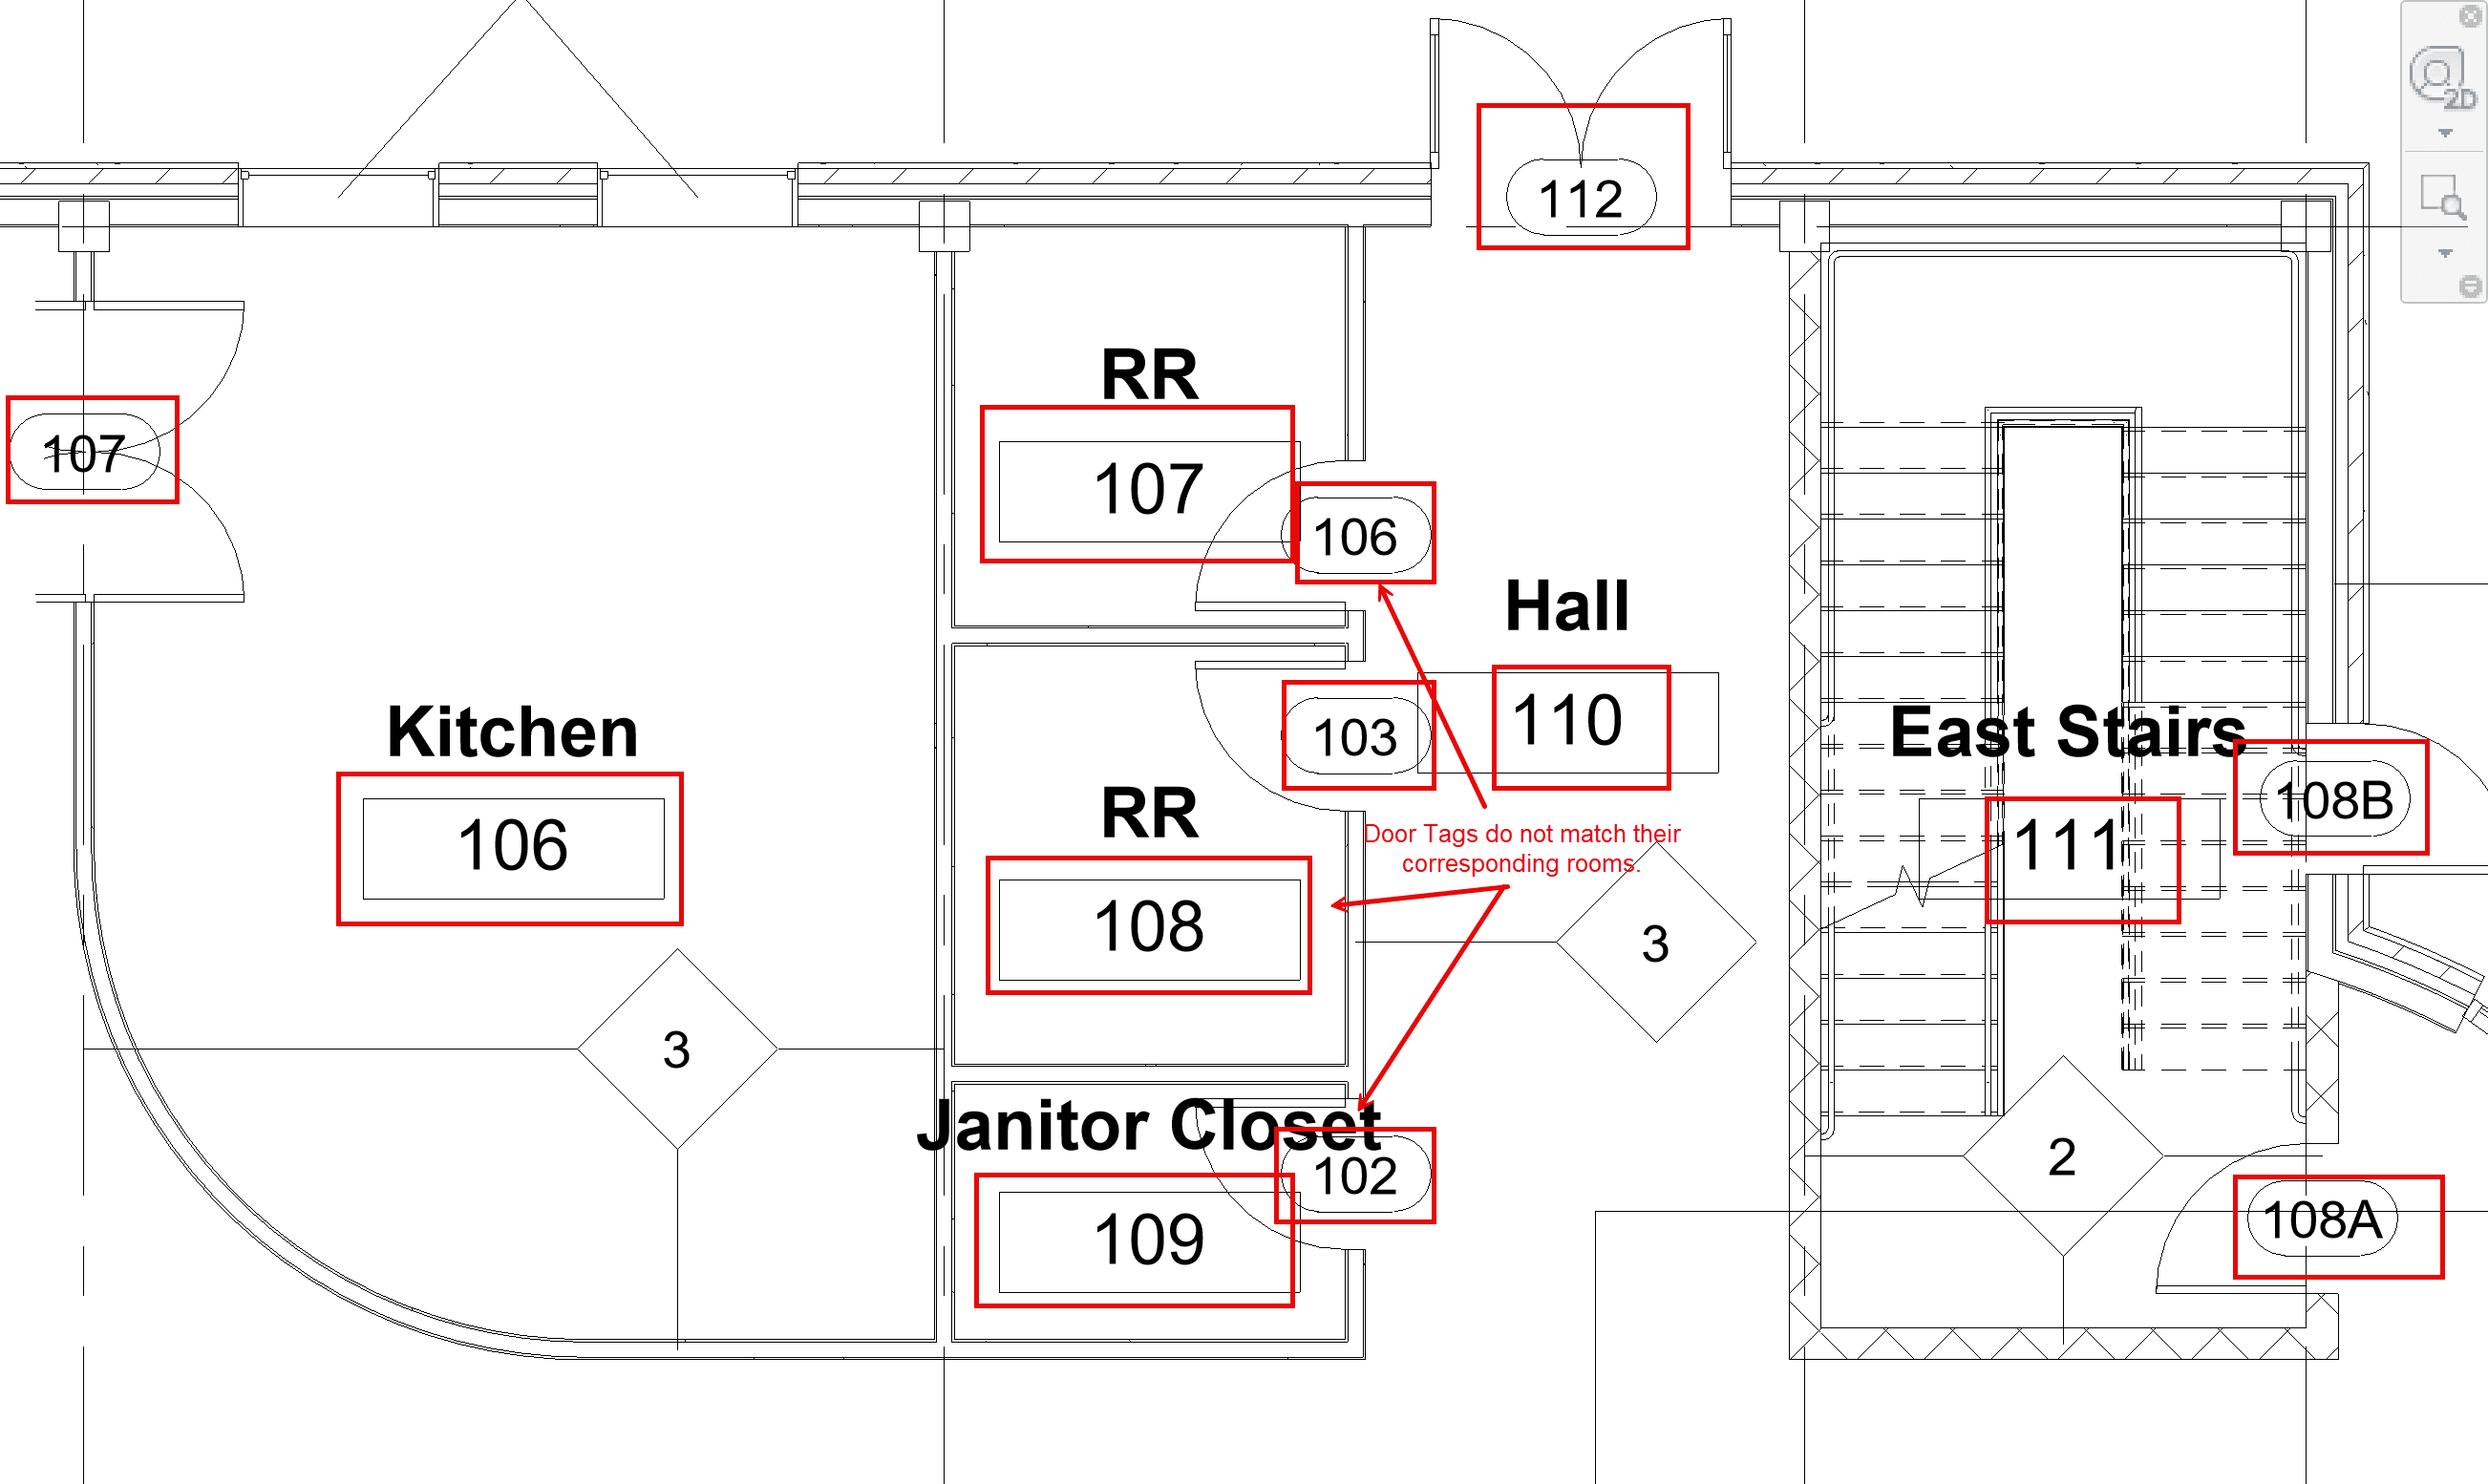
Door tags displayed on a Revit Floor Plan that do not match their associated rooms.
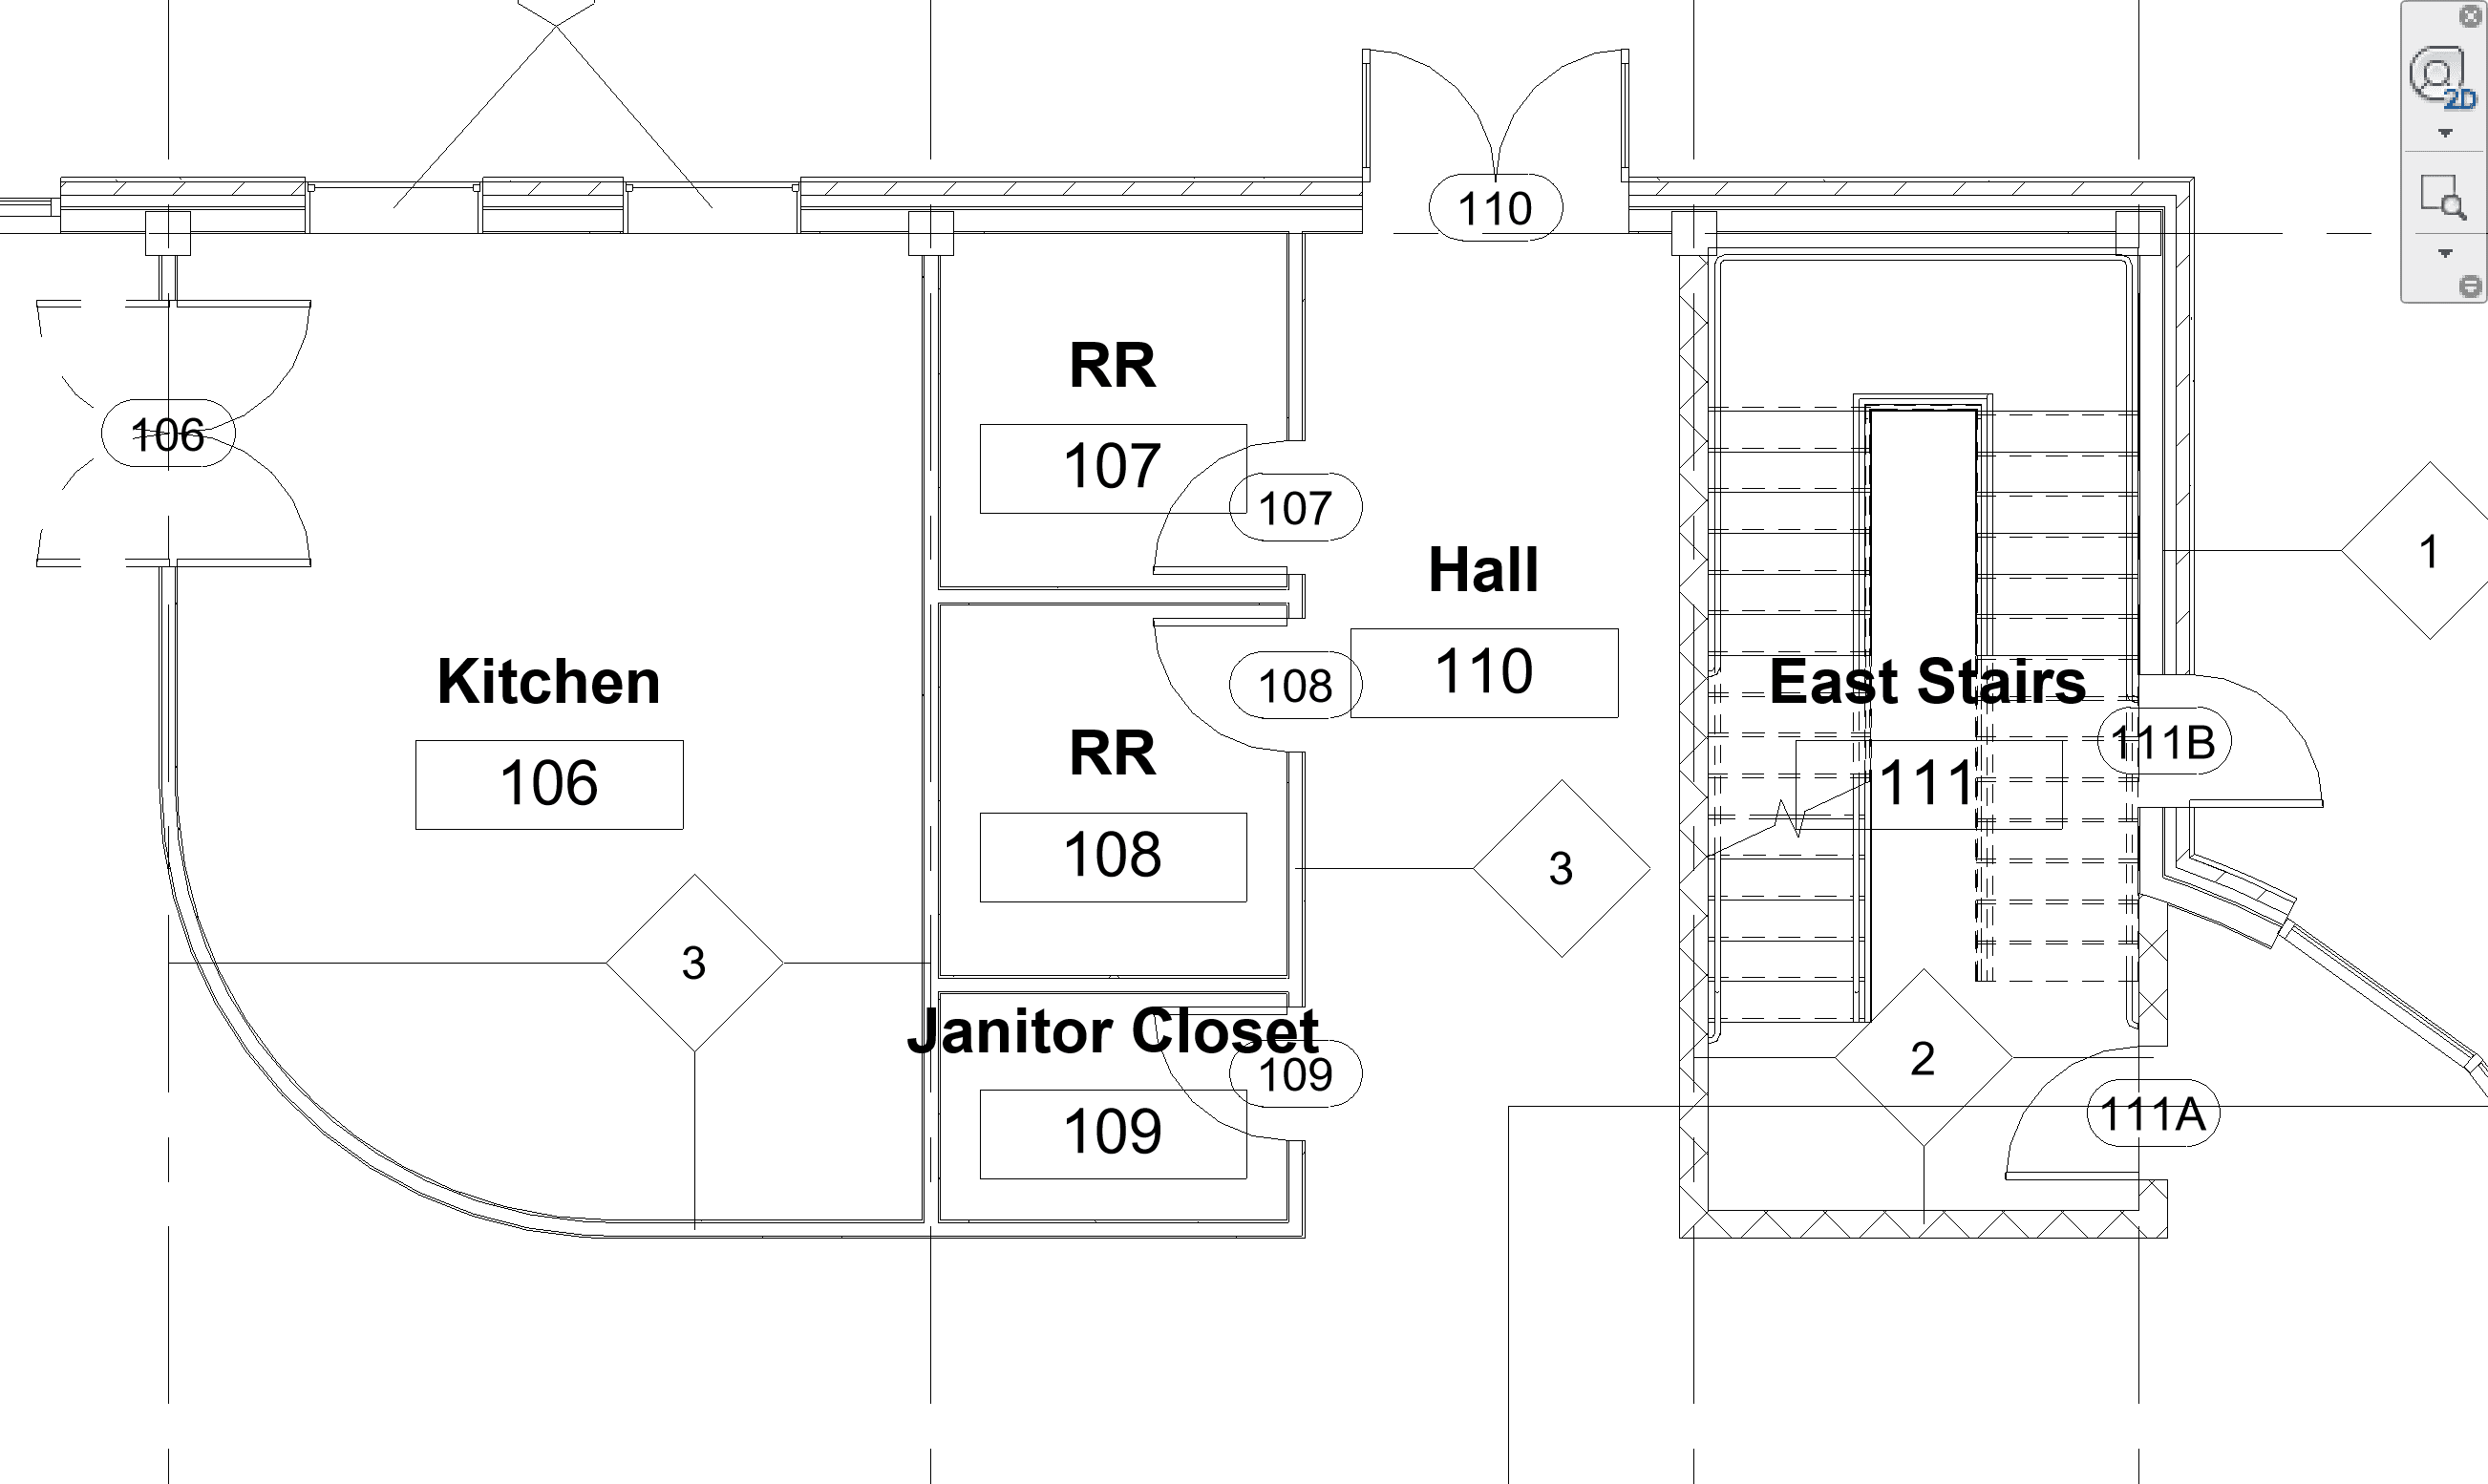
Door tags displayed on the same Revit Floor Plan after updating the door tags to match their associated rooms.
Benefits of Using the Door Mark Update Utility
- Consistency: Ensures door tags are always consistent with room numbers, enhancing the clarity and accuracy of your project documentation.
- Efficiency: Streamlines the process of updating door tags, reducing the time and effort required for manual updates.
- Integration: Works seamlessly with the Room Renumber utility, providing a comprehensive solution for managing room and door numbering.
- Accuracy: Minimizes the risk of errors associated with manual door tag updates, improving the overall quality of your Revit models.
Practical Applications
1. Post-Renumbering Updates:
- After renumbering rooms using the Room Renumber utility, use the Door Mark Update utility to ensure all door tags are up to date, maintaining consistency across your project.
2. Design Changes:
- Easily update door tags when room layouts and numbers change during the design development phase, ensuring that your project documentation remains accurate.
3. Large Projects:
- Manage door tagging efficiently in large-scale projects, saving valuable time and resources.
Example Workflow
- Renumber Rooms:
- Use the Room Renumber utility to update the room numbers in your Revit project.
- Update Door Tags:
- Immediately follow with the Door Mark Update utility to synchronize door tags with the newly renumbered rooms.
- Review and Finalize:
- Check the updated door tags for accuracy and make any necessary adjustments.
I am excited to share the capabilities of the Door Mark Update utility with you and demonstrate how it can streamline your Revit workflow. Stay tuned for more insights and tips on IMAGINiT’s renumbering tools in the upcoming parts of this series.
About the Author
Follow on Linkedin More Content by Scott Green


