
Welcome again to my ongoing series covering IMAGINiT’s Utilities for Revit. In this latest iteration, we will explore the 'Place Family' tool—an innovative utility designed to assist Revit users with family placement. This tool allows users to place a single instance of a family or multiple instances along a curve, such as a wall, model line, or reference plane, providing greater control and precision compared to Revit’s radial array tool. Let’s dive into the features and benefits of this powerful utility.
Introduction to the 'Place Family' Tool
Family placement is a fundamental aspect of working in Revit, whether you’re dealing with furniture, lighting, or structural components. However, placing these elements accurately along a curved path can be challenging using Revit’s standard tools. The 'Place Family' tool in IMAGINiT’s Utilities for Revit addresses this challenge by offering enhanced control and flexibility, making it easier to position families along various curves and paths in your project.
Key Features and Benefits
- Flexible Placement Options: The 'Place Family' tool allows users to place families along different types of curves, including walls, model lines, and reference planes. This versatility is ideal for complex designs and architectural elements.
- Single and Multiple Instances: Users can place a single instance of a family or multiple instances at specified intervals. This feature is particularly useful for repetitive elements like light fixtures or structural supports.
- Precision Control: Unlike the standard radial array tool, the 'Place Family' tool provides greater control over the exact placement of families. This ensures that elements are positioned accurately according to design specifications.
- Custom Spacing: Users can define custom spacing between multiple instances of a family, allowing for tailored placement that meets specific design requirements.
- Alignment and Orientation: The tool ensures that placed families are aligned and oriented correctly along the curve, maintaining consistency and visual accuracy in your design.
Step-by-Step Guide to Using the 'Place Family' Tool
1. Access the Tool: Open your Revit project and navigate to the IMAGINiT Utilities tab. Select the 'Place Family' tool from the list of available utilities.

2. Select the Family: Choose the family you want to place from the available options in your project. This can be any component family, such as furniture, lighting, landscape, or structural elements.

Select an instance of the family you want to place along the curve.
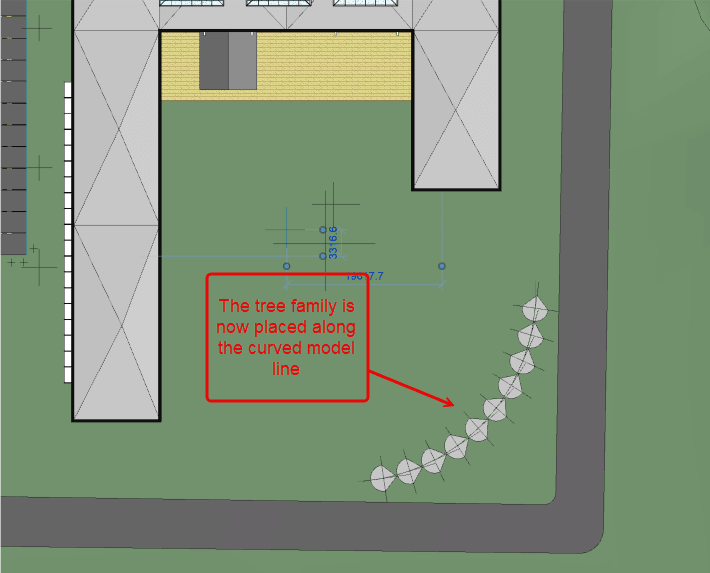
3. Define the Curve: Select the curve along which you want to place the family. This can be a wall, model line, or reference plane. The tool will recognize the selected path for placement. Note: The tool can also work with straight lines as well.

After selecting a family, select any curved model line, reference plane, or wall. Above is selected a model line.
4. Configure Placement Settings: In the 'Place Family' dialog box, configure your placement settings. Specify whether you want to place a single instance or multiple instances and define the spacing and alignment preferences.

After selecting the family and curved line, select your spacing options (singular or arrayed with either spacing by a set unit of measurement or evenly distributed along the curve).
5. Place the Family: Once you are satisfied with the preview, apply the placement. The tool will automatically position the families along the curve according to your settings.
The family instances should then be placed on the line after clicking the desired placement setting (evenly distributed by number of instances, or by set interval based on a unit of measurement).

An example of using the tool on a wall with hosted windows. The windows will automatically host to the wall (the centerline of the wall was selected as the curve).
6. Review and Adjust: After placement, review the positioned families in your project. Make any necessary adjustments to ensure they meet your design requirements.
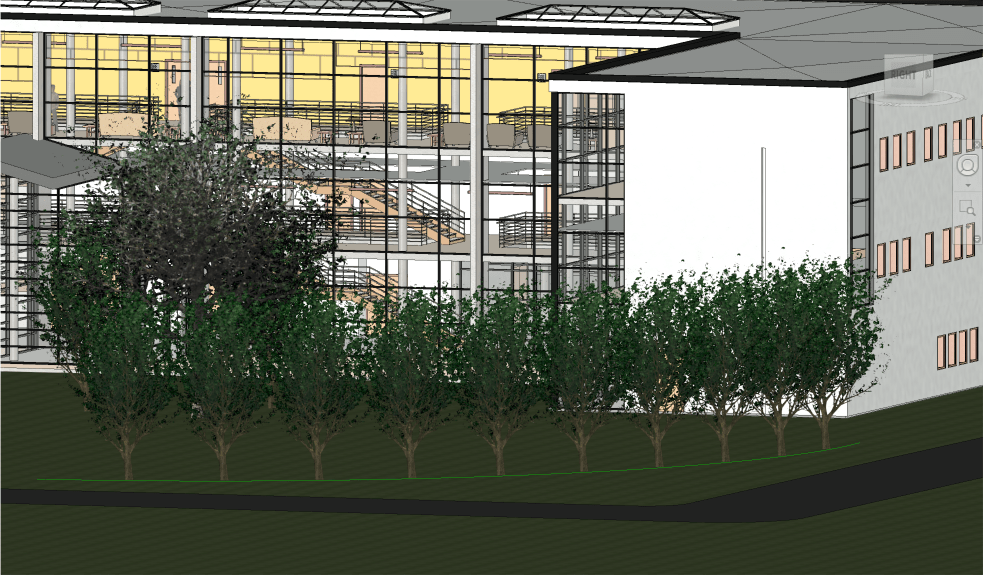
The arrayed trees after using the ‘Place Family’ tool.
Practical Applications
The 'Place Family' tool is particularly useful in the following scenarios:
- Lighting Design: Efficiently place light fixtures along curved ceilings or walls, ensuring even spacing and alignment.
- Furniture Arrangement: Position furniture pieces along curved walls in interior design projects, maintaining a consistent layout.
- Structural Components: Accurately place repetitive structural elements, such as beams or columns, along curved paths in complex architectural designs.
The 'Place Family' tool in IMAGINiT’s Utilities for Revit offers enhanced control and precision for placing families along curves, making it an invaluable addition to your Revit toolkit. By providing flexible placement options and precise control, it helps streamline your design process and improve the accuracy of your project elements. Stay tuned for the next installment in this series, where we will explore another powerful tool within the IMAGINiT Utilities suite.
About the Author
Follow on Linkedin More Content by Scott Green


