
Welcome back again to my fourth blog in my series on IMAGINiT’s Utilities for Revit. In this two-part exploration of IMAGINiT’s CAD utilities, we will dive into the powerful and time-saving CAD Block Insert utility.
What is the CAD Block Insert Utility?
The CAD Block Insert utility is a feature within IMAGINiT’s Utilities for Revit that allows users to map and insert Revit families on top of corresponding CAD blocks within a linked .dwg file. This utility is particularly useful for projects that involve integrating CAD data into Revit, providing a streamlined process to convert CAD block data into native Revit elements.
Key Features of the CAD Block Insert Utility
- Insertion of Revit Families Over CAD Blocks:
- This utility enables the insertion of Revit families in the exact locations of corresponding CAD blocks in a linked .dwg file. This ensures that the transition from CAD to Revit is smooth and accurate.
- Adjustments for Coordinates and Rotation:
- The utility allows users to make precise adjustments to the X and Y coordinates of the inserted Revit families. Additionally, it includes the ability to adjust the rotation angle, ensuring that the Revit families are oriented correctly as per the original CAD block orientations.
- Streamlined Workflow:
- By automating the insertion process, the CAD Block Insert utility saves considerable time and reduces the potential for errors that might occur with manual placement of Revit families over CAD blocks.
How to Use the CAD Block Insert Utility
Here’s a step-by-step guide to using the CAD Block Insert utility:
- Prepare Your Revit and CAD Files:
- Begin by linking the CAD (.dwg) file into your Revit project. Ensure that the CAD file is correctly positioned within the Revit environment when you link it in.
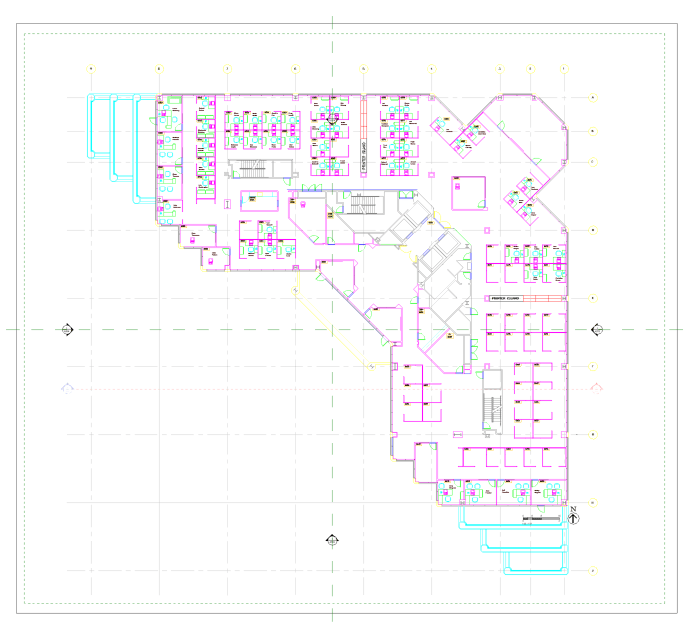
The linked ‘Floor Plan’ sample DWG from AutoCAD 2024 as it appears in Revit 2024.
- Access the CAD Block Insert Utility:
- Navigate to the IMAGINiT Utilities for Revit menu via the Ribbon and select the CAD Block Insert utility from the ‘CAD’ drop-down menu.

The CAD utilities drop-down menu located from the IMAGINiT tab on the Revit Ribbon.
- Map CAD Blocks to Revit Families:
- Use the utility’s interface to map specific CAD blocks to the corresponding Revit families. This involves selecting the CAD block names and linking them to the correct Revit family types.
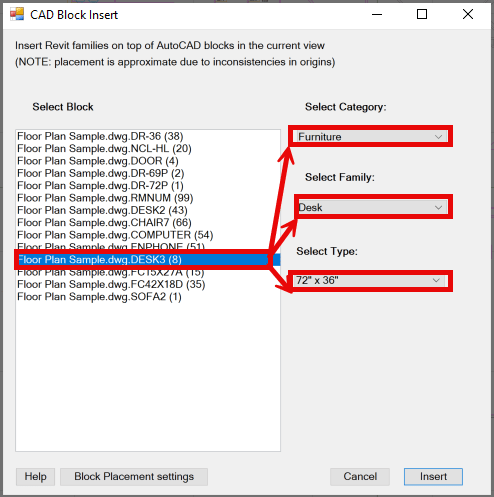
Mapping Revit families to your CAD blocks made easy!
- Configure Placement Settings:
- Adjust any desired placement settings, including the X and Y coordinates and rotation angle if necessary. This ensures that the Revit families will be inserted at the correct locations and orientations.
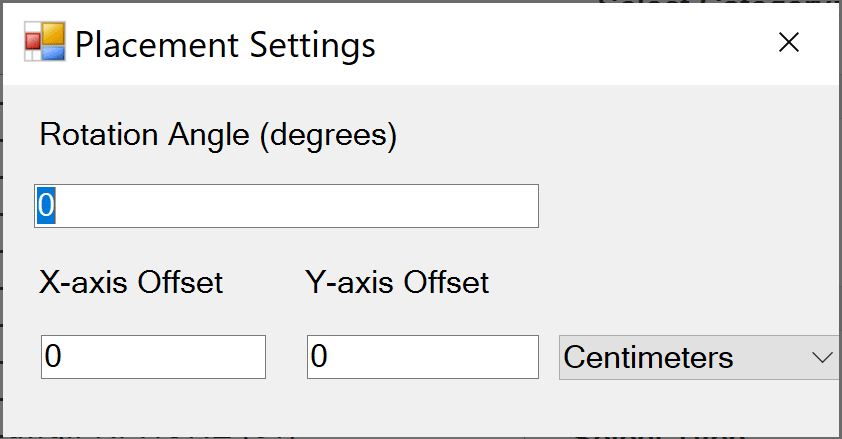
X and Y axis, and rotation settings under ‘Block Placement settings’.
- Insert Revit Families:
- Execute the insertion process. The utility will automatically place the Revit families selected for the selected CAD block at the locations of the corresponding CAD blocks, while also applying any placement adjustments.
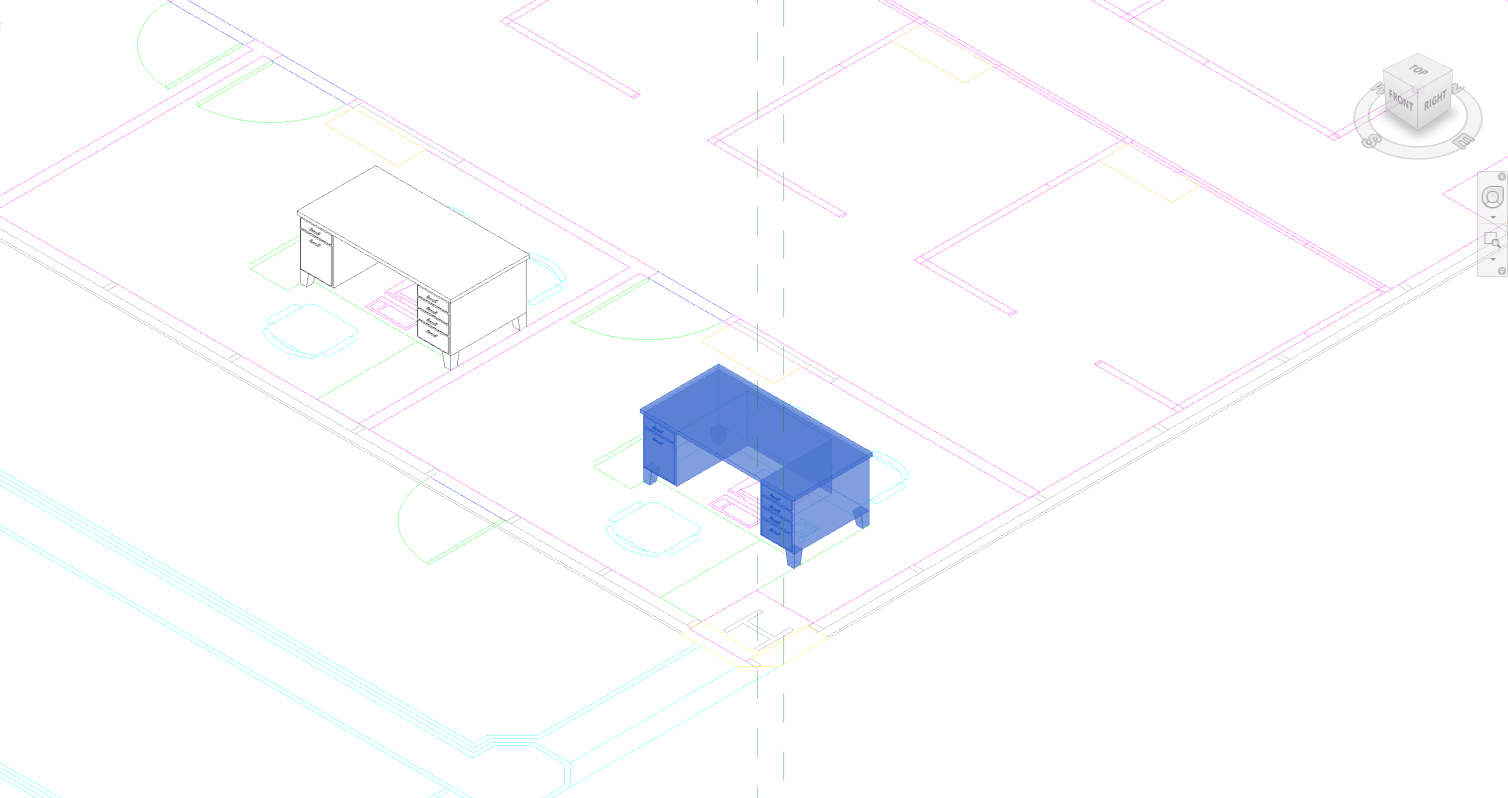
The Revit family after being inserted over the corresponding CAD Blocks.
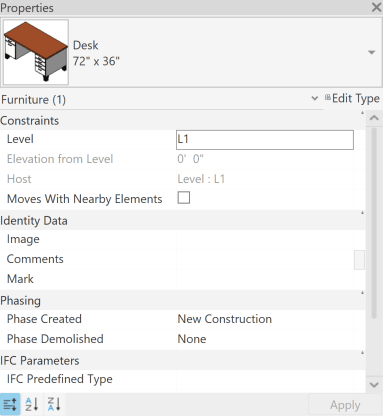
Selecting the inserted Revit family shows that the correct family was placed in the model.
Benefits of Using the CAD Block Insert Utility
- Efficiency and Accuracy:
- By automating the insertion of Revit families over CAD blocks, this utility greatly reduces the time and effort required for this task. It also ensures higher accuracy, minimizing the potential for manual errors with family placement.
- Enhanced Collaboration and Integration:
- For projects involving collaboration between teams using AutoCAD and Revit, the CAD Block Insert utility improves integration and improves overall project coordination by allowing a seamless way to integrate CAD data into Revit, making it easier to transition projects from CAD-based workflows to Revit-based workflows.
Conclusion
The CAD Block Insert utility is another great tool within IMAGINiT’s Utilities for Revit, offering a robust solution for integrating CAD blocks into Revit projects. By automating the placement of Revit families based on CAD block data, it ensures efficiency, accuracy, and seamless workflow integration.
Stay tuned for Part 2, where we will explore IMAGINiT Utilities for Revit’s CAD utilities – Rooms From CAD, further leveraging your IMAGINiT’s utilities to help you maximize your Revit productivity.
About the Author
Follow on Linkedin More Content by Scott Green


