
Struggling making your surveyed trees look right? Size ranges can pose a unique configuration hurdle; this post will share 3 Description Key configuration options. The automation comes from using Wild Cards paired with survey filed code, for more information you can visit Civil 3D Help file.
Option 1: Single and Double Digits
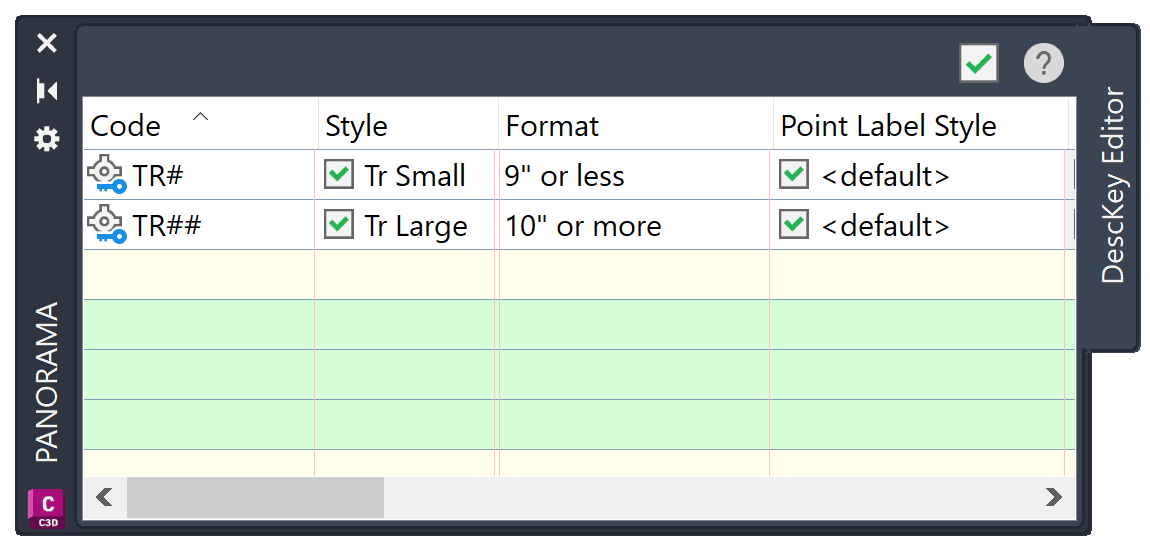
We will start with a simple configuration, control ALL single and double digits: 
The Description Key configuration is simply two (2) rows:
-
- For single digits (1-9): code TR is supplemented with a single pound sign “#”
- For double digits (10-99): code TR is supplemented with double pound signs “##”
The results for the single and double digit values will result in a simple collection of points: 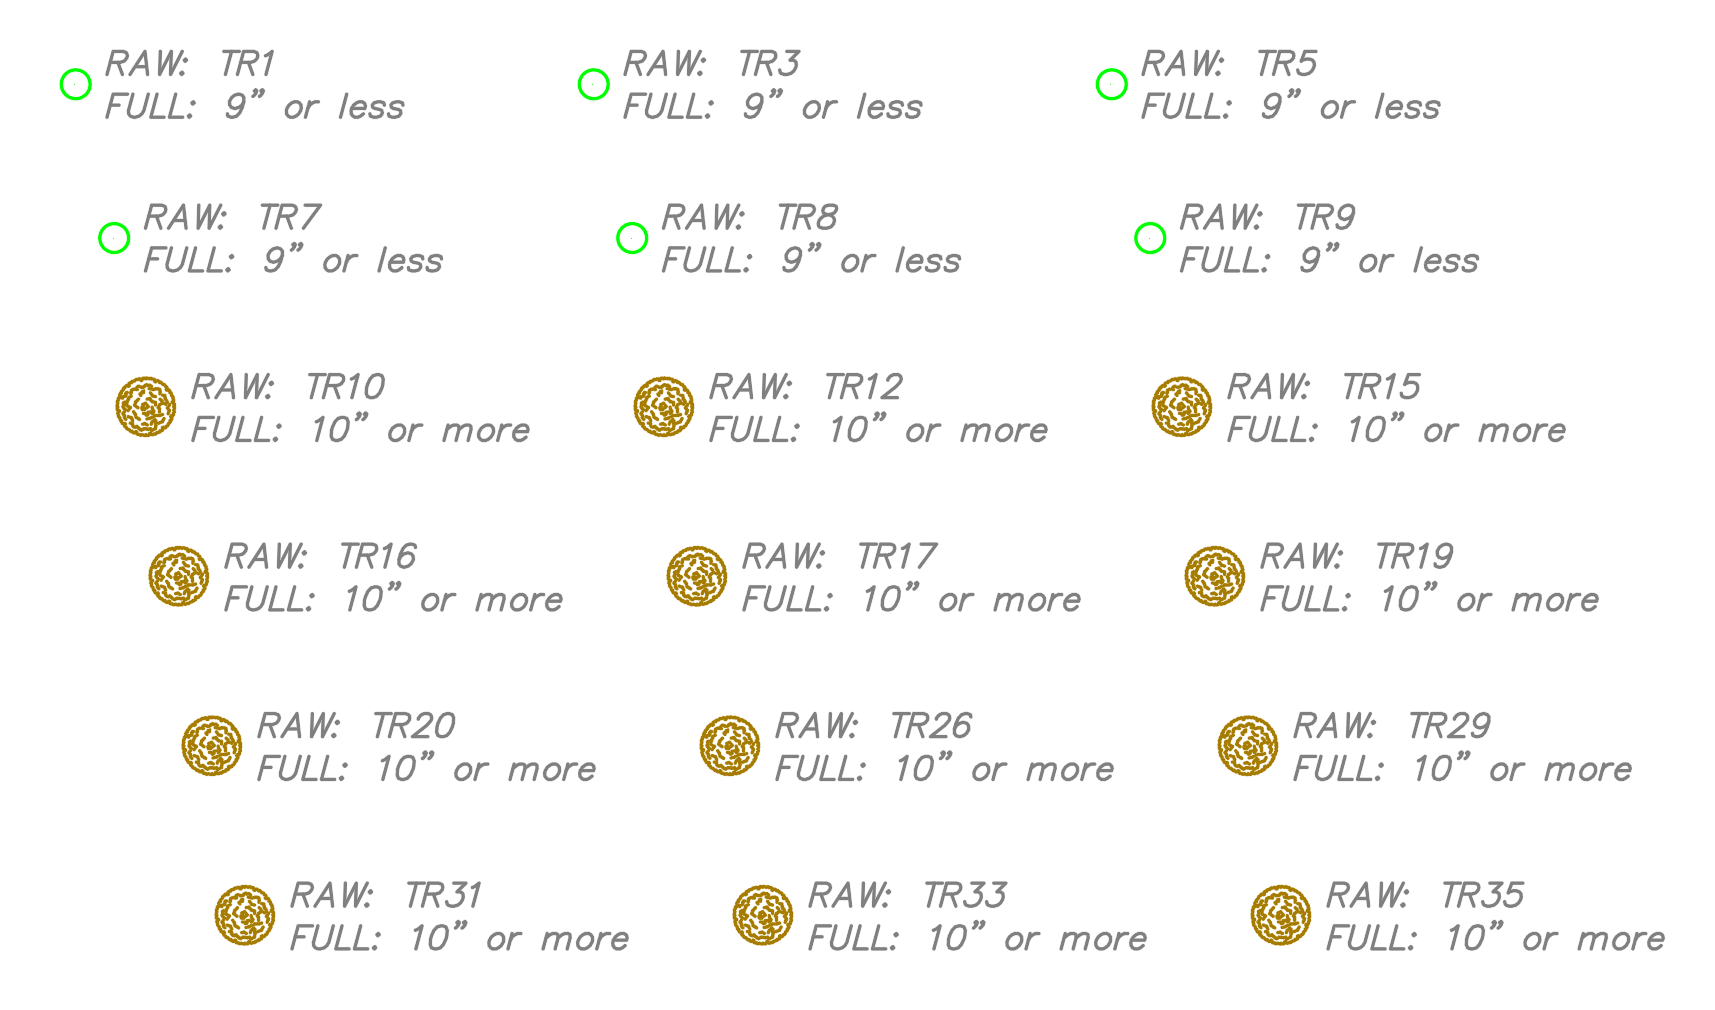
Option 2: Single and Range of Tens
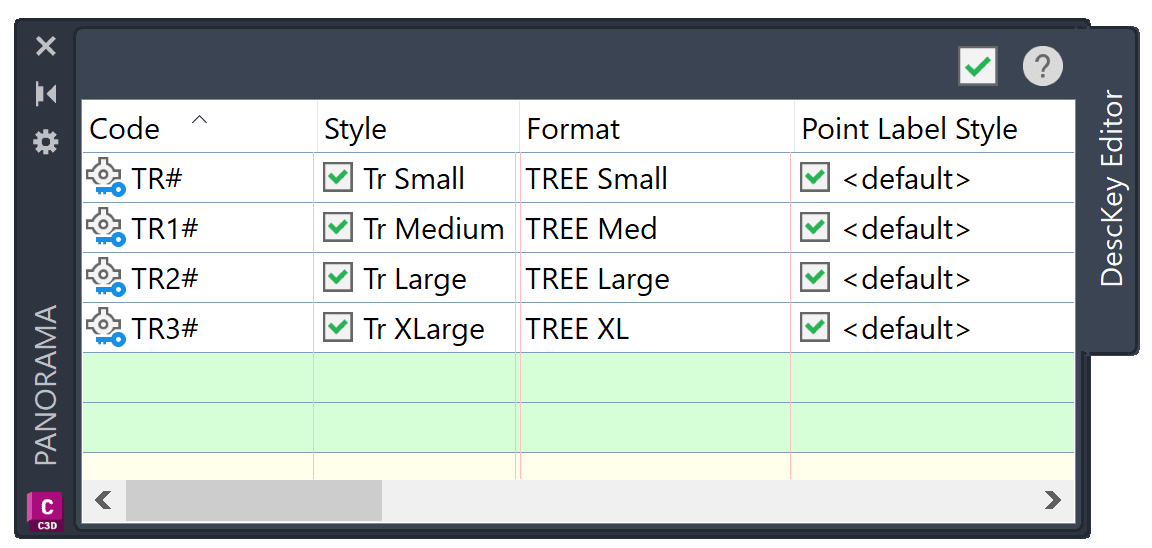
Building on the use of the pound sign #, single digits, values for 10’s, 20’s and 30’s:
The Description Key configuration will be a total of four (4) rows:
-
- For single value (1-9): code TR is supplemented with one pound sign “#”
- For TENs values (10-19): code is TR1 paired with single pound sign “#”
- For TWENTYSs values (20-29): code is TR2 paired with single pound sign “#”
- For THIRTYs values (30-39): code is TR3 paired with single pound sign “#”
The results can be seen for the groups of single and double decimal value sets: 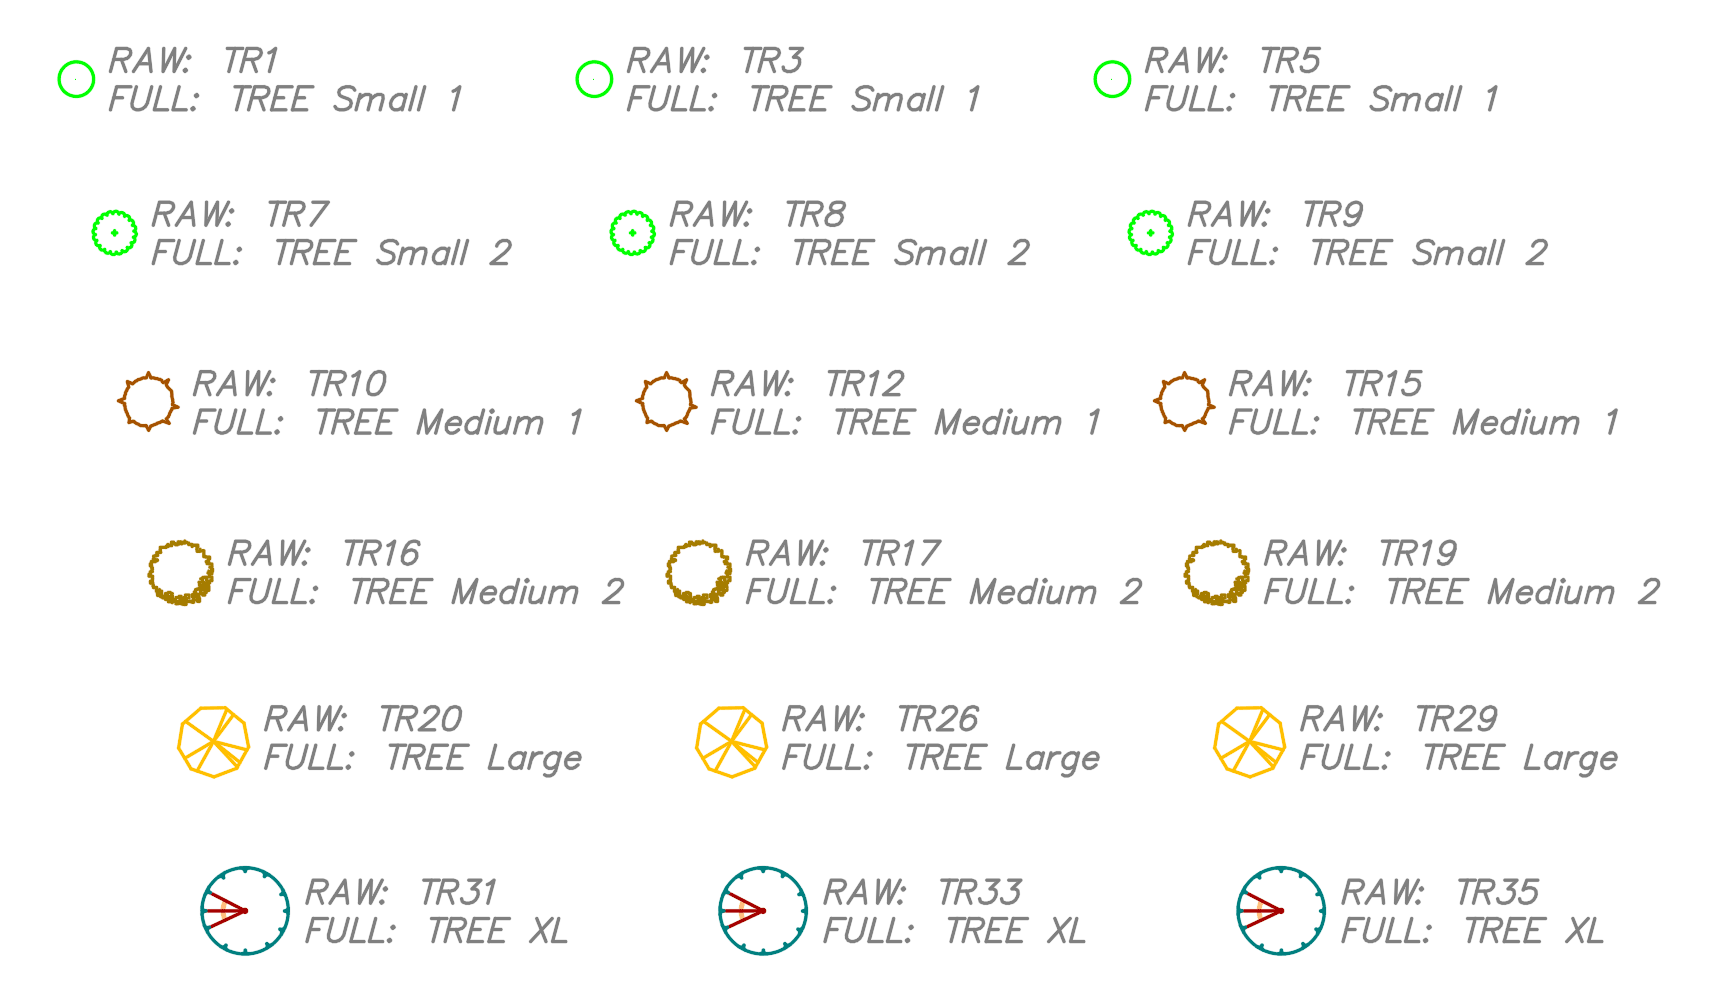
Option 3: Ranges for Single and Double Digits
Finally, configuration will be more complex: varied ranges. Ranges for single digit and 10’s. And single range for all 20’s and 30’s:
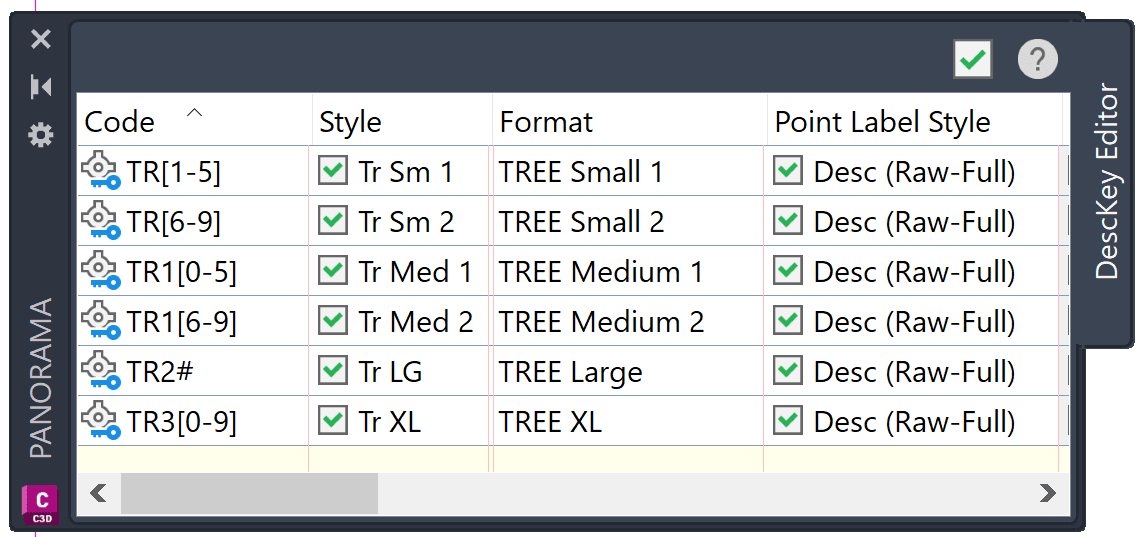
For the Description Key configuration, [brackets] will be used to establish the varied ranges. The bracket “[ ]” only handle a single value:
-
- For single digits - code is prefixed with [brackets]:
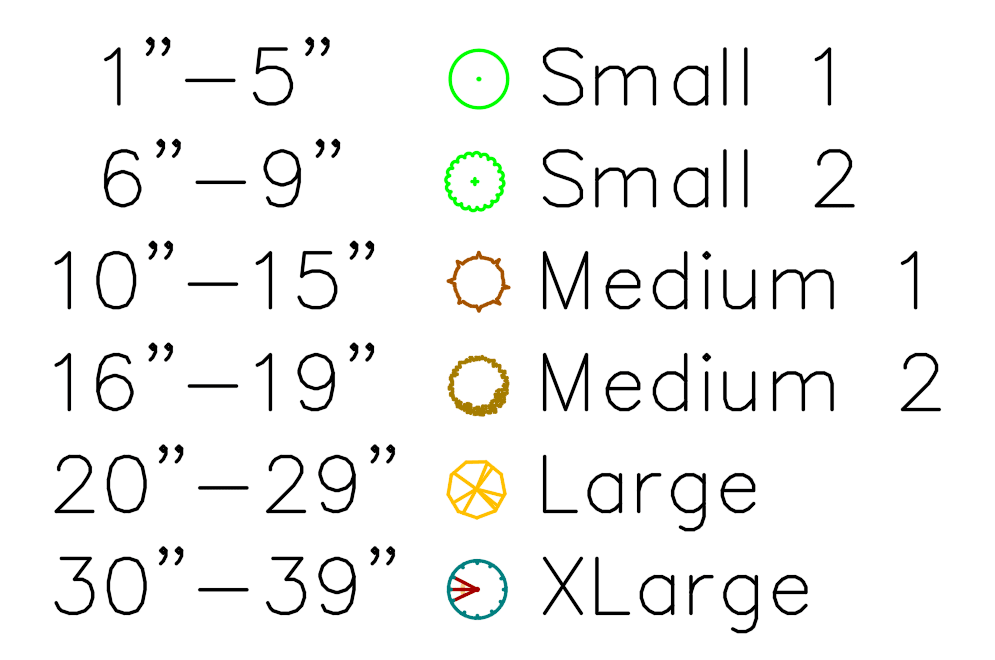
- Values 1” - 5” : the TR code with [1-5]
- Values 6” – 9” : the TR code with [6-9]
- For a the TENs (10’s) – the code is prefixed with [brackets]:
- Values 10” – 15” : code TR1 followed by range in brackets [0-5]
- Values 16” – 19” : code TR1 followed by range in brackets [6-9]
- For ALL the TWENTYs (20’s) – the code is prefixed with pound sign:
- A single line is created with code TR2, followed by pund sign "#"
- For ALL the THIRTYs (30’s) – the code is prefixed with brackets:
- A single line is created with code TR3, followed by range in brackets [0-9]
- For single digits - code is prefixed with [brackets]:
The results for the multiple varied ranges can help bring your drawings to life: 
Hope you enjoyed this post and perhaps found a way to make your drawings more detailed. If you are interested on more uses for Description Keys see our other posts:
- Dana Rice configuring Description Keys for Designers:
https://resources.imaginit.com/civil-solutions-blog/description-keys-for-designers-2
- James Branangan use of Point Group and Description Keys:
https://resources.imaginit.com/civil-solutions-blog/getting-cogo-points-to-display-how-you-want
About the Author
More Content by Leo Lavayen


