
Since the update release of Civil 3D 2023.2 transitions can be applied to corridors. This allows for user edit subassemblies in a tabular format. The functionality is straight forward, along with the ability to export/import design and station values. 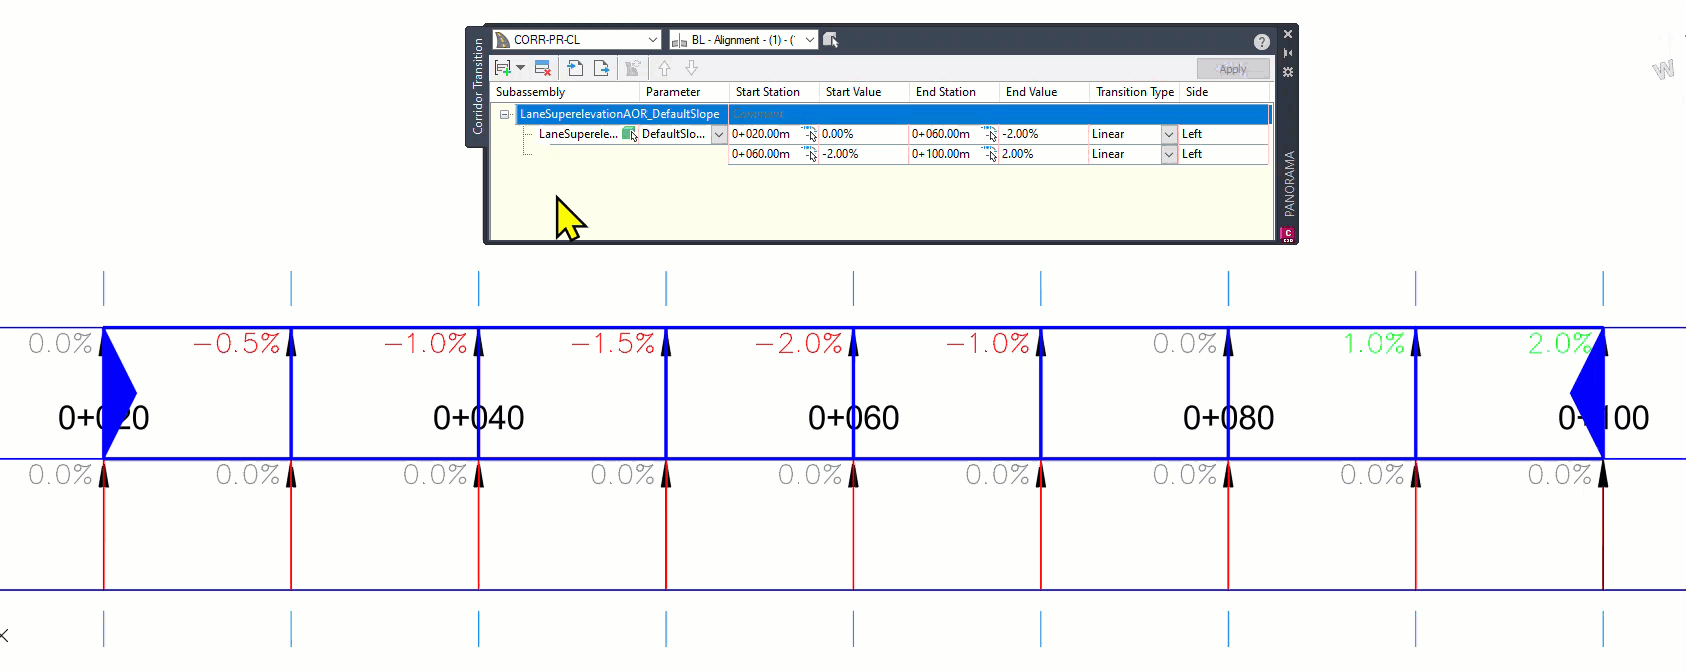
There are many posts that showcase this NEW corridor functionality. This post will show more about how the assigned values are applied throughout the station range: 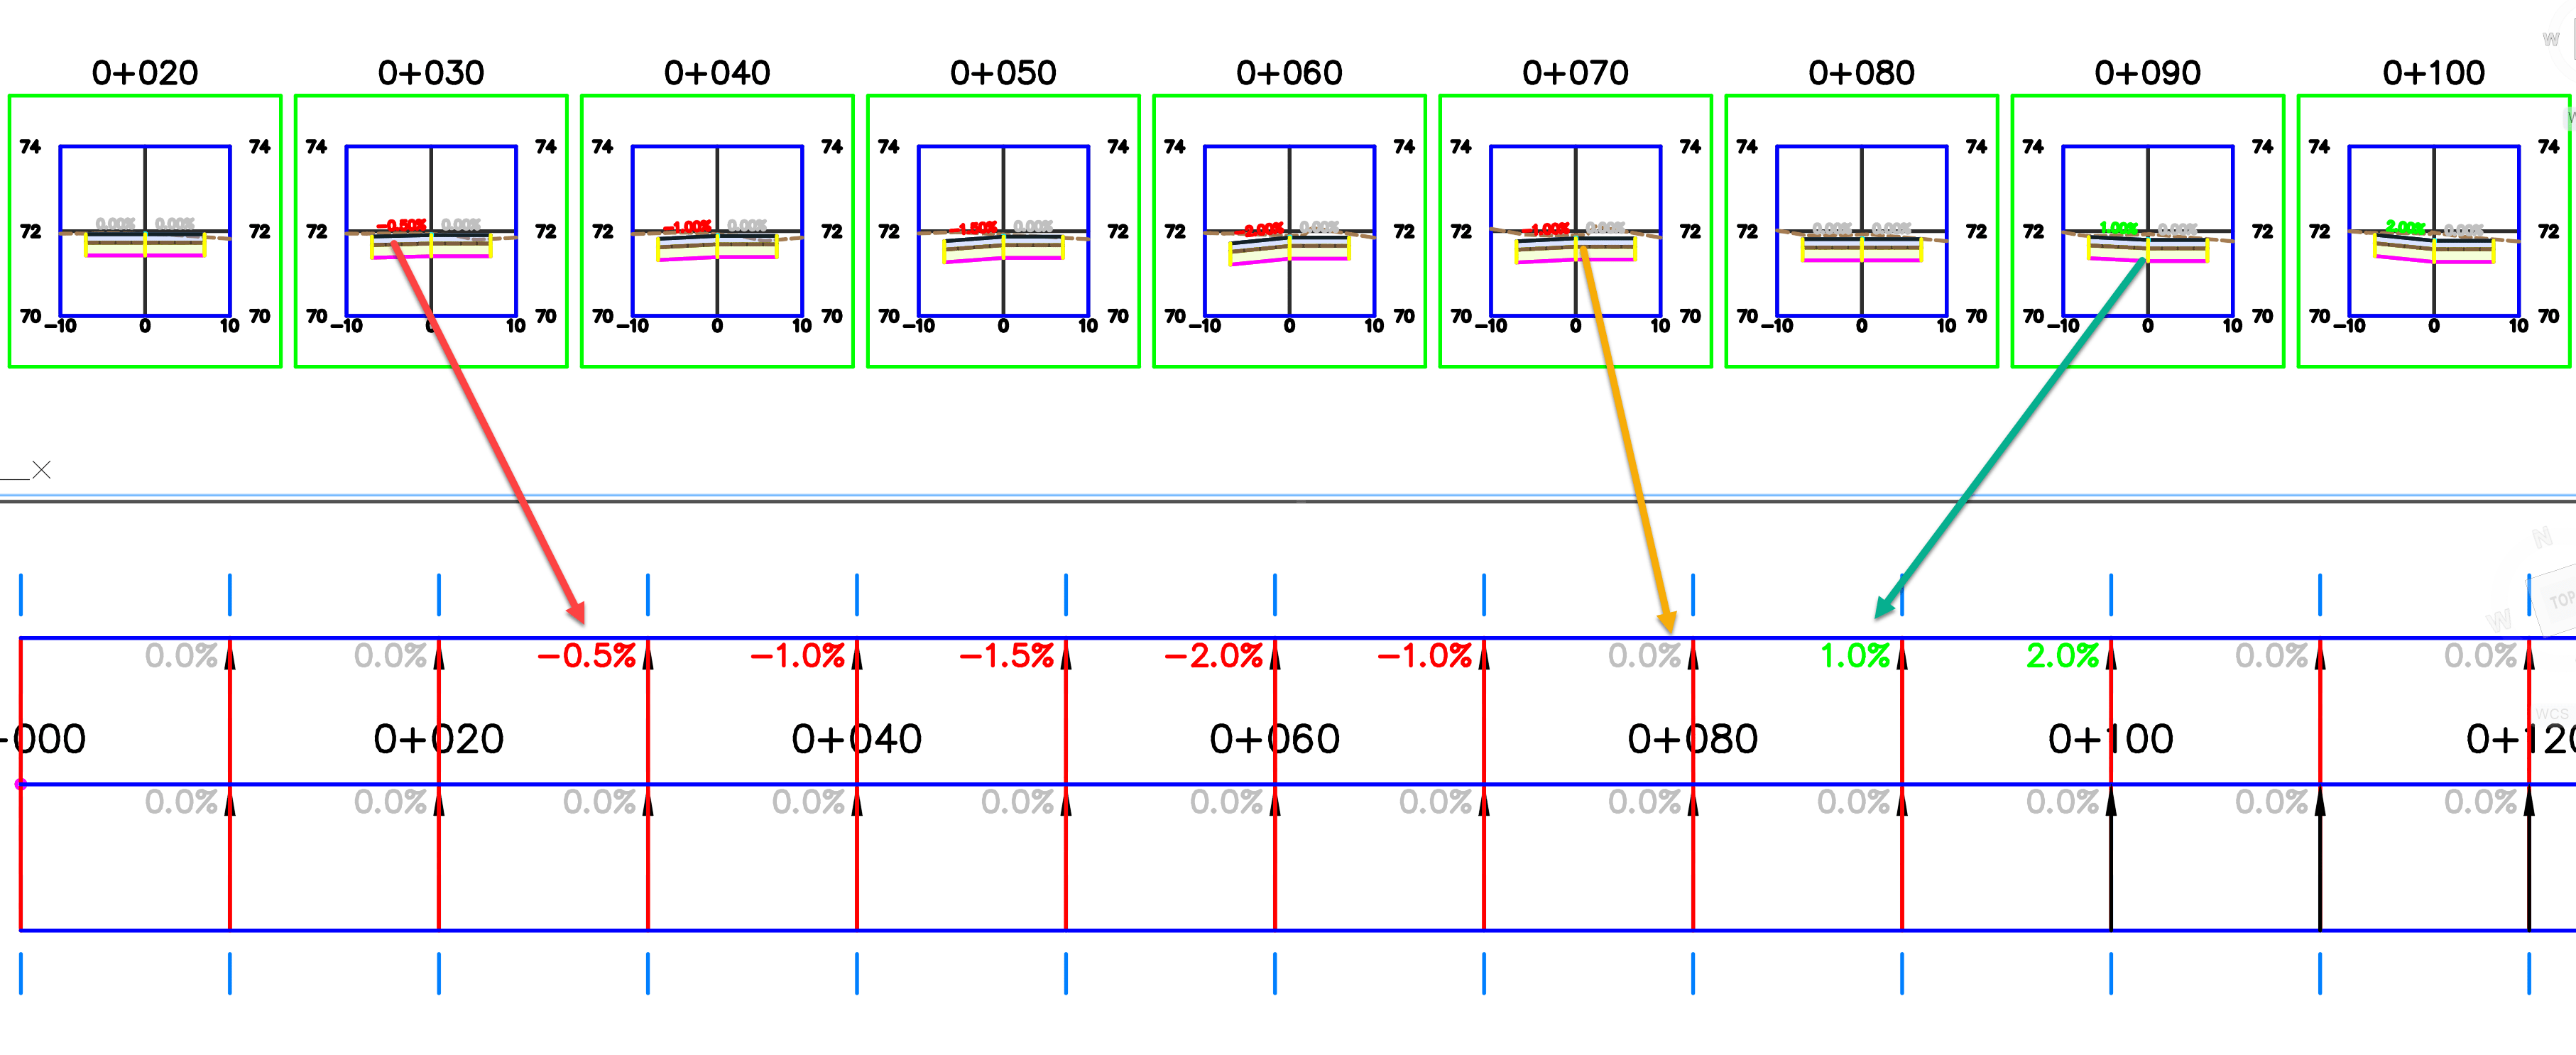
The used assembly is simple 0.00% (shown as gray) pavement slope grades for both the left and right sides. 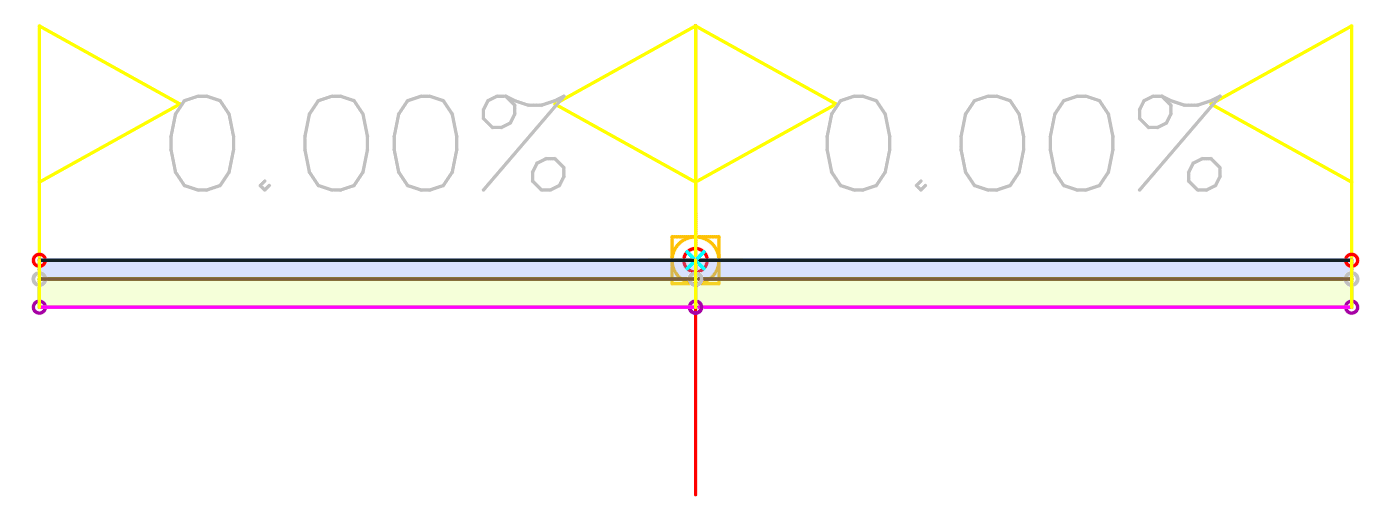
Once the corridor is created along with section views, the initial values can be seen. With dynamic label configurations, the initial 0.00% grades shown as gray:
To access the NEW design feature > select the corridor > from the contextual ribbon tab > select the Edit Corridor Transitions command:
From the Panorama > Corridor Transitions tab > select Create a new transition set button. The focus in this post will be the Left Lane > Default Slope (north side): 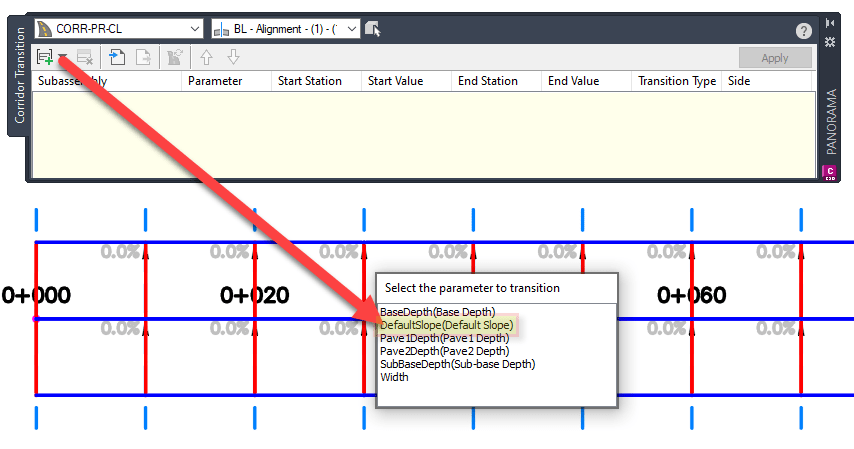
Transition values can be assigned via the command line or the Panorama box:
• Begin 0+020 Station to a 0.00% grade
• End 0+060 Station to a -2.00% grade
• Don’t forget to click on the Apply button
NOTE: configuration in this drawing has been made to automatically change label COLORS for slope values.
Take a close look at how the value from 0.00% to -2.00% are evenly applied throughout the corridor:
• The change in grade of 2.00% is spread out evenly throughout the length of 40.
• Applying the change over the distance will be done in quarters.
• Change of -0.5% is evenly applied over distance of 10.
• After end station (0+060), value snaps back to 0.00% (an immediate return to default). 
More Transition ranges can added from the Panorama box:
• Begin 0+060 Station to a-2.00% grade.
• End 0+100 Station to a 2.00% grade.
• Don’t forget to click on the Apply button. 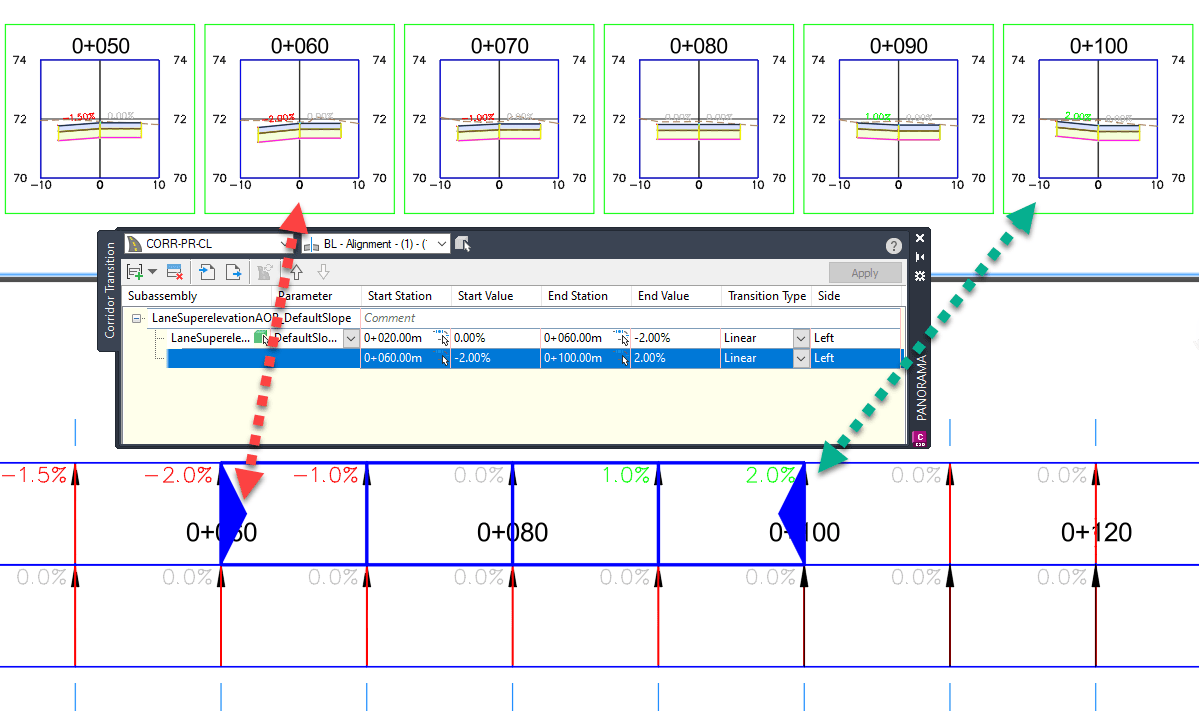
NOTE: configuration in this drawing has been made to automatically change label COLORS for slope values.
Take a close look at how the values from -2.00% to 2.00% are spread evenly throughout the corridor:
• The change in grade of 4.00% is spread out evenly throughout the length of 40.
• Applying the change over the distance will be done in quarters.
• Change of 1.00% is evenly applied over distance of 10.
• After end station (0+100), value snaps back 0.00% (an immediate return to default). 
Hope you found this write up help full! Stay tuned for the next one, how to apply grades to the other lane. If you would like to work with the drawing, download the source file.
If you enjoyed this post, visit our IMAGINiT support page for similar content.
About the Author
More Content by Leo Lavayen


