
Applies to:
All product years of AutoCAD-based software
Issue:
When Publishing a Sheet Set or via the Publish Command in an AutoCAD-based Vertical (like Civil 3D, AutoCAD Architecture, etc.), the publish command completes, however you may get an error/warning about plot style or plotter configuration missing or get different results than plotting a single sheet from the layout tab and plot dialog box. This issue only occurs when you are plotting or publishing in the background.
This generally occurs when you have multiple versions of AutoCAD based programs (and AutoCAD) installed or you have multiple or custom program profiles for each installed program as well (or are not using the out-of-the-box configuration)
Cause:
Here is where the issue is coming from, and how to correct it. When Publishing in the Background, the software will launch a separate instance of acad.exe or accoreconsole.exe (basically launching another AutoCAD you cannot see or interact with). If you not launched and configured all the AutoCAD based software on your machine, that acad.exe may be using the AutoCAD default configuration, the last product you opened (before the one you have open), and not your specific settings for the Plot style path you have set in the vertical you are using. Depending on your machine configuration and last version you launched, this can be different each time you publish.
Solution:
You can correct this via one of three methods.
Method 1: (the quick-fix): Open file explorer and right mouse click on the plot style folder and select Create Shortcut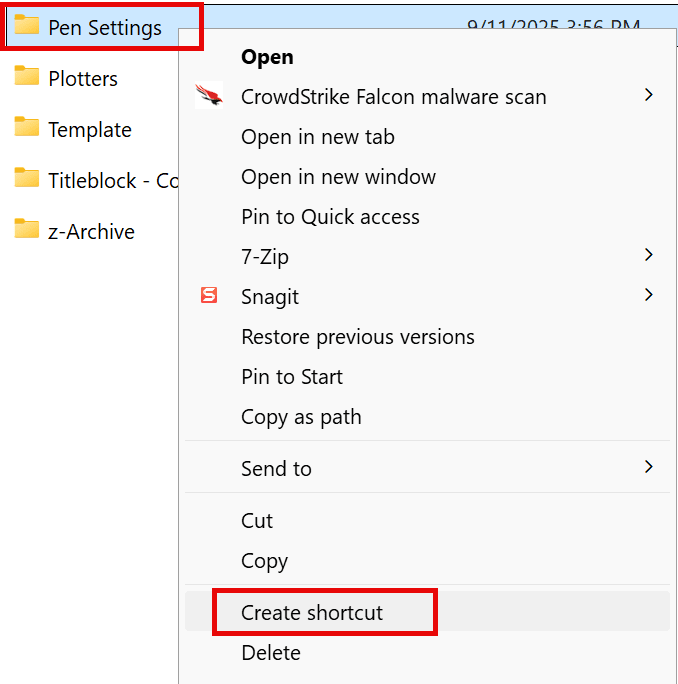
That will create a new shortcut in that folder, now copy or cut that shortcut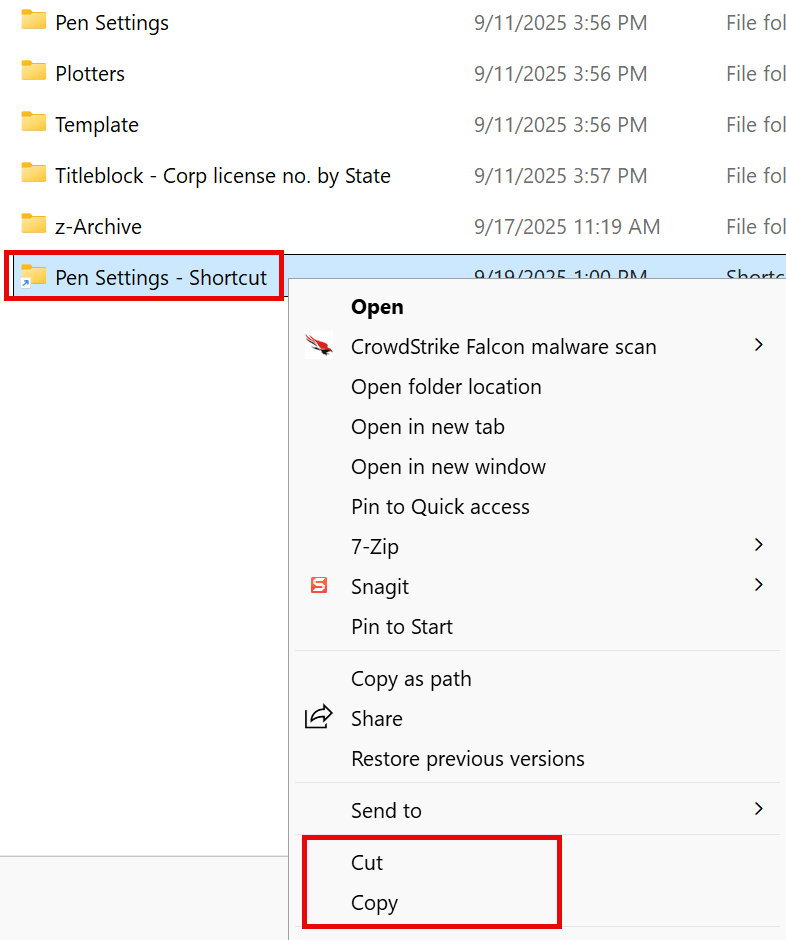
Navigate to the Plot styles folder(s) under each AutoCAD based Product (Typically C:\Users\<username> Appdata\Roaming\Autodesk\<prodcut and year>\<maybe an R number>\enu\Plotters\Plot Styles)
C:\Users\<username>\AppData\Roaming\Autodesk\AutoCAD 2026\R25.1\enu\Plotters\Plot Styles (for AutoCAD 2026)
Then paste the shortcut created earlier into this folder. Repeat process until all installed products have that shortcut in them
Now when publish runs under an incorrect profile or default one, it will see your preferred plot style location as well as the default.
Method 2: Launch all AutoCAD based Software and in Options, set the same Printer Configuration Search Path, Printer Description Path, and Plot Style Table Search Path to match the working one. You will need to change these for each profile, within each program.

I generally recommend that you set these all the same as your primary software (so any AutoCAD based program you open uses the same information).
Method 3: This one is a little more complicated but will not require you to open each program to configure it. This will require you to directly edit the registry.
Warning! Problems caused by improperly editing the Windows registry could render your computer operating system unusable. Microsoft provides a wealth of critical information that you need to know about the registry in the Microsoft Knowledge Base at http://support.microsoft.com/support.
Use the Microsoft® Registry Editor only at your own risk and only after backing up the registry as well as the system.dat and user.dat files as outlined for your operating system in the Microsoft Knowledge Base and in the related solution, TS66513. Additional information about the registry is also contained in the Help topics in the Microsoft Registry Editor
Close any open AutoCAD based Software
Open the Registry Editor (Regedit.exe) and navigate to this key:
Computer\HKEY_CURRENT_USER\Software\Autodesk\AutoCAD or AutoCAD LT

Each of these R2#.# refers to each version of AutoCAD installed.
R21.0 is 2017
R22.0 is 2018
R23.0 is 2019
R23.1 is 2020
R24.0 is 2021
R24.1 is 2022
R24.2 is 2023
It is similar for LT
R27 is AutoCAD LT 2021
We will be looking for the three path keys above.
The three keys are:
PrinterConfigDir – This is the Printer Configuration Search Path
PrinterDescDir – This is the Printer Description Path
PrinterStyleSheetDir - This is the Plot Style Table Search Path
Simply hit the F3 Key to bring up the Find box and type in this Value PrinterStyleSheetDir:

Then click Find Next and in the right pane double click to open the Key:

Once you open the key, change the Value Data to the correct location

Keep repeating F3 until you are no longer in the HKEY_CURRENT_USER

Then navigate back to this key:
HKEY_CURRENT_USER\Software\Autodesk\AutoCAD
Then hit Control + F and put in the next key and repeat until you have modified all three (if necessary) to use your preferred values.
That will update all Installed Autodesk based programs and different profiles to point to the correct location. Retest Publish and verify that it's now working without any errors.
Note: If you have custom folders inside your Support File Search Path area in Options and those point to your custom standard items (typically fonts, linetypes, hatch patterns, etc).

Then you will need to open each product and add those paths, Apply the changes, then switch to a different profile, and repeat until you have all profiles updated with the custom paths.
About the Author
Follow on Linkedin More Content by Ryan Wunderlich


