Convert Revit file to be used by AutoCAD in Archibus

April 29, 2025 Tim Schaubroeck

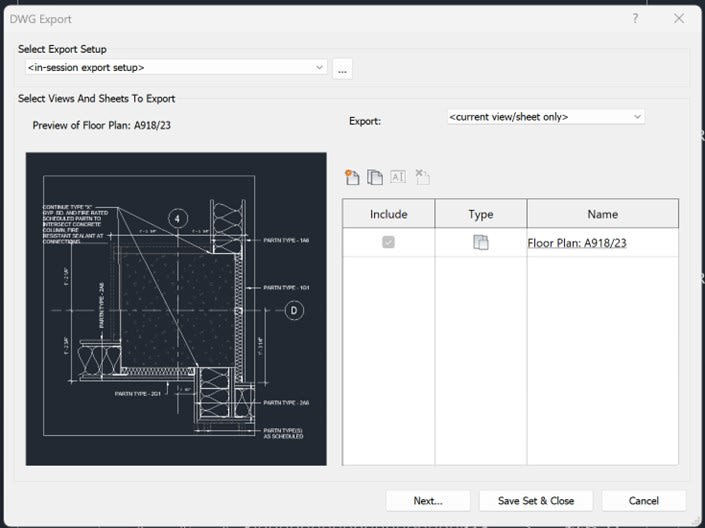
You will want your Revit model to have a floor plan view for every floor that will have in Archibus.  Once this is setup, open the view of that level

 Now in Revit, click on the File Menu.  Then Export and Cad formats.  And finally choose the filetype you wish to use.  AutoCAD uses a dwg file.

You will get this dialog box.


If you want to control how the model converts objects to layers, click the … button that is at the end of the Select Export Setup drop down list. 

Then select the layer tab. It will show you a list of all the model categories.  You can then change the layer you want theses to show on in the AutoCAD drawing and also the color they will be.

If you need to export room, spaces, or areas out as polylines, click on the General Tab in this dialog box and place a checkmark in “Export rooms, spaces, and areas as polylines”.

Near the bottom of the list on the General tab, is a Export to file format drop down list.  In this list, you can select which version of AutoCAD you wish to create for the drawing file.


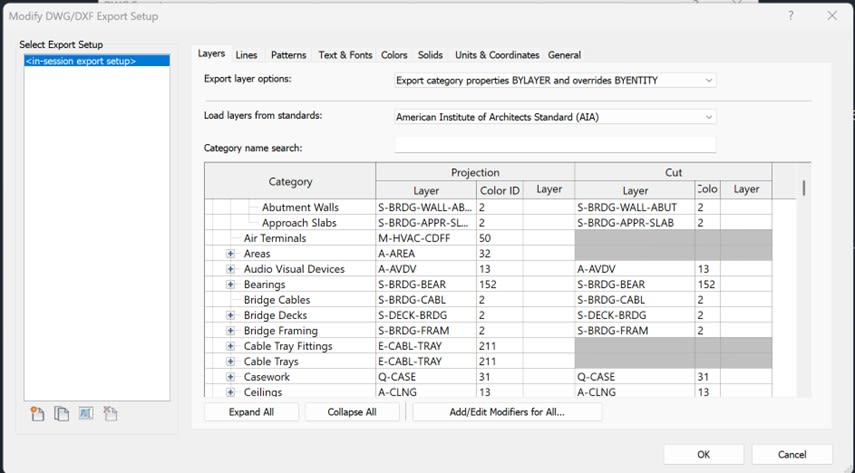
After you get all that set, press the OK button.  Now press the Next button.  It will then display a dialog box that you can use to set they drawing name and location.  After you press OK on this screen, it will save the level as an AutoCAD file.


About the Author

Tim Schaubroeck

FM Support Specialist

More Content by Tim Schaubroeck
Previous Article
How does Revit choose the default language during installation

The default language for the Revit installation is based on the computer's regional settings.

Next Article
How to validate Archibus space data

Have you ever found rooms in Web Central or Smart Client that don't exist in the AutoCAD drawing? Or rooms ...

×

Get Tips Delivered.

Subscribe to Email Updates.

First Name
Last Name
Country
Thank you!
Error - something went wrong!