
Issue:
You previously created an Autodesk custom install deployment, and now a new product update is available. How can I add a new Autodesk update to my existing deployment(s)?
Solution:
Rebuild the custom install configuration and specify the existing deployment image folder. The image tool will update the existing deployment with any updates. *This method is not recommended for deployments used with SCCM - Autodesk recommends creating a separate SCCM package for Updates and deploying it along with the full product package.*
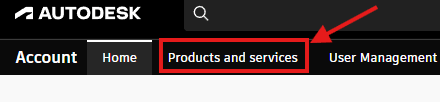
1. Go to manage.autodesk.com and choose "Products and services" at the top of the page.
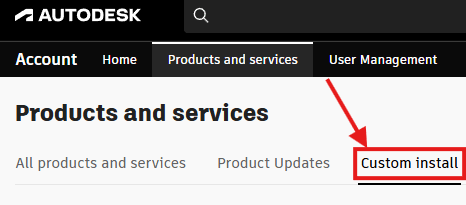
2. Now choose “Custom Install”. This is where you should have created the existing Autodesk
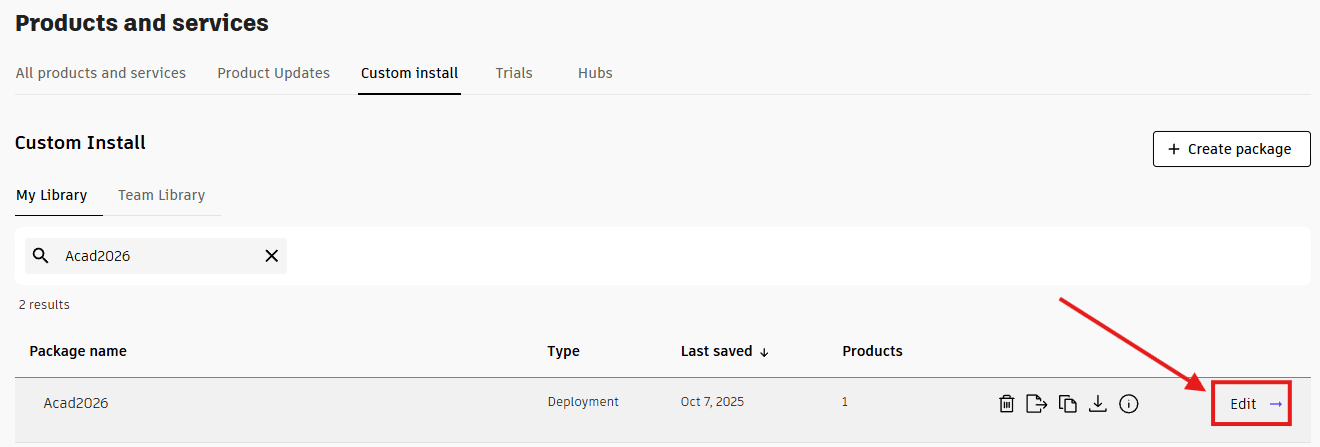
3. Choose the Autodesk product for which we need to add the updates. Find the "Package name" of the Custom install and choose edit to the right by the arrow.
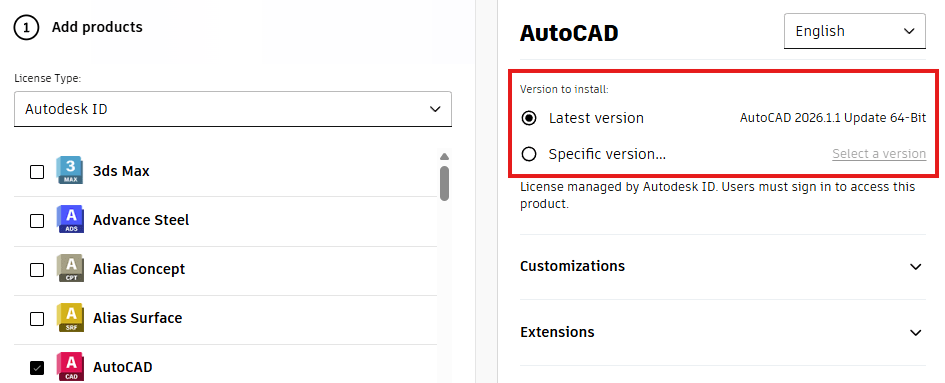
4. Choose the “Latest version” or a "Specific version...". Click Next.
5. Click the Download button, and an executable file will download. Run the downloaded executable file. When the executable file starts, you will be presented with a window asking you if you want to update a deployment. Choose “Download and update”.

6. When it completes, you have added the updates to your deployment.
7. You can rerun the deployment install on a machine, and it will only add the updates. It will not uninstall the product and reinstall it.
Also, again *This method is not recommended for deployments used with SCCM - Autodesk recommends creating a separate SCCM package for Updates and deploying along with the full product package.*
About the Author
Follow on Linkedin More Content by Ken Williams


