
Adding onto the last post AutoCAD electrical Adding new Terminal Strips through terminal strip editor.
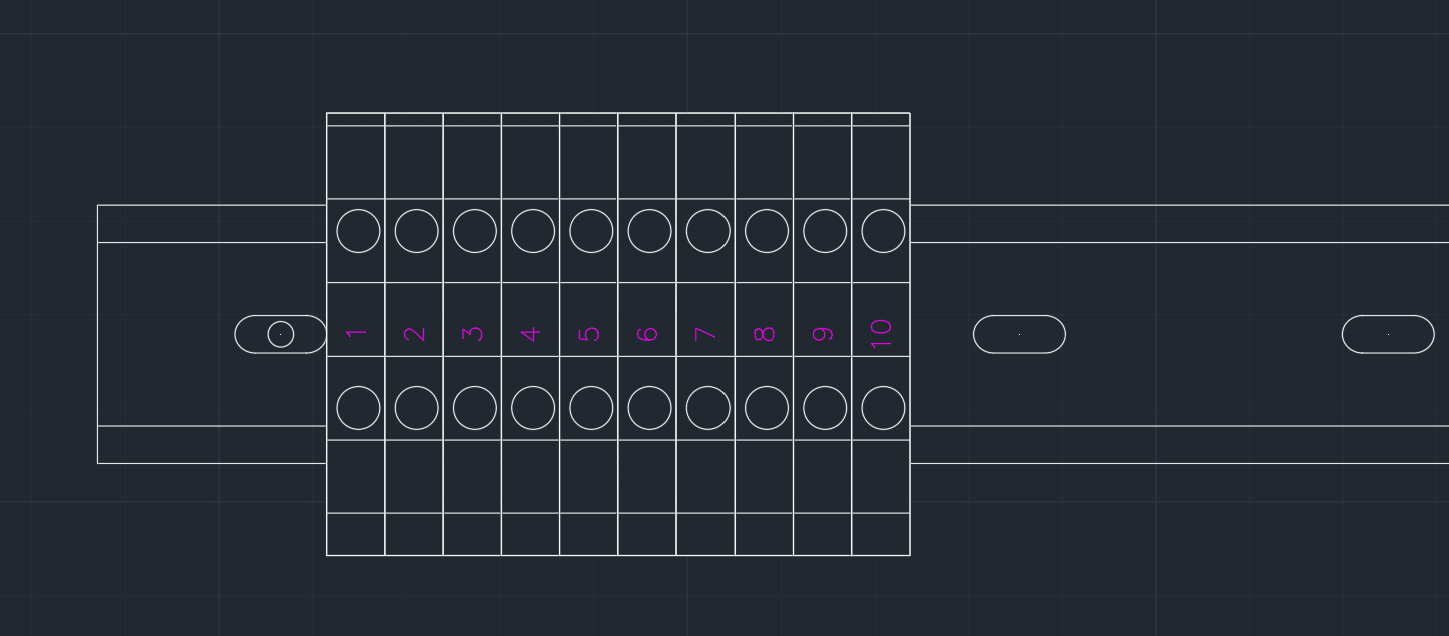
Now the terminals must be added into the schematics. Open the schematic drawing that will utilize the terminals placed in the panel drawing.
In Schematic Tab> Insert Components Panel> click drop down menu for Icon Menu>Terminal (Panel List)
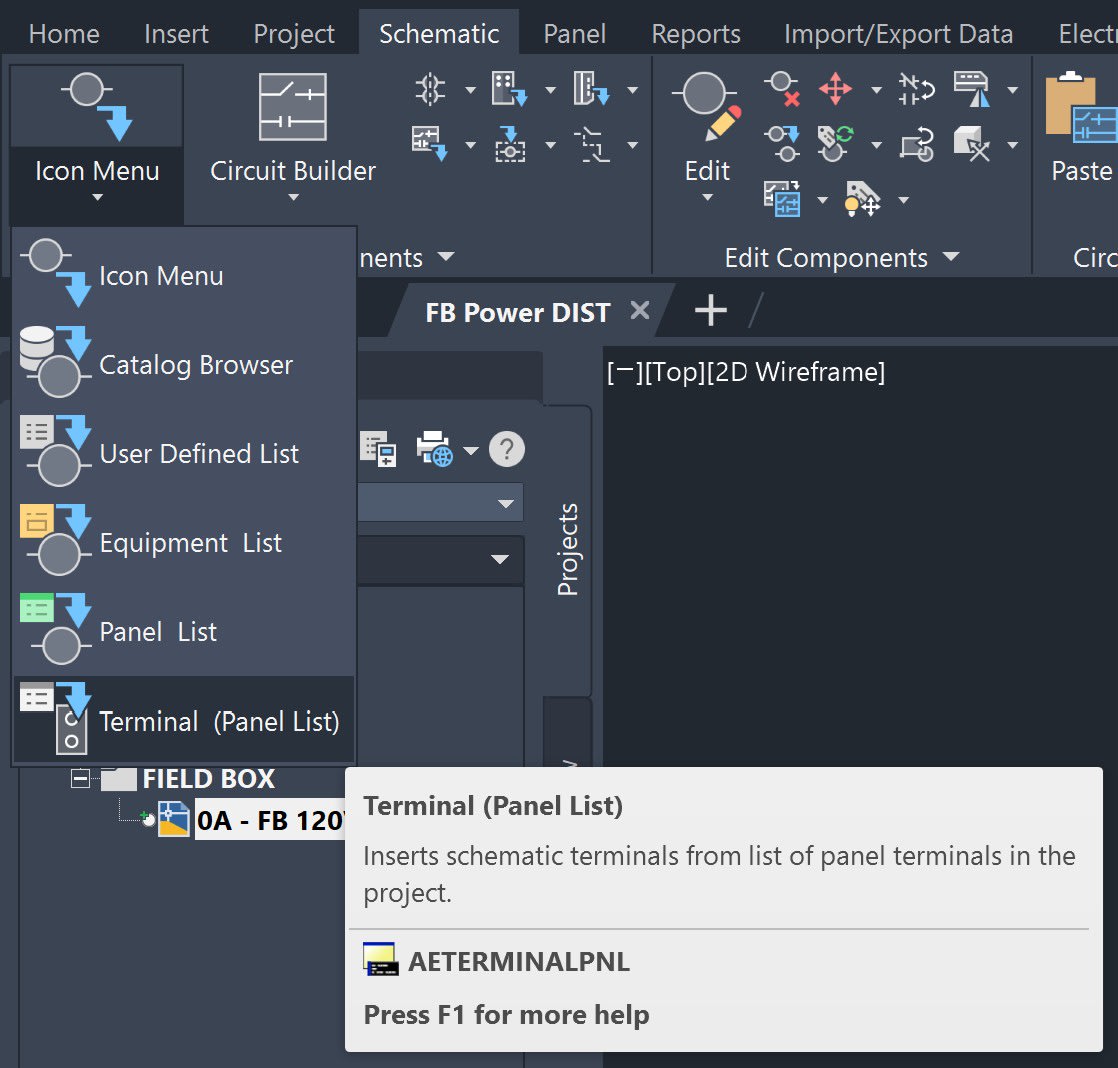
After selecting Terminal (Panel List) a dialog box will be promped, asking the location of the terminals. 
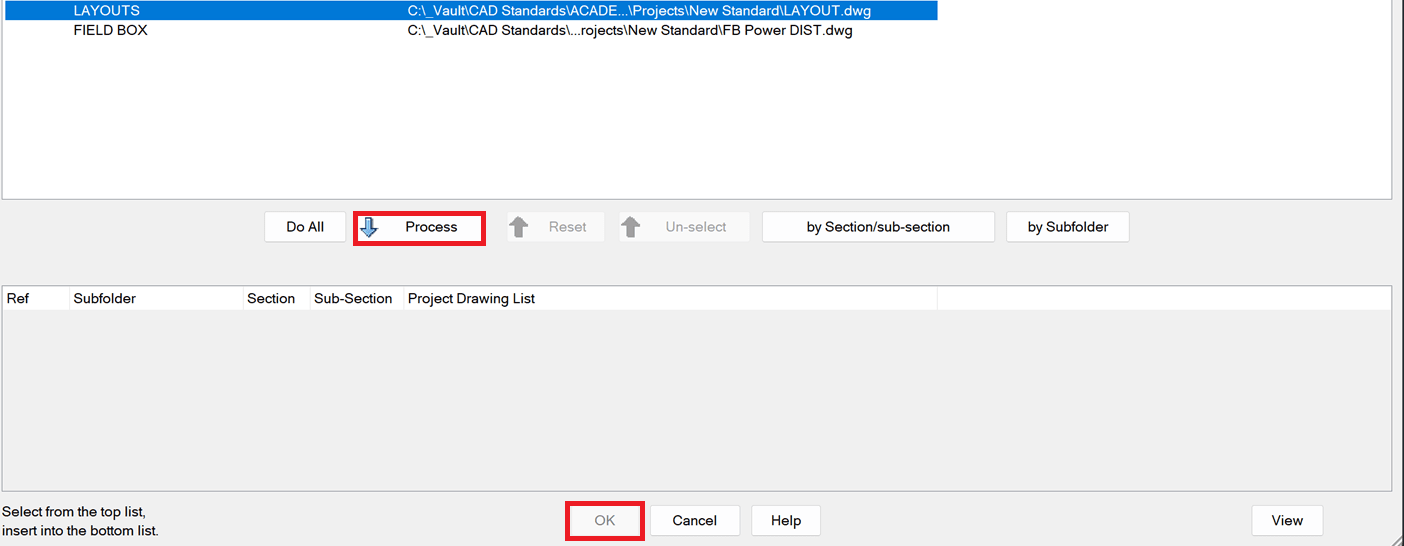
Select the drwing>Click Process>Click ok
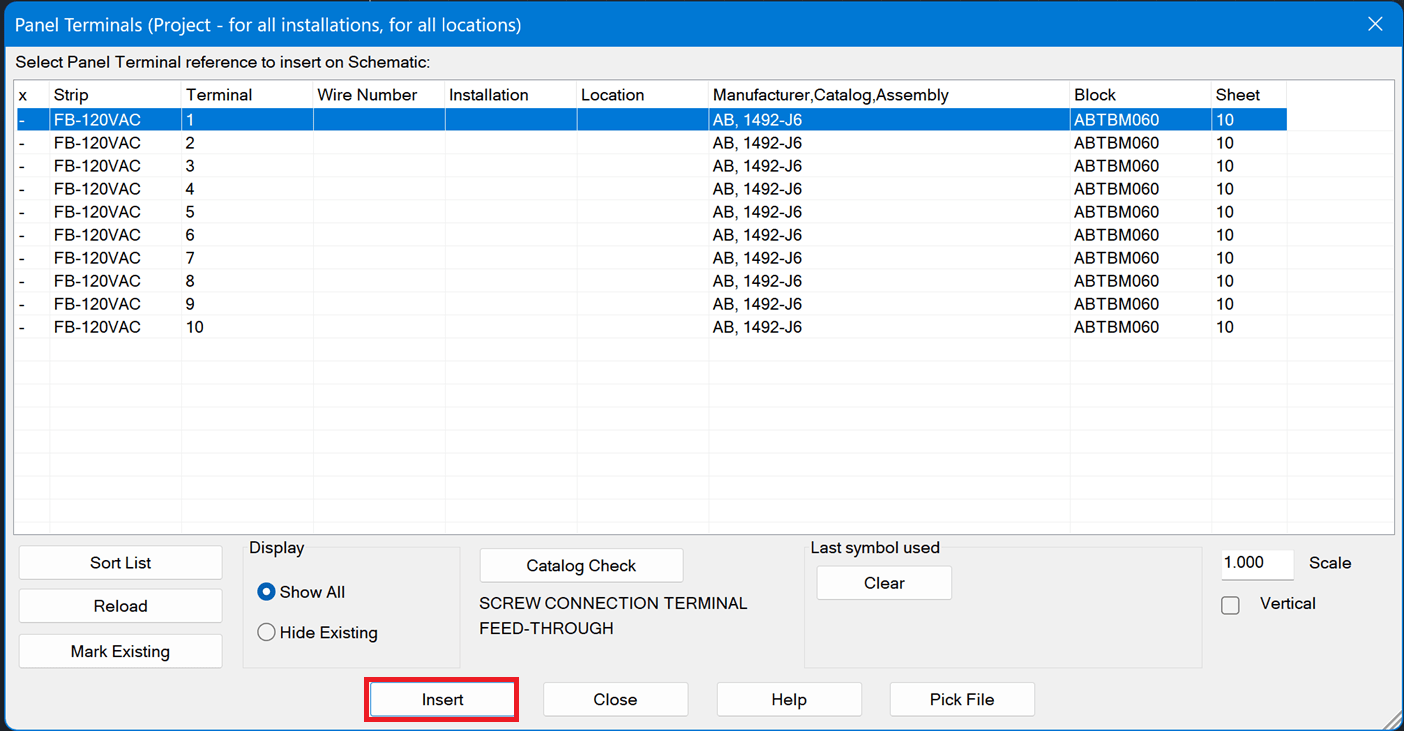
Adding one terminal at a time, select the terminal to be inserted>insert
In this dialog box choose the type of terminal to be inserted either from the block name or icon menu. Copy Component can only be utilized if there is a like component inserted in drawing. Once this is selected it will use the same block name for all similar terminals based off the part number.
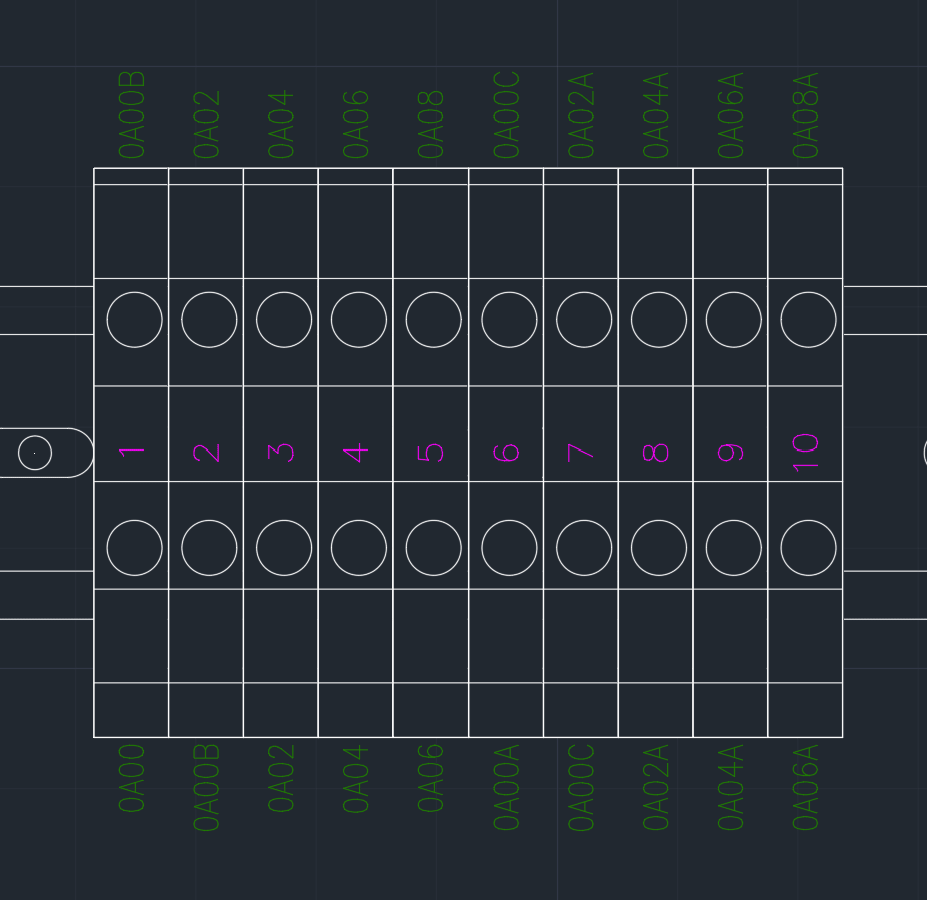
![]()
Place terminal into drawing and Insert/Edit Terminal Symbol dialog box will appear. Click the details button to expand catalog data, Descriptions and Ratings. If edits are needed proceed to make edits if everything looks ok click ok.
If selecting multiple terminals to insert select one hold down shift>Click Insert
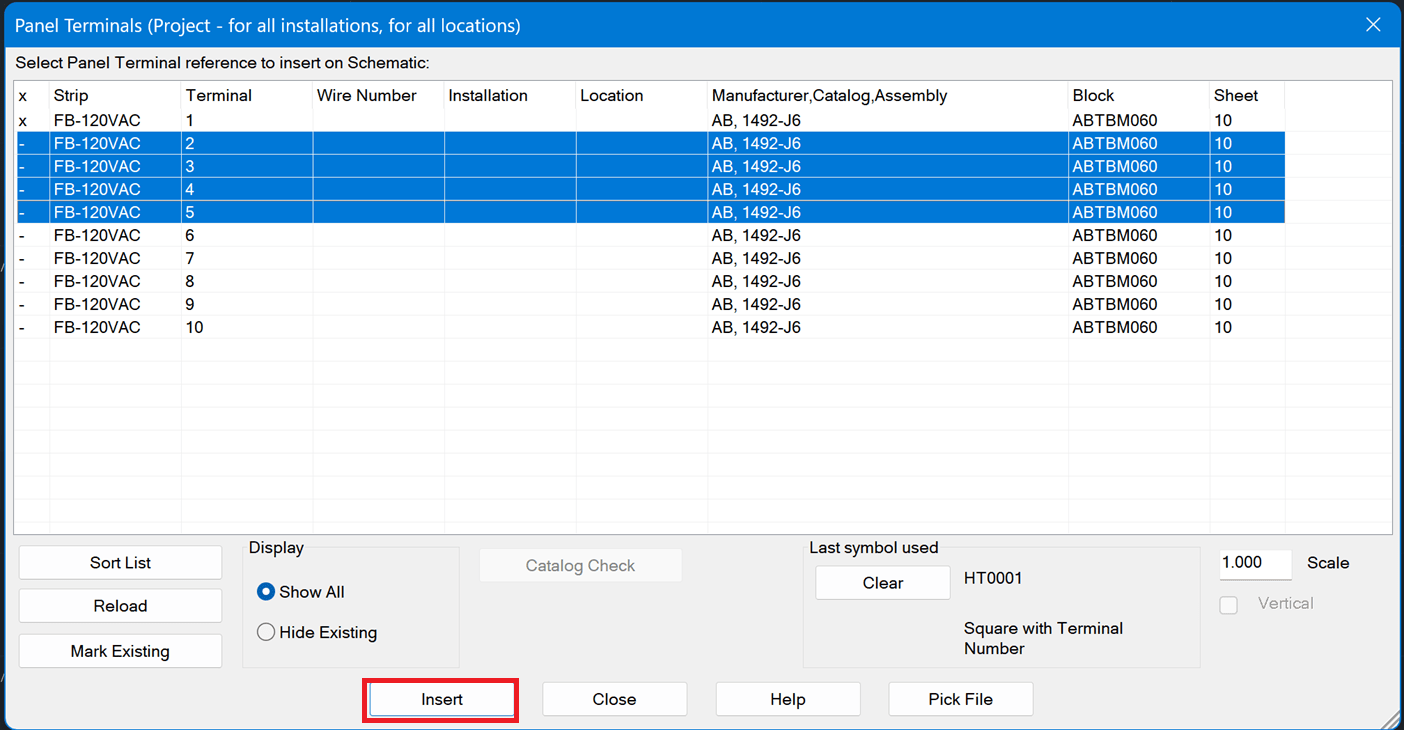
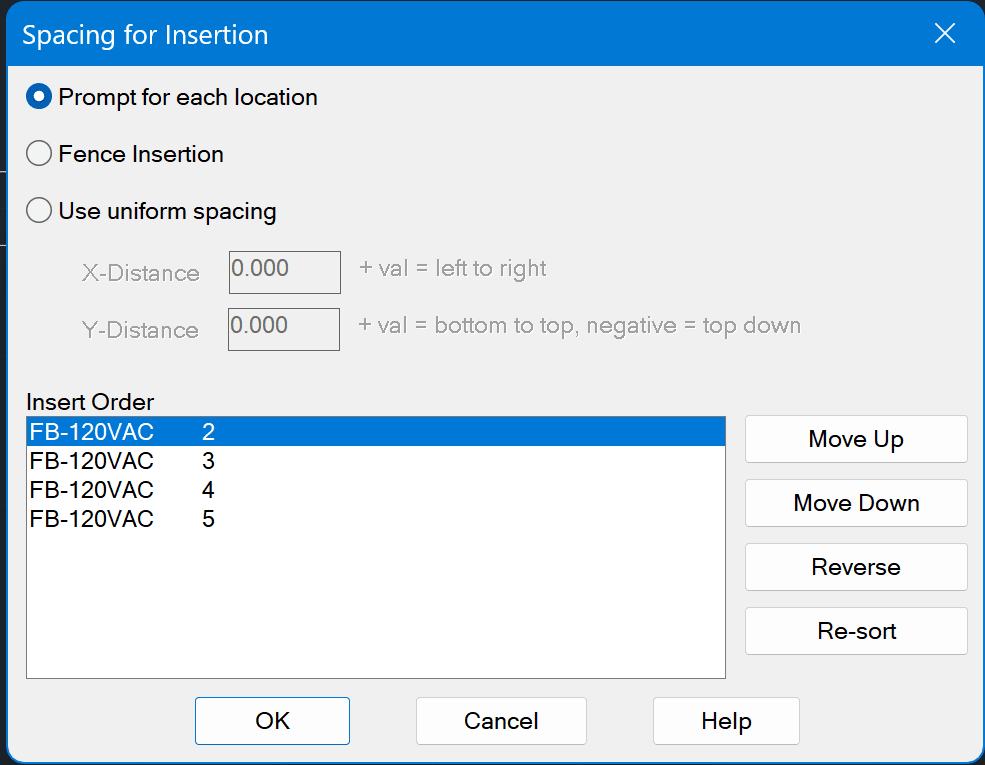
Spacing for Insertion dialog box will be proped. Prompt for each location, allows free placement. Fence Insertion works best if wire run parellel to each other. If X,Y distance is know, check use unifore spacing and enter in distance on X or Y. After selecting type of insertion, sort the order in which the terminals should be inserted.
If promped to Update other drawings click Ok>oK on Qsave.
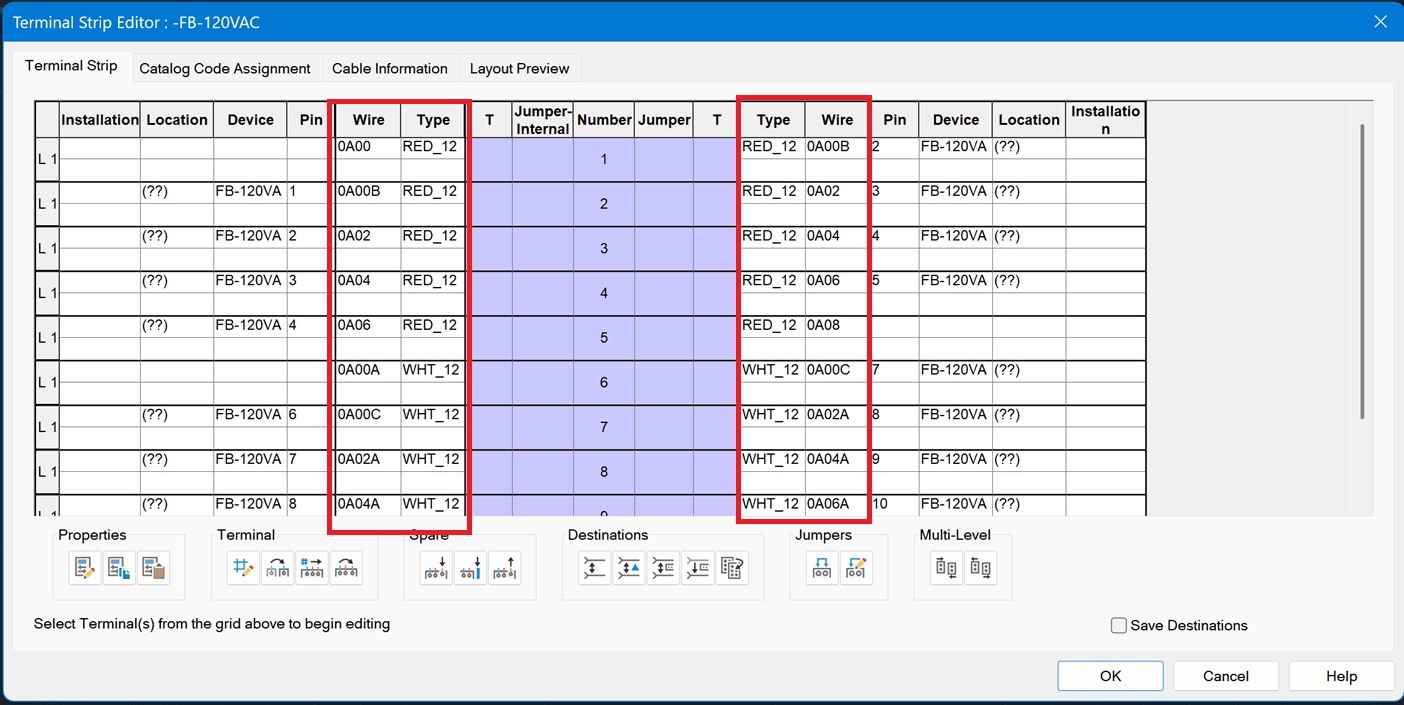
If wire number are added, go back to the panel drawing and rerun the Terminal Strip Editor.
Now additional information will be added to the terminals.
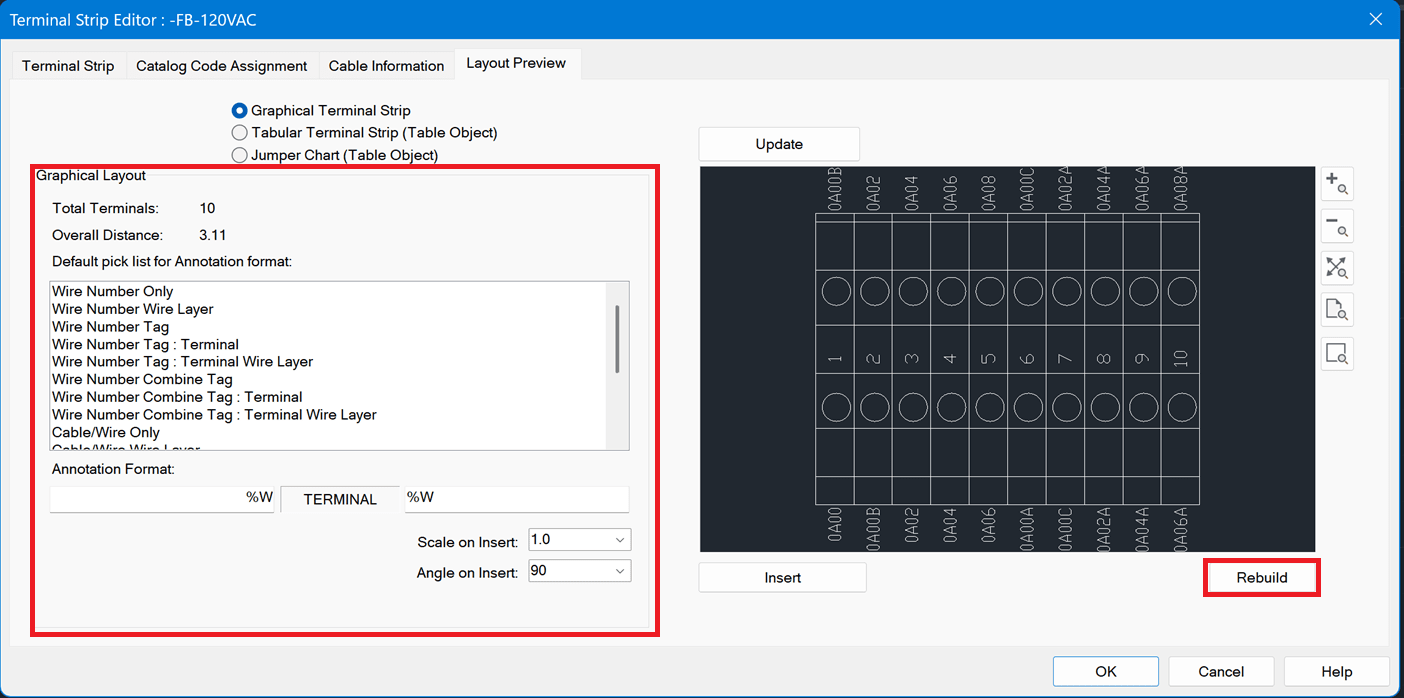
If extra information needs to be displayed in the footprint, go to the Layout Preview tab and edit the Graphical Layout.
Click Rebuild
Terminal Strip Updated dialog box will appear>ok>ok on Terminal Strip Editor>Done on Terminal Strip Selection.
Be sure to check back regularly for more insights and practical tips on how to get the most out of your software from the experts at IMAGINiT. Our team is committed to helping you stay ahead with the latest strategies, solutions, and support to drive real results. Whether you're implementing new software, streamlining processes or exploring new technologies, we've got the guidance you need to succeed.
About the Author
More Content by Drew Niemeyer


