
Creating and working with points is only for surveyors, right? Well, no actually. During the month of June, I will be posting a series of articles aimed at teaching point creation methods that can speed up the design process.
Civil 3D has a plethora of point creation methods at our disposal. The screenshot below only shows a portion of these methods. This blog will focus on creating points through interpolating by relative location, which could be very helpful during the beginning phases of drainage design.

Let's look at the design scenario below. The storm drainage designer, needs to quickly calculate slopes and elevations for potential catch basin locations. Creating points using the Interpolate by Relative Location method will do that without the need to create temporary linework or surfaces.
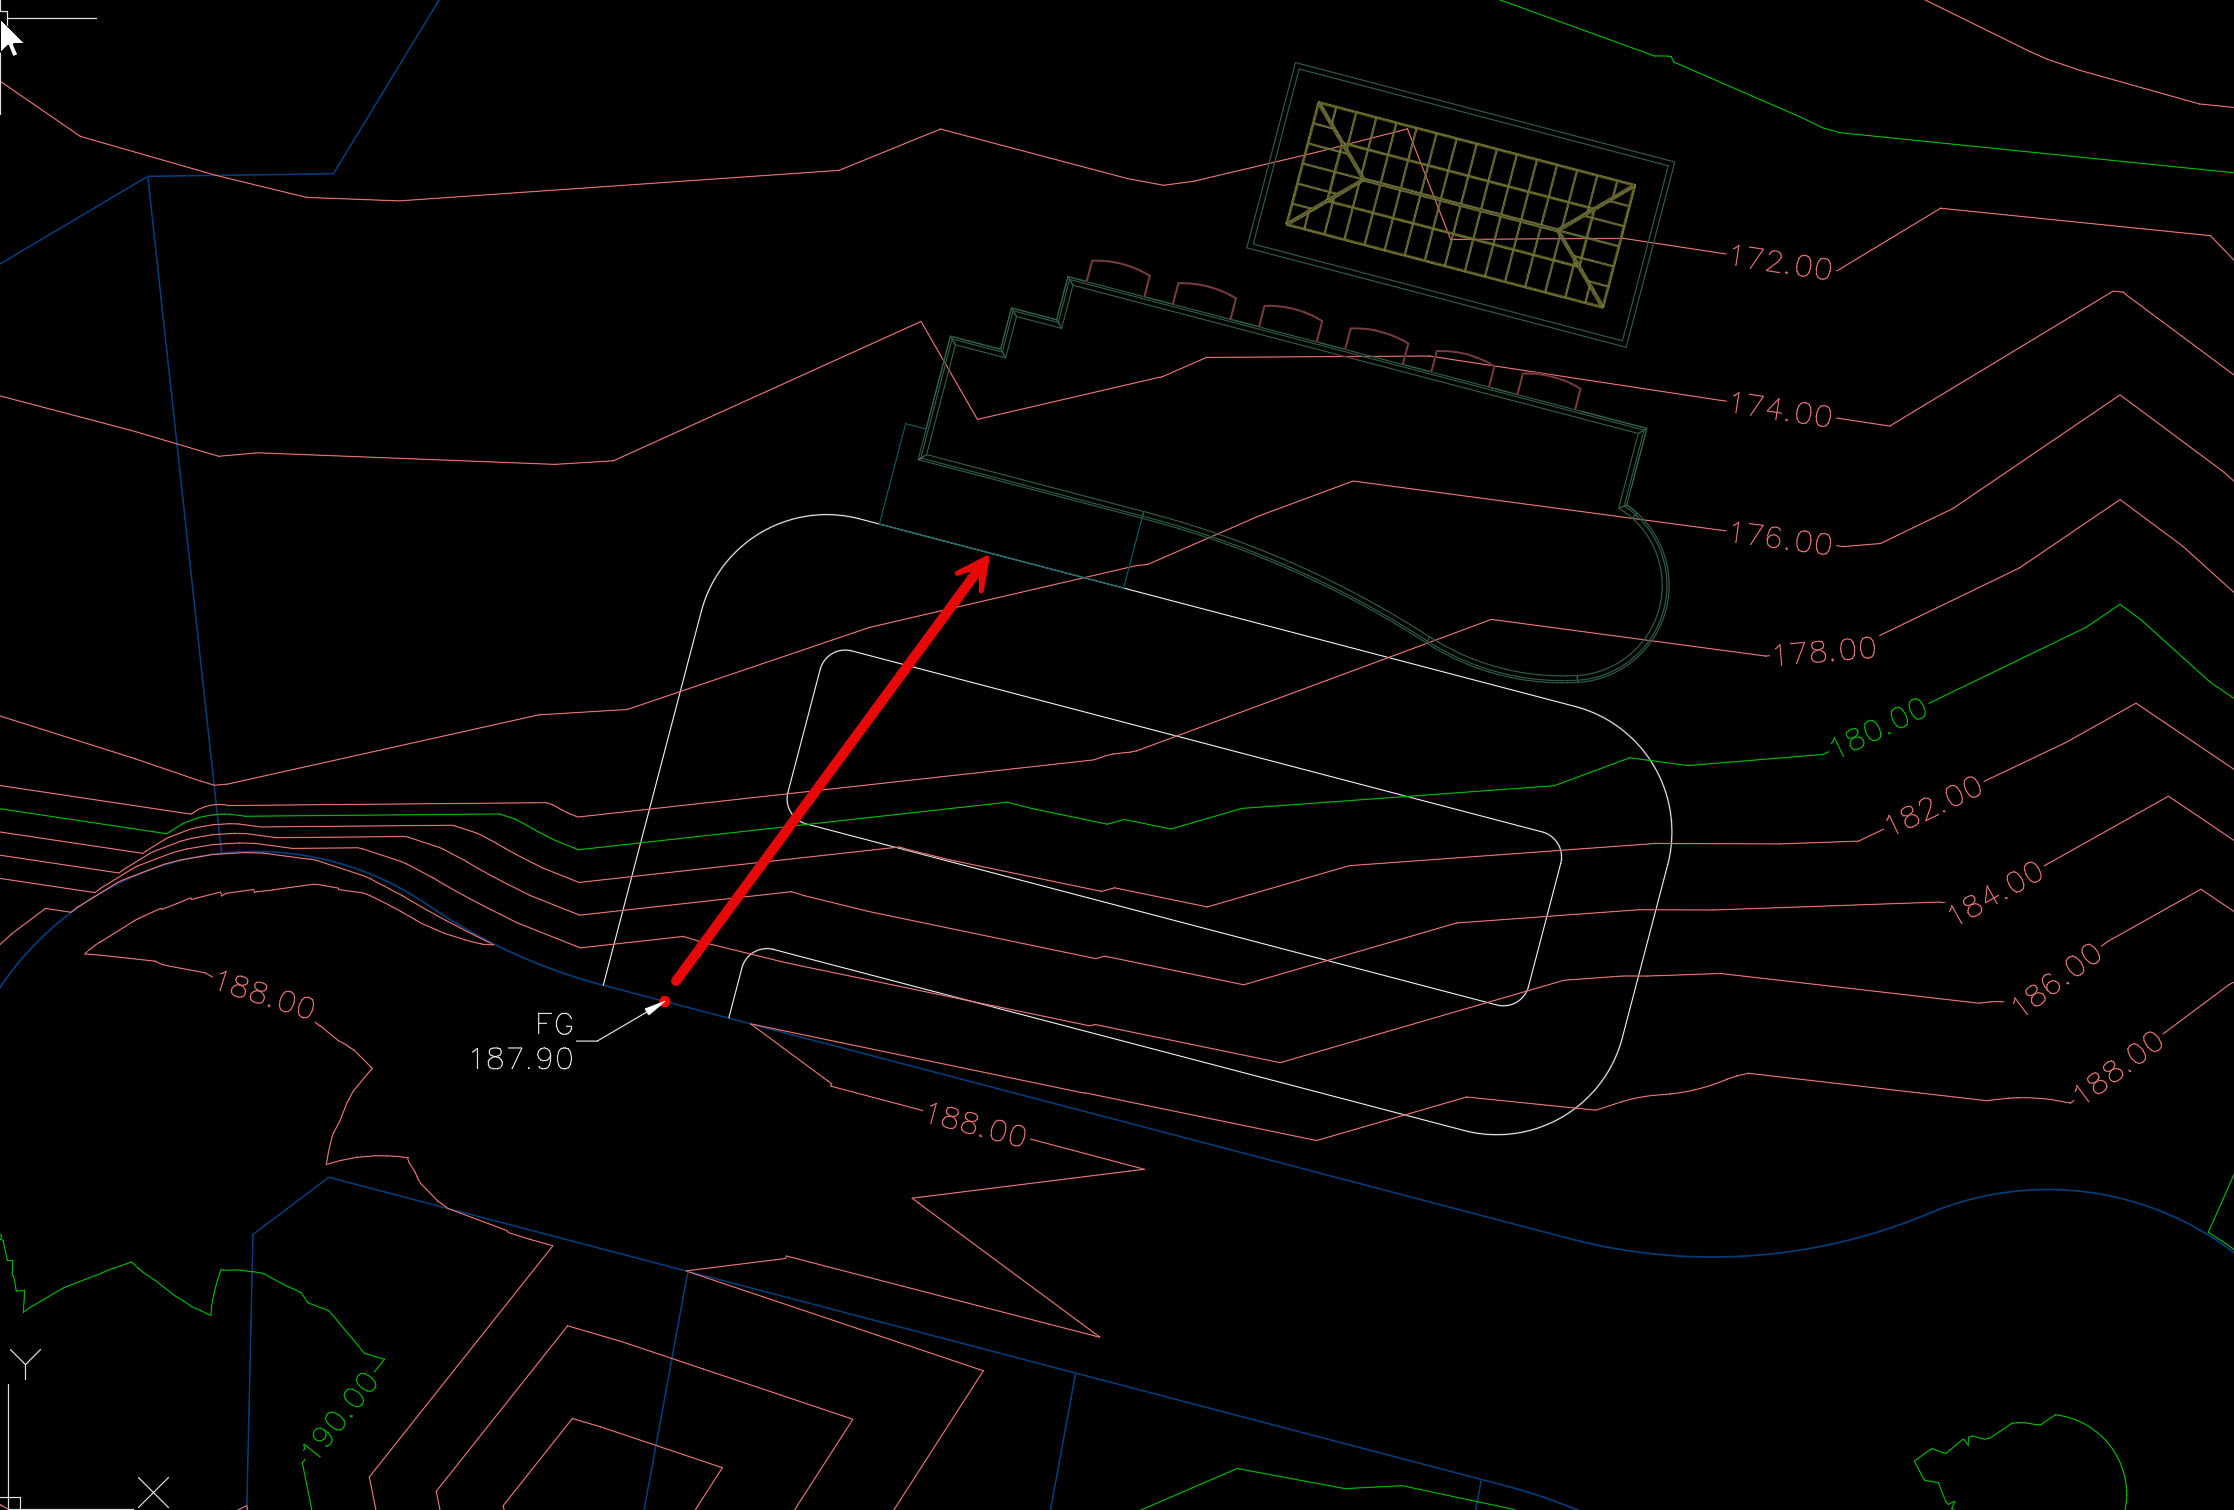
Our drawing below has a finished grade point set at the proposed driveway entrance. In this scenario, the access road has been built so the FG point reflects a real-world elevation. This will be our tie-in point to the storm main. Our storm drainage designer needs to calculate the graded elevation at the concrete pad in front of the proposed office complex. This will be a potential catch basin location.
This is a command in which you want to read the command line every step.
- Start the command by selecting Points < Create Points - Interpolate < By Relative Location
- The command line tells you to Specify first point. I will select the FG point at the driveway edge. (Node OSNAP)
- The command line then tells you to Specify an elevation. The elevation from the FG point is pre-populated so I'm going to hit the Enter key to select that. (187.90)
- You are prompted to Specify the second point. I will click immdiately in front of the concrete pad.
- Now the design begins. As you can see on the command line, you can calculate the second points elevation by Difference, Slope, or Grade. For this exercise I will be selecting Grade and typing in 2. That will create a point that is at a 2% higher grade than our starting point.

- The command prompts for distance. I will click the same location in front of the concrete pad.
- Specify an offset of zero. If I typed in a number higher than zero, my final point would be to the right of the spot I selected. A negative number would place the point to the left.
- Enter a point description. I am using a description that uses Description Keys and Point Groups set up for design points. (More on that next week)
- My point is set and the command is still active. I can place another point along the white polyline representing curbs.
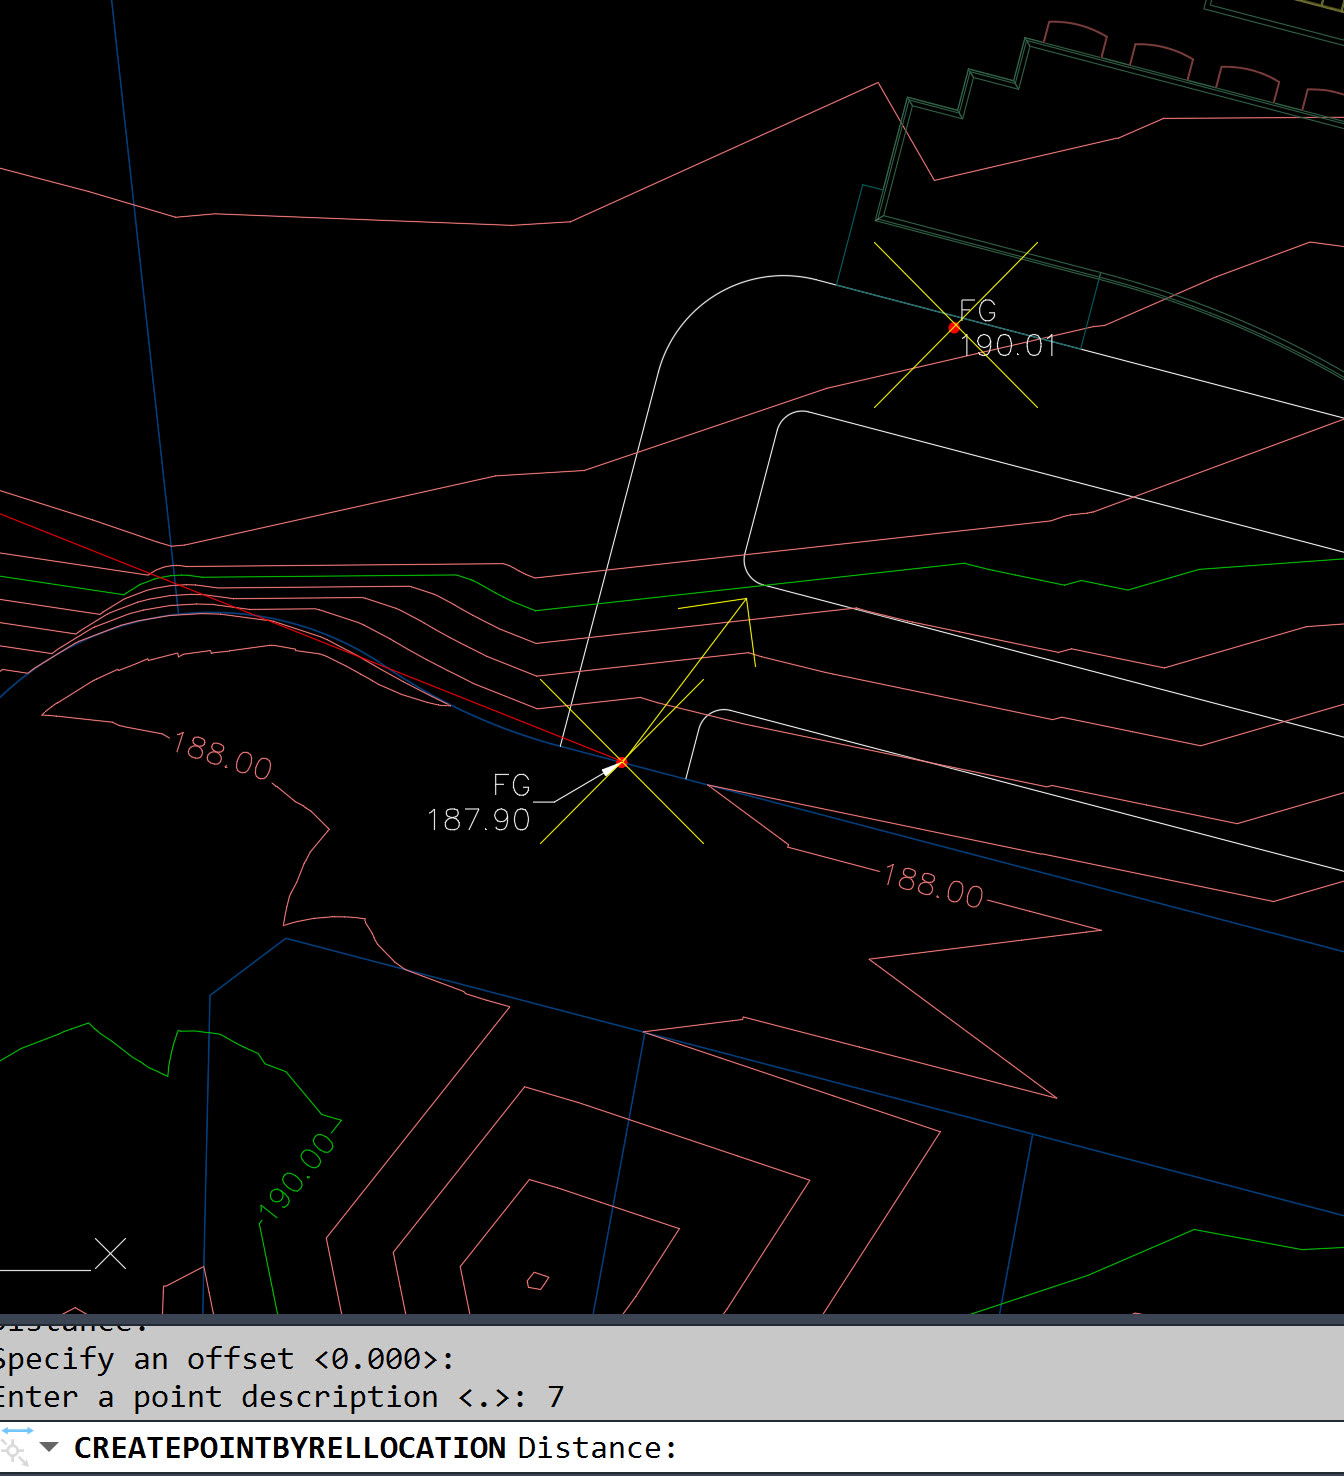
Our final screenshot shows three points calculating a 2% grade from the existing tie-in location to the proposed concrete pad of our new building. In just a few minutes you can have a rough plan laid out for potential storm drainage structure locations and these points can easily be shown or hidden by gathering them into a point group.

About the Author
Follow on Linkedin More Content by Dana Rice


