
Applies to:
All AutoCAD-based Products
Issue:
You want to create custom linetypes, but need to have shape files for complex geometry in the shapes.
Solution:
First review this blog on the easy way to create linetypes:
https://resources.imaginit.com/support-blog/how-to-create-a-custom-linetype-in-autocad-based-products
This covers the basics but doesn’t have shape files, below we will discuss how to create shapes, and the shape make can be used in place of the text element when generating a linetype from above.
1. Draw the shape you want (typically I create my linetypes and shapes inside basic AutoCAD and not a vertical – due to units issues).
Note: Hatching must be exploded and the drawn items cannot contain solids fills, you have to use horizontal lines very close together the achieve the “filled shape”, vertical lines will cause gaps and shifting of the “fill” in the shape.
2. I usually will make sure my Annotation scale is set 1:1 and will put in a linetype with shapes or text to have a basis for scaling (like FENCELINE1 or FENCELINE2)

3. Once you have a shape that is scaled properly and looks like what you want, now we’ll make a shape from it for inclusion in a linetype.
4. In the Express Tools tab, locate the Tools section, click the drop down and select Make Shape

5. Browse to a location, enter a filename that makes sense, and click Save

6. In the command line enter the Shape Name (I typically recommend one shape per shape file)

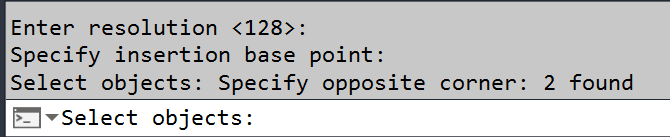
7. Next, enter the shape resolution

Normally 128 is fine, however if you are wanting a “filled” shape, you may need to increate this number to 4096
8. Specify the base point, I usually will select the point where it will join to the line segment on the left


9. Now select the objects, be sure to only select the shape pieces and not the line before and after (otherwise that will throw off the linetype)
10. When you hit enter, the shape should now be created and present in the drawing

11. Type in SHAPE and then the shape name (ARWCIR in this case) to create a copy of the shape and insert it. Now you can use that in your linetype building, and using the first link above, you can now successfully generate linetypes with shape files.
IMPORTANT: You will now need to copy the SHX file you just created into a location that your AutoCAD Support Search Paths can see

Failure to do so will cause your drawing to state that there’s a missing SHX and the linetype you create will fail to load.
About the Author
Follow on Linkedin More Content by Ryan Wunderlich


