Civil 3D: Changing pipe networks catalog location

You've just created a custom pipe network catalog and saved it to a shared network drive. Congrats! Building pipe network catalogs is no small task. The heavy lifting has been done, the remaining step is to change the Pipe Network Catalog settings in Civil 3D. 

Open the Create Design Panel on the Home Ribbon. You will see commands for setting Pipe Network catalog and Pressure Network catalog. 

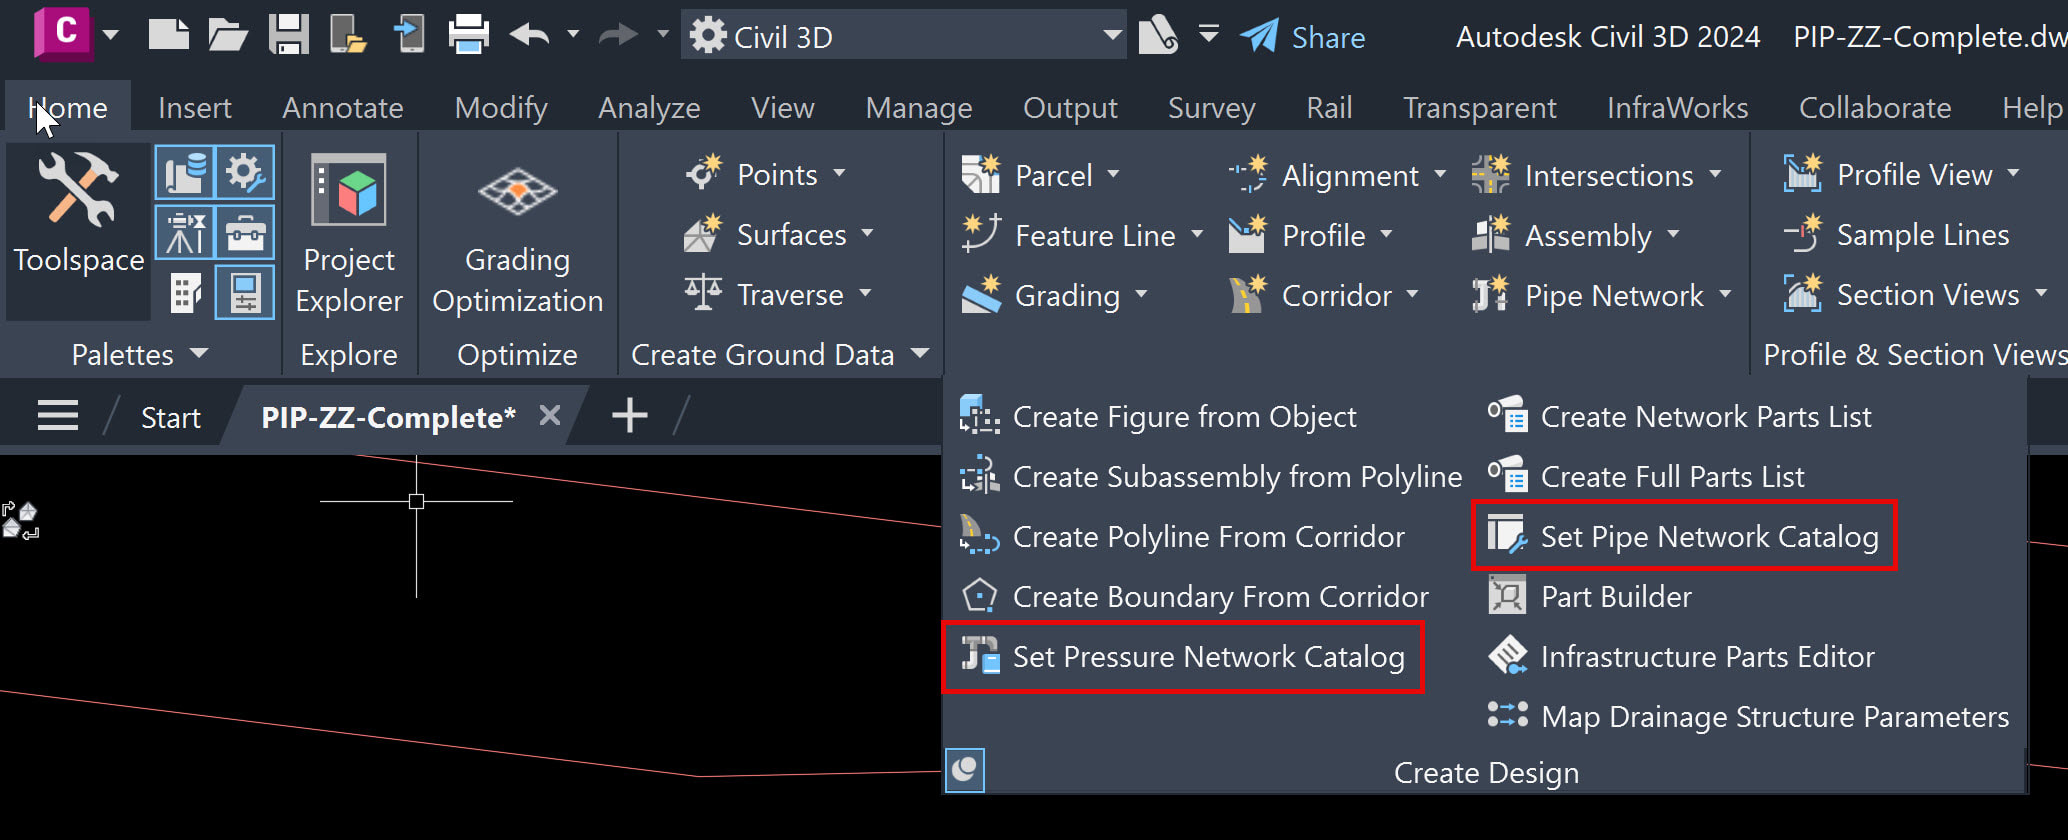
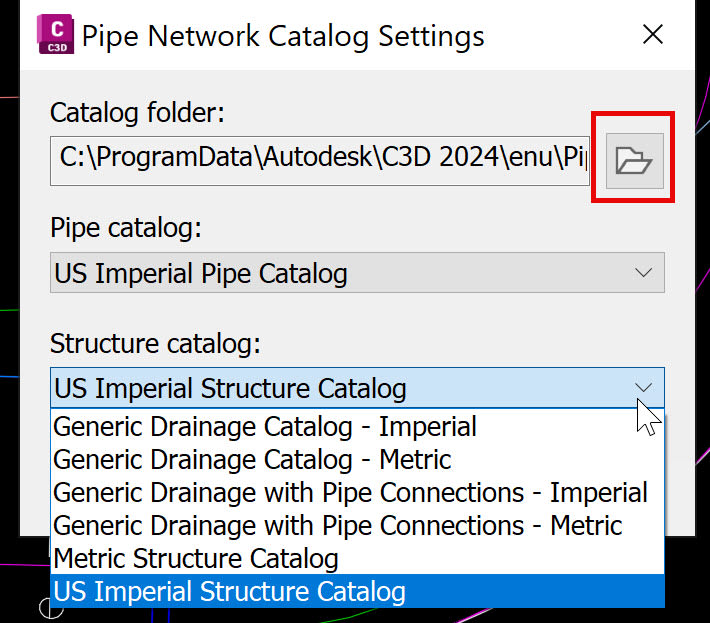
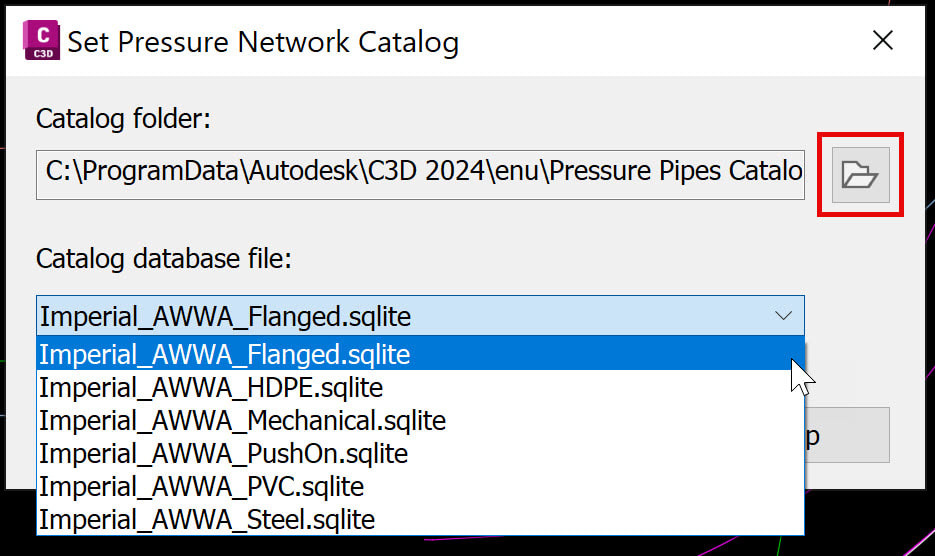
Select either the Set Pipe Network Catalog or Set Pressure Network Catalog commands and the dialog boxes shown below pop up. Navigate to your custom network on your shared network directory. 

Your parts lists will now function properly. This step will need to be performed for every member of your team. 


About the Author

Dana Rice

As an Applications Expert, Dana is responsible for supporting, training, and implementation of software for survey and civil engineering professionals. Dana began her career as an AutoCAD and Civil 3D draftsperson in the civil engineering industry. She supported surveyors and engineers by managing CAD templates, assisting with preliminary design, processing field data, and creating construction documents. After a decade in production work, Dana transitioned to a CAD manager, working in both the private and public sectors. She has more than 24 years of experience helping large and small, public and private organizations in the southeastern United States.

Follow on Linkedin More Content by Dana Rice
Previous Article
Practical Tools for Managing Change in Utility Design

IMAGINiT's ProductivityNOW eLearning platform provides training for Automated Utility Design (AUD), Substat...

Next Article
Revit Error: An Unrecoverable Error has Occurred

You are receiving the error "An Unrecoverable Error has Occured" when trying to open a Revit project. Here'...

Need tech support? Let us help!

Learn More