
This series focuses on the Conditional Horizontal subassembly, found under the Conditional tab in the Tool Palettes. Conditional subassemblies function like an if/then statements. They evaluate whether a horizontal target is found and apply geometry accordingly. Using a "found" or "not found" condition, it will show or hide the subassemblies, Conditionals onn their own, are not linework.
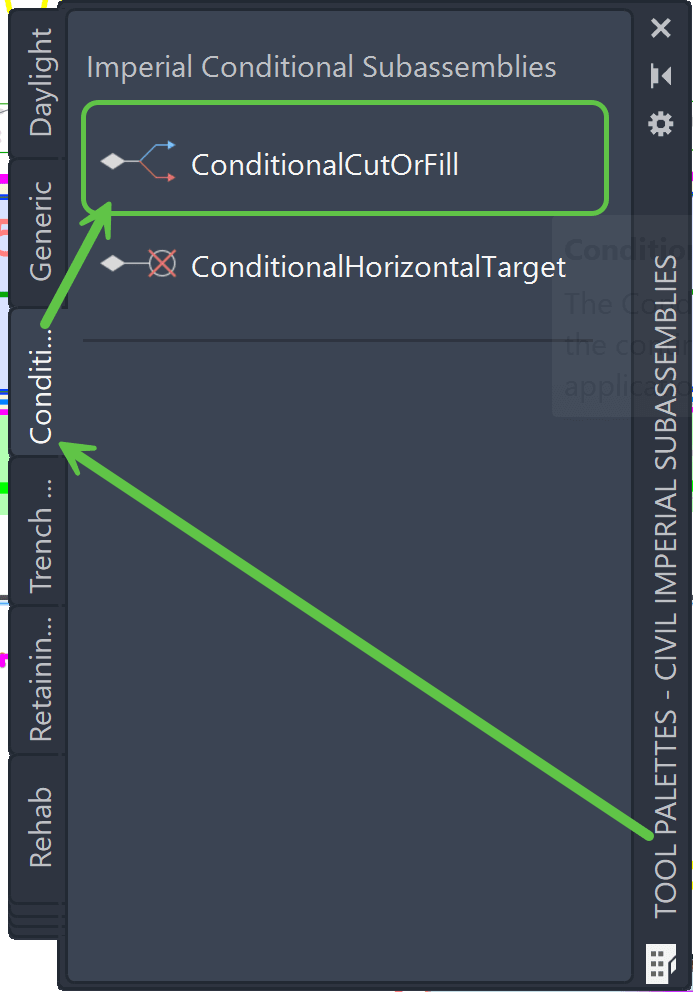
For additional insight, refer to the Civil 3D Help file.
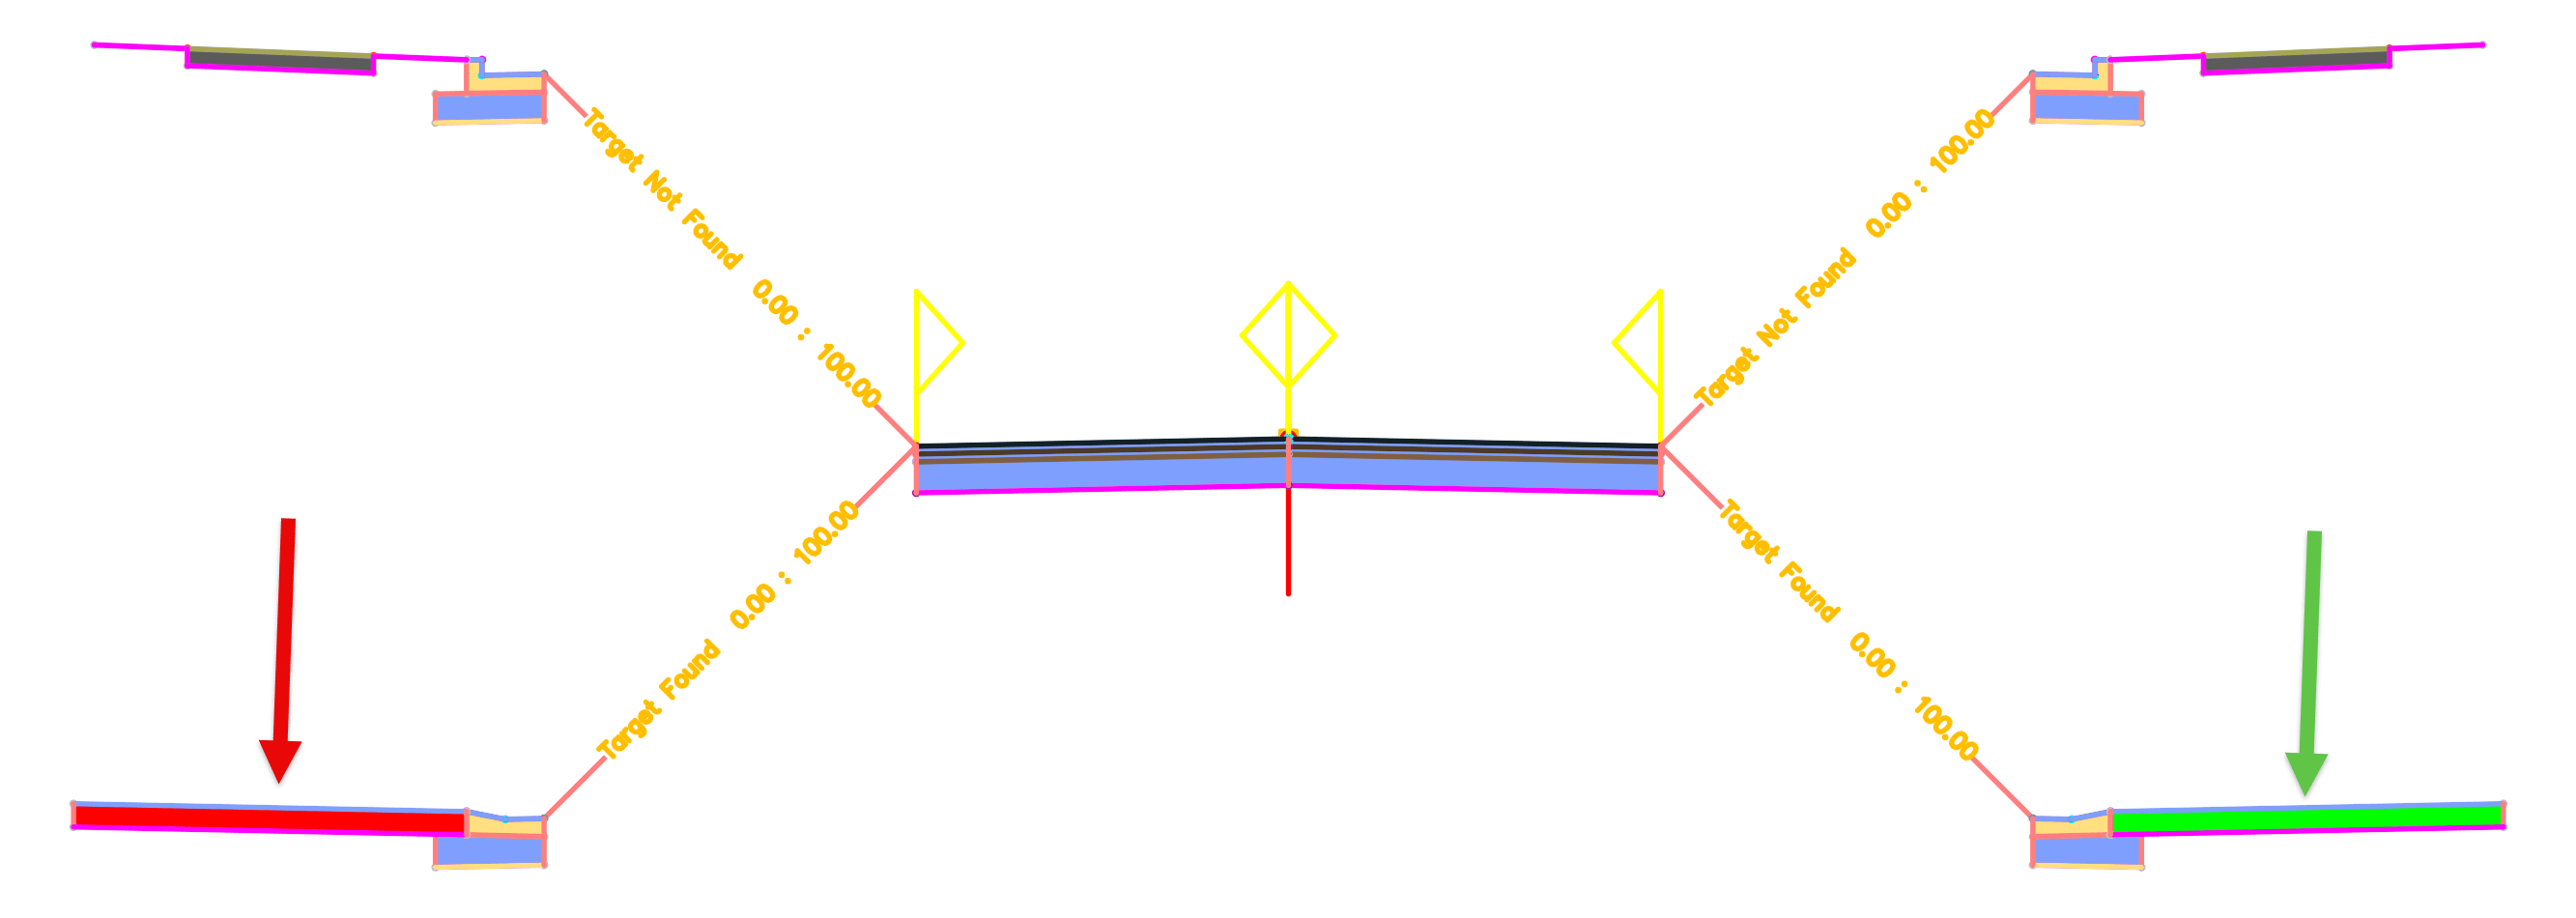
Assembly Overview
The full assembly used here consists of a simple two-lane crowned roadway with conditional variations at the edge of pavement:
-
Target Not Found: Standard curb with sidewalk (gray concrete)
-
Target Found: Reduced curb with driveway with Left driveway (red) and Right driveway (green)
In this Part 1, we will enhance the corridor design by adding additional sampling at horizontal target locations. Conditionals will by default show the "Not Found" option.
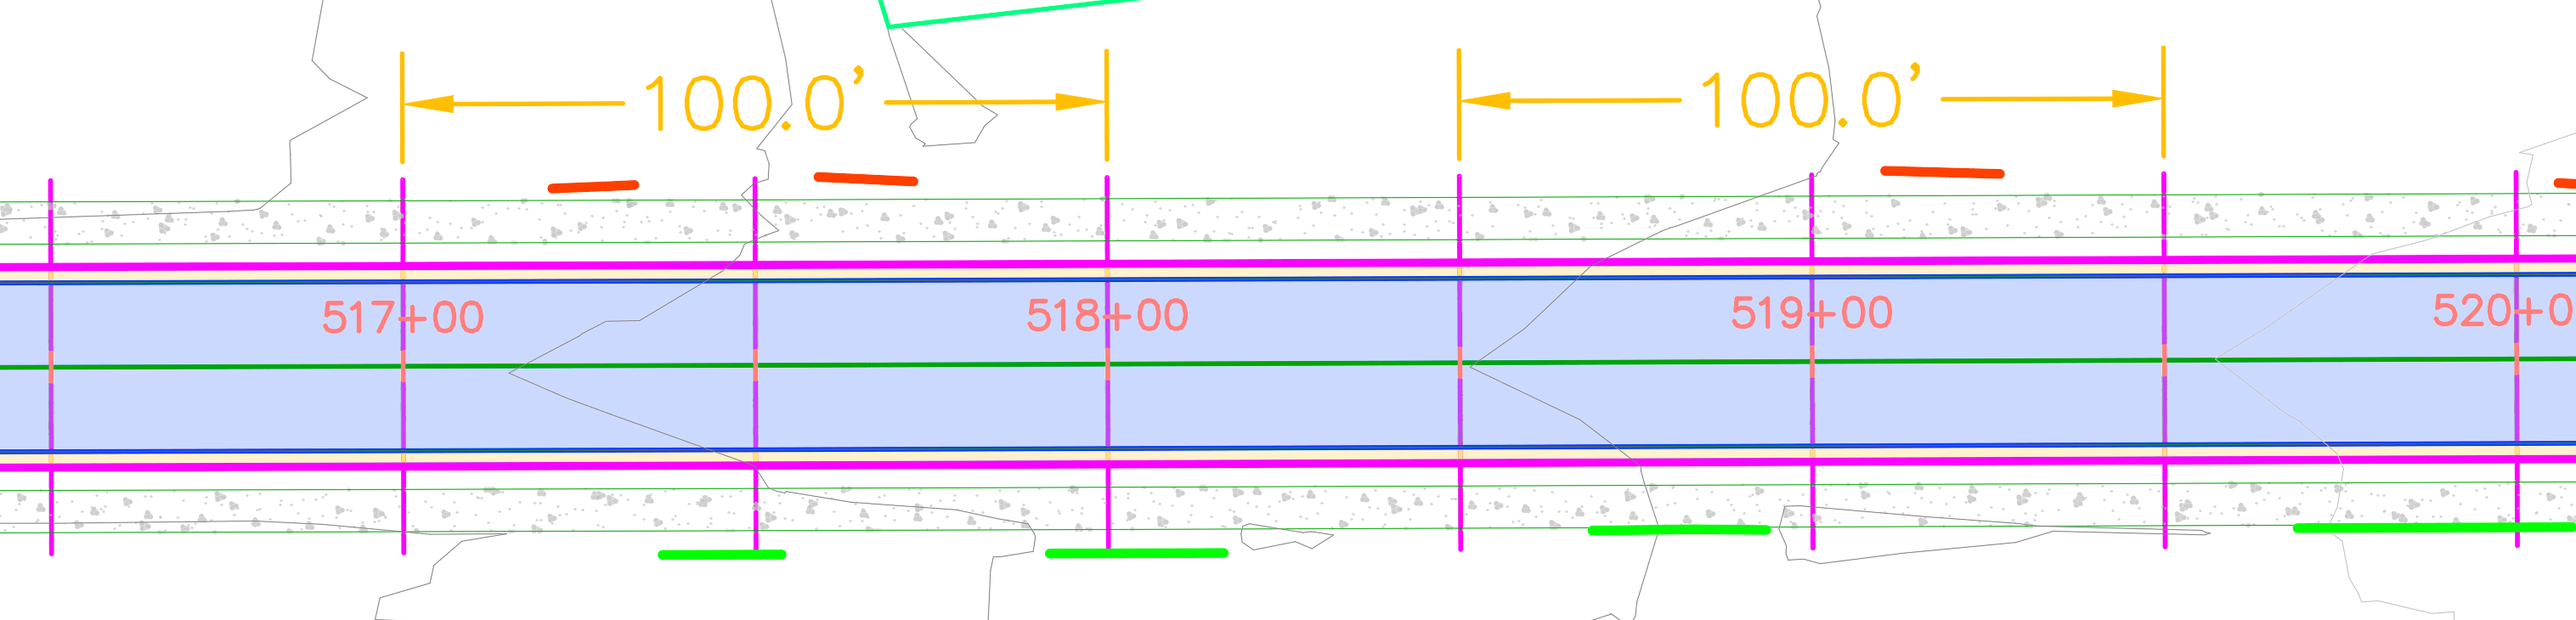
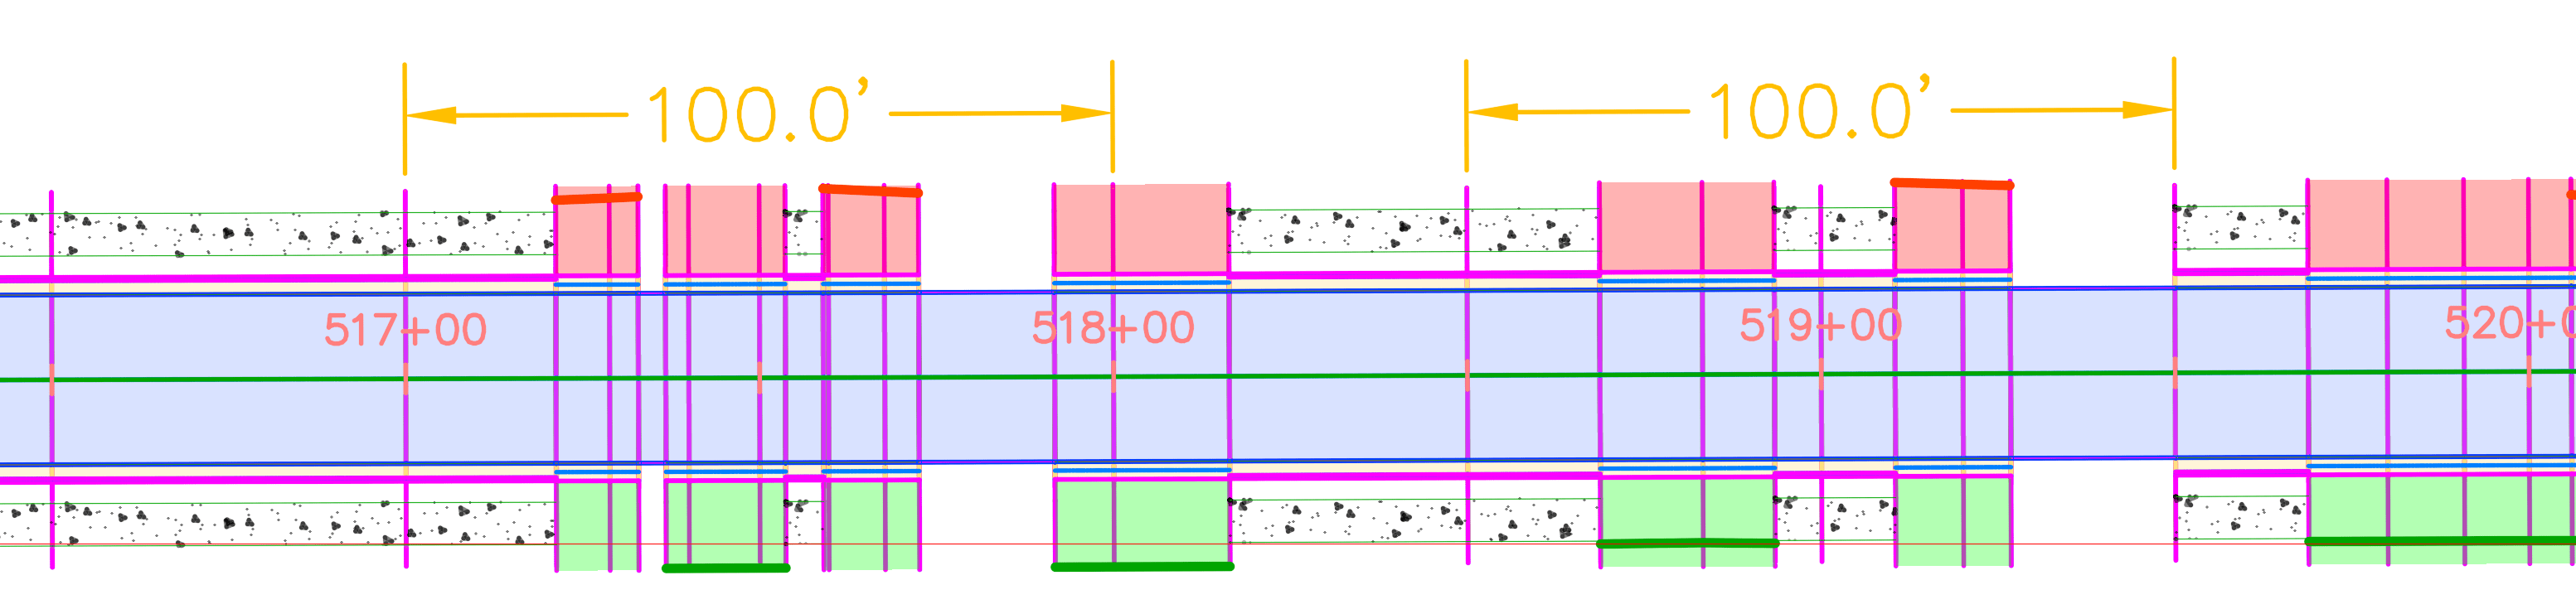
The Issue
Even though Conditional (4) targets are assigned on both the left and right sides and Found and Not Found options, the resulting sections appear uneven and inconsistent. The corridor frequency is strictly set to 50', with no additional sampling enabled. In the initial corridor result detail is lacking:
-
Sidewalks (gray) disappear at some target locations
-
Only some driveways (red and green) are applied
This happens because Civil 3D only evaluates conditional logic at corridor sample stations. With no additional sampling, Civil 3D does its best to interpolate geometry between the 50’ stations, which leads to inconsistent results.
The Solution
Additional sections can be automatically generated for Conditional for:
- At the offset targety geometry ponts
- Adjacent to offset target at the start/end
- Along offset target curves: increment or curvature
This is configured in the Corridor Properties → Frequency to Apply Assemblies → Offset Targets → enable features by selection
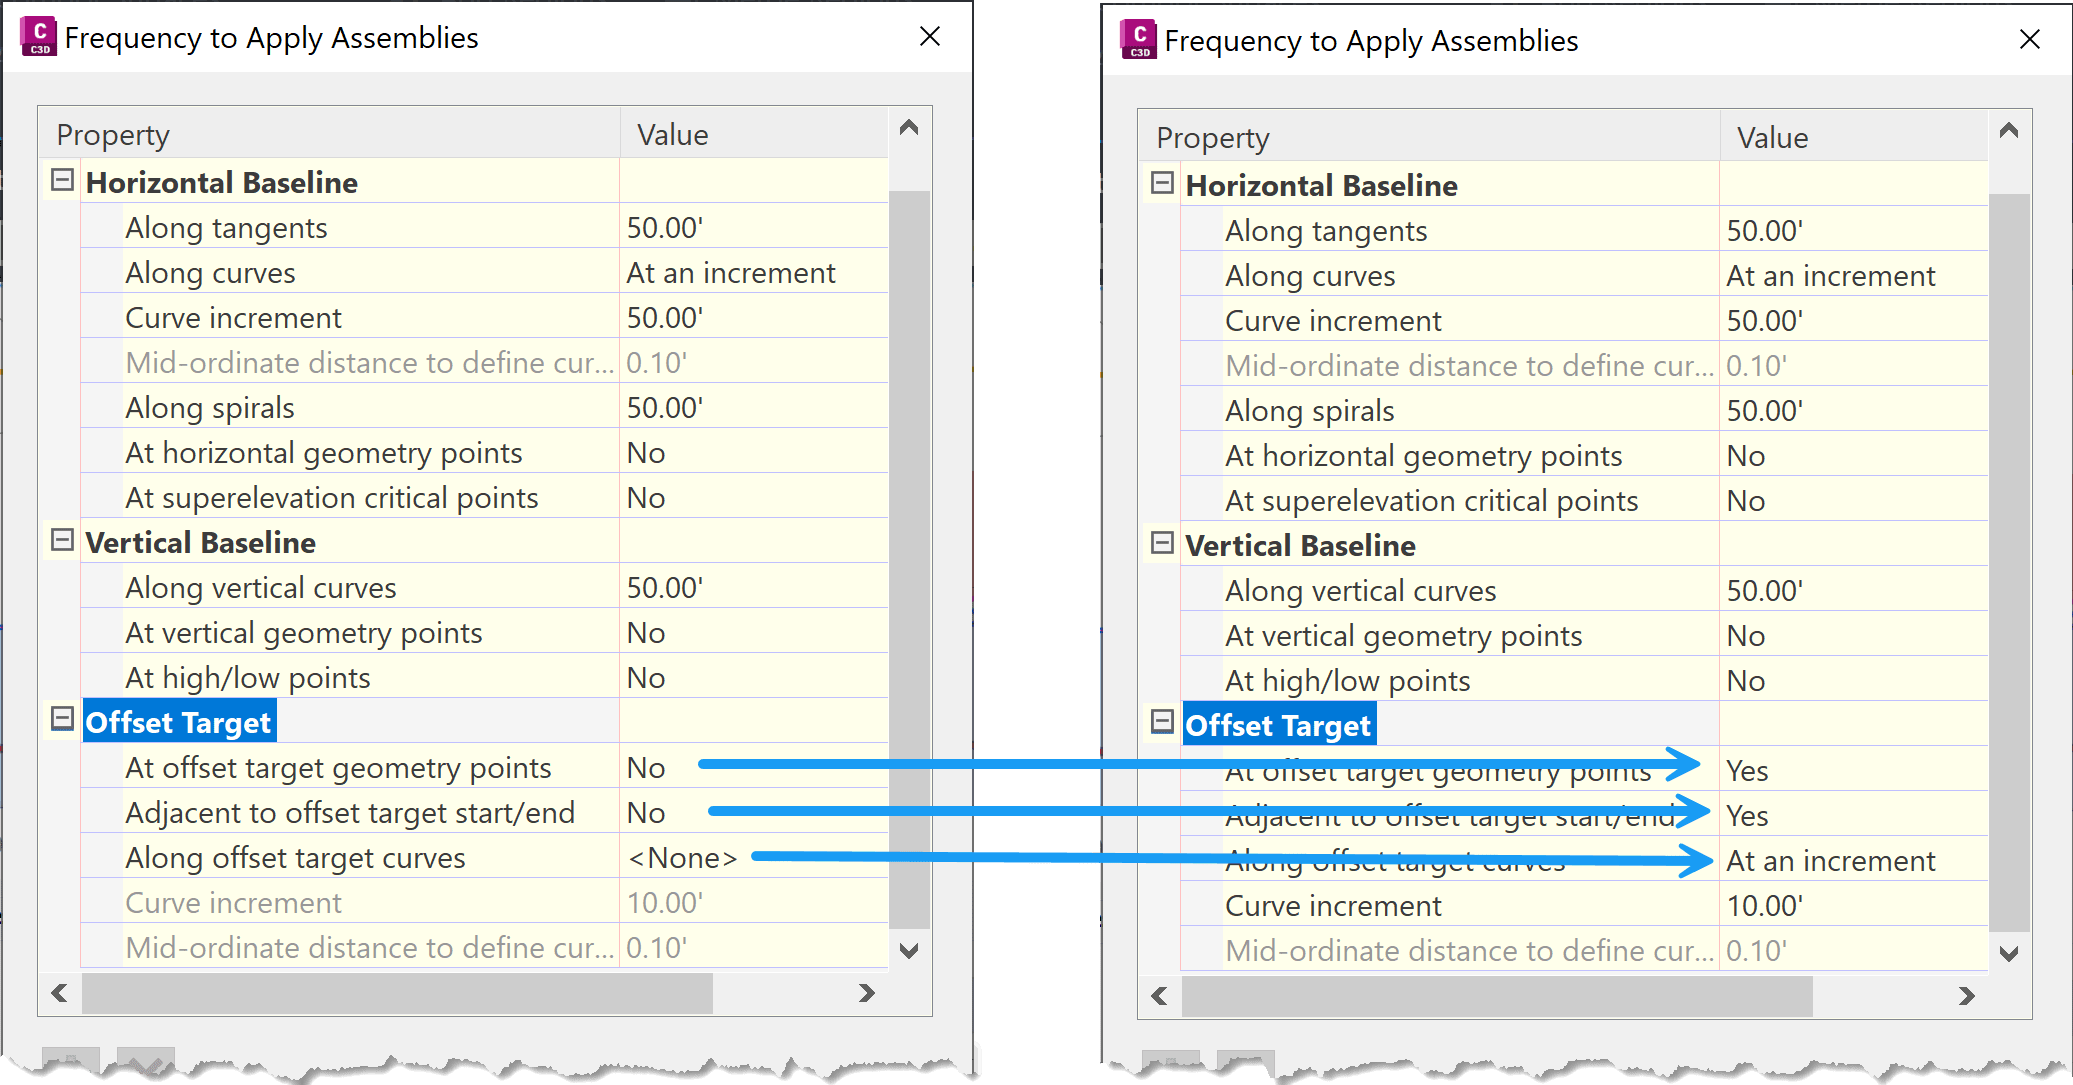
Enabling these options increase assembly frequency witin corridor, specifically at target driveway locations (red/green)
 *By default, this settings are enabled, here they were turned off to show how they work*
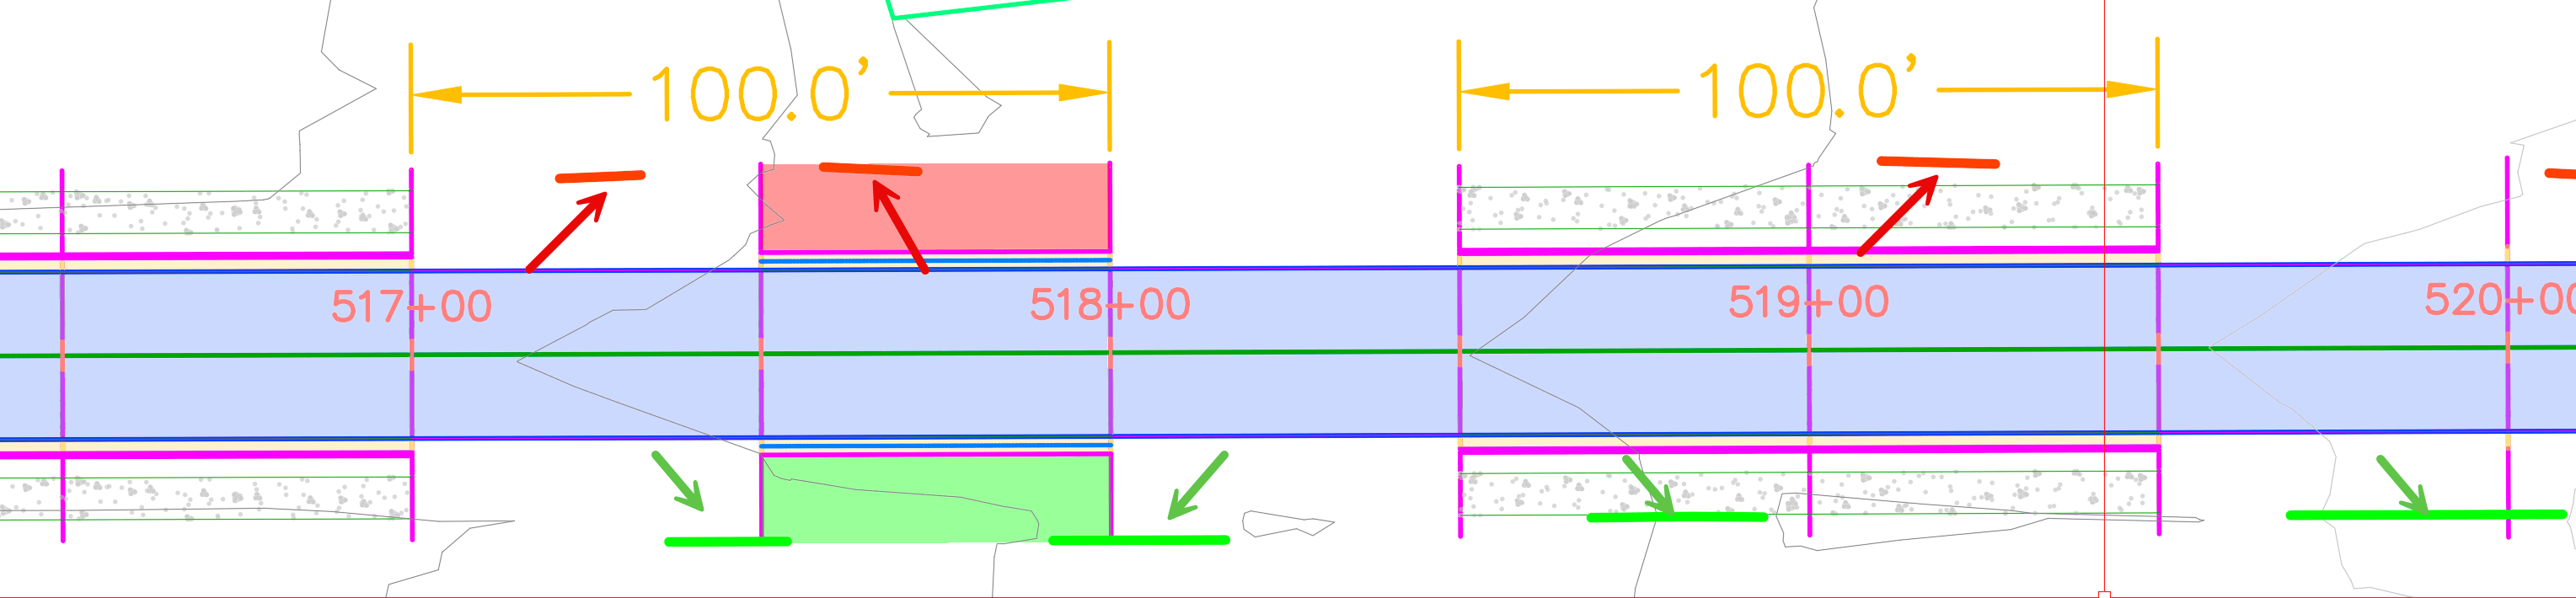
The Result
With this setting enabled, more sections are added to the corridor, improving design significantly:
-
Additional sections are added at driveway target limits (end ponts)
-
Driveway geometry (red/green) is applied more consistently
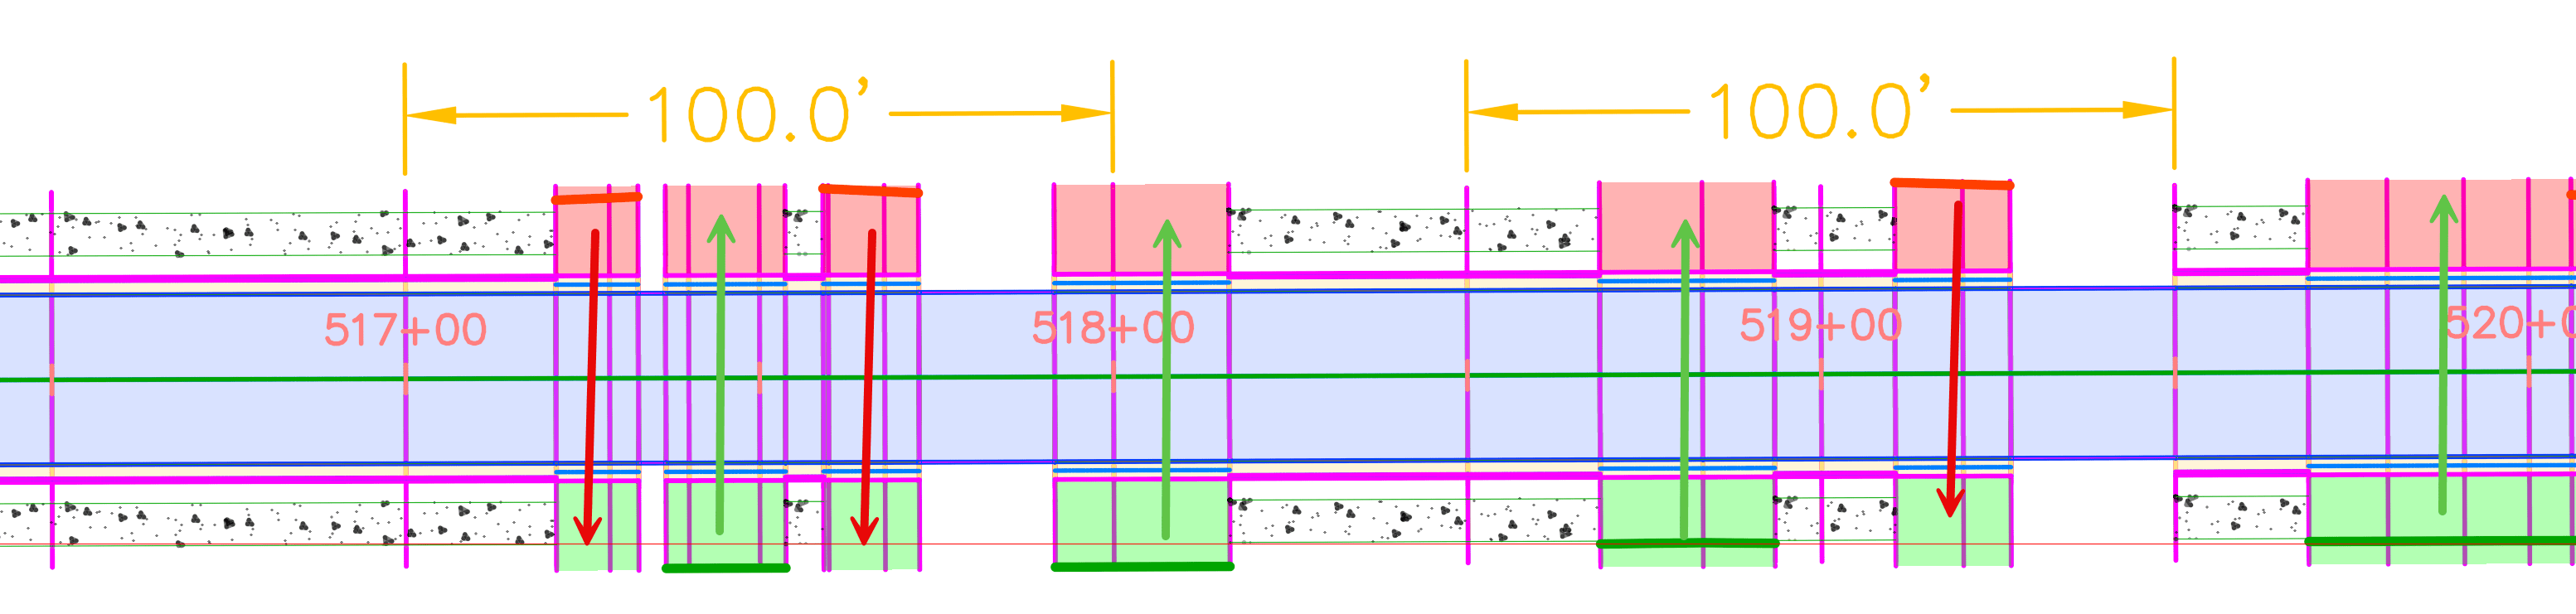
However, a new issue appears: left and right targets are applied to both sides, resulting in excessive driveway areas.
Part 2 of this series will address how to control target application by side and eliminate the excess driveways.
About the Author
More Content by Leo Lavayen


