

Issue: Batch Plotting Produces Inconsistent Results
When batch plotting multiple AutoCAD drawings, each sheet may have different plotting settings. This can result in drawings being plotted with the wrong:
Printer or plotter, Paper size, Plot scale, Orientation, CTB/STB plot style, Plot area.
Manually correcting each sheet can be time-consuming, especially when working with a large drawing set.
Causes: Different Page Setup Settings
AutoCAD stores the page setup assigned to each layout. When the Publish command is used, AutoCAD uses the page setup assigned to each sheet.
If layouts were created at different times or by different users, they may have different page setups and plotting configurations. This can cause individual sheets in a published drawing set to use different printers, paper sizes, scales, orientations, or plot styles.
Solution: Use Page Setup Manager
The Page Setup Manager allows you to create a standard page setup and apply it to multiple layouts.
Step 1: Create a Standard Page Setup
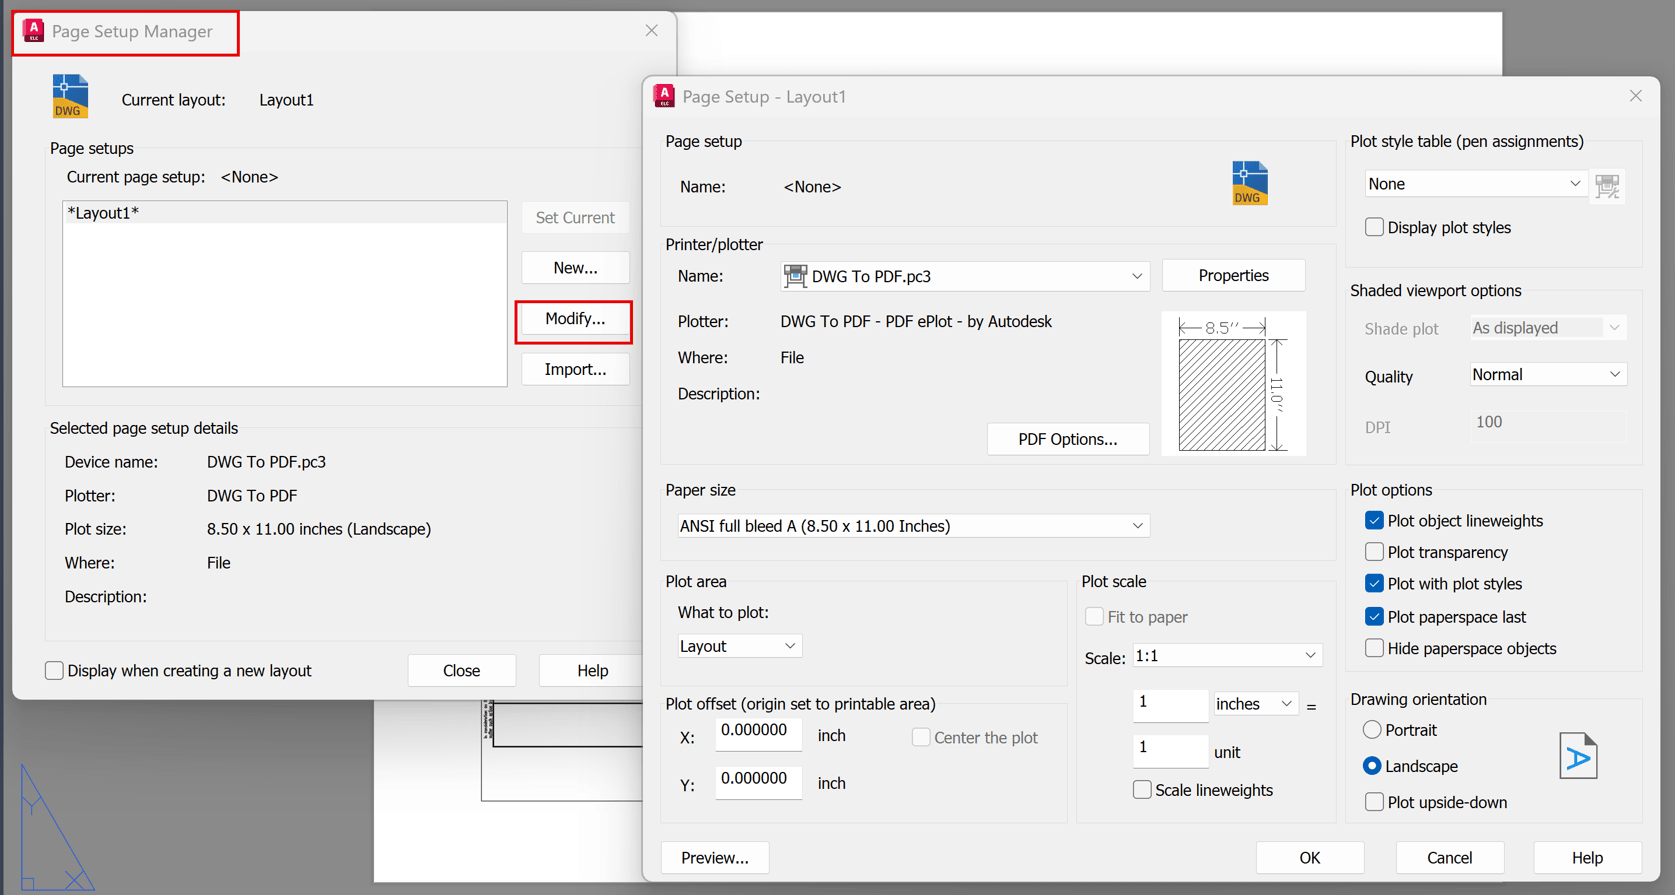
1. Open a drawing containing the desired plotting configuration.
2. Right-click the Layout tab.
3. Select Page Setup Manager.
4. Select the layout and click Modify or you can create a new setup.
5. Configure the required: Printer/Plotter, Paper size, Plot area, Plot scale, Orientation, CTB/STB file.
6. Click OK.
Give the page setup a recognizable name, such as 24x36 PDF or 11x17 Monochrome.
Step 2: Apply the Page Setup to Multiple Sheets
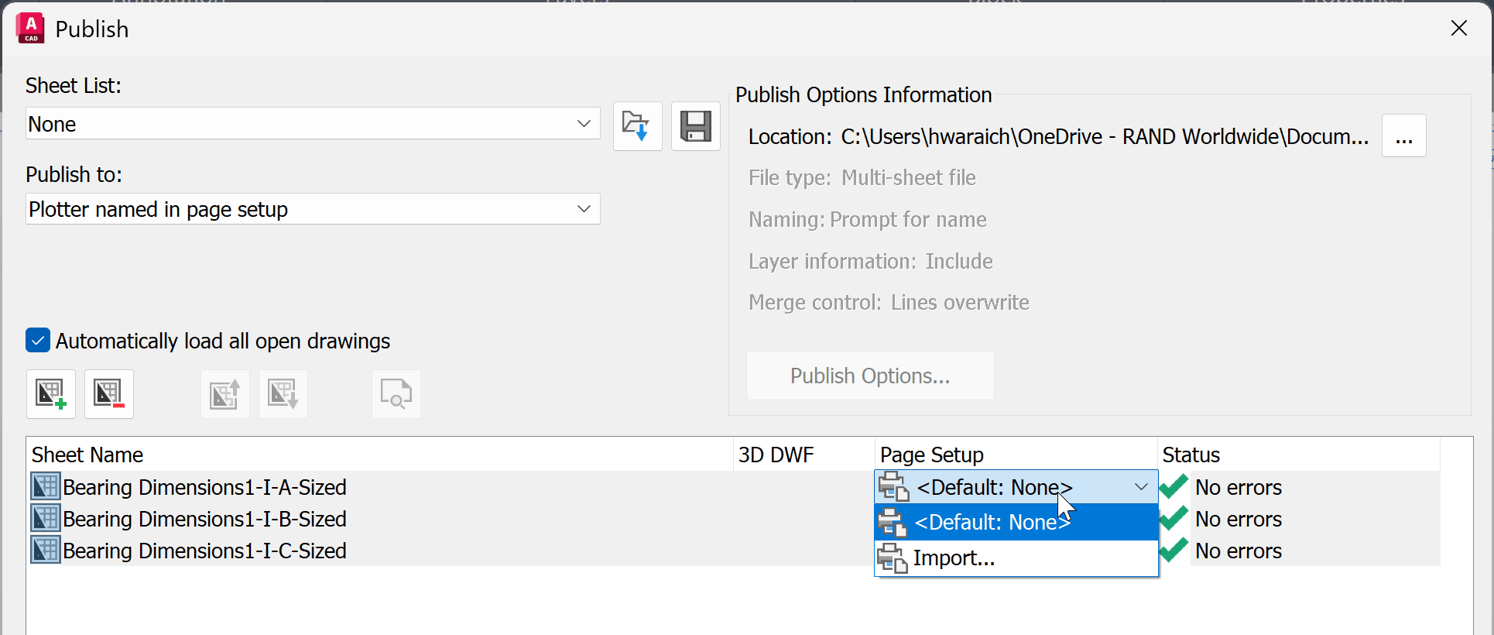
After adding your drawings to the Publish window, you can change the page setup for multiple sheets at the same time.
If the sheets you want to modify are listed consecutively:
1. Select the first sheet.
2. Hold Shift.
3. Select the last sheet.
All sheets between the first and last sheet will be selected.
You can then use the Page Setup column/drop-down to assign the desired page setup to all selected sheets at once. If you want to use a page setup from another drawing, use the Import option to import the page setup.
This is particularly useful when publishing a large drawing set because you do not have to change the page setup individually for every sheet.
Step 3: Publish the Drawing Set
Once the page setup has been applied:
1. Review the sheets in the Publish window.
2. Verify the printer/plotter and page setup.
3. Select Publish.
4. Choose the desired output method, such as PDF or Plotter.
AutoCAD uses the page setup assigned to each sheet when processing the selected sheets.
For frequently used drawing sets, consider creating standard page setups in your company drawing template (DWT). This allows new drawings and layouts to use consistent plotting configurations and reduces the need to manually configure page setups before publishing.
About the Author
More Content by Harpreet Waraich


