Issue/Question:
Administrators have a number of existing locations in a Forma Build project. They would like to import a large number of additional locations/rooms without affecting or deleting existing locations.
Solution:
Following are the steps to import a number of additional locations/rooms without creating duplicates or affecting the existing location hierarchy:
-
Select Project Admin module from Forma project
-
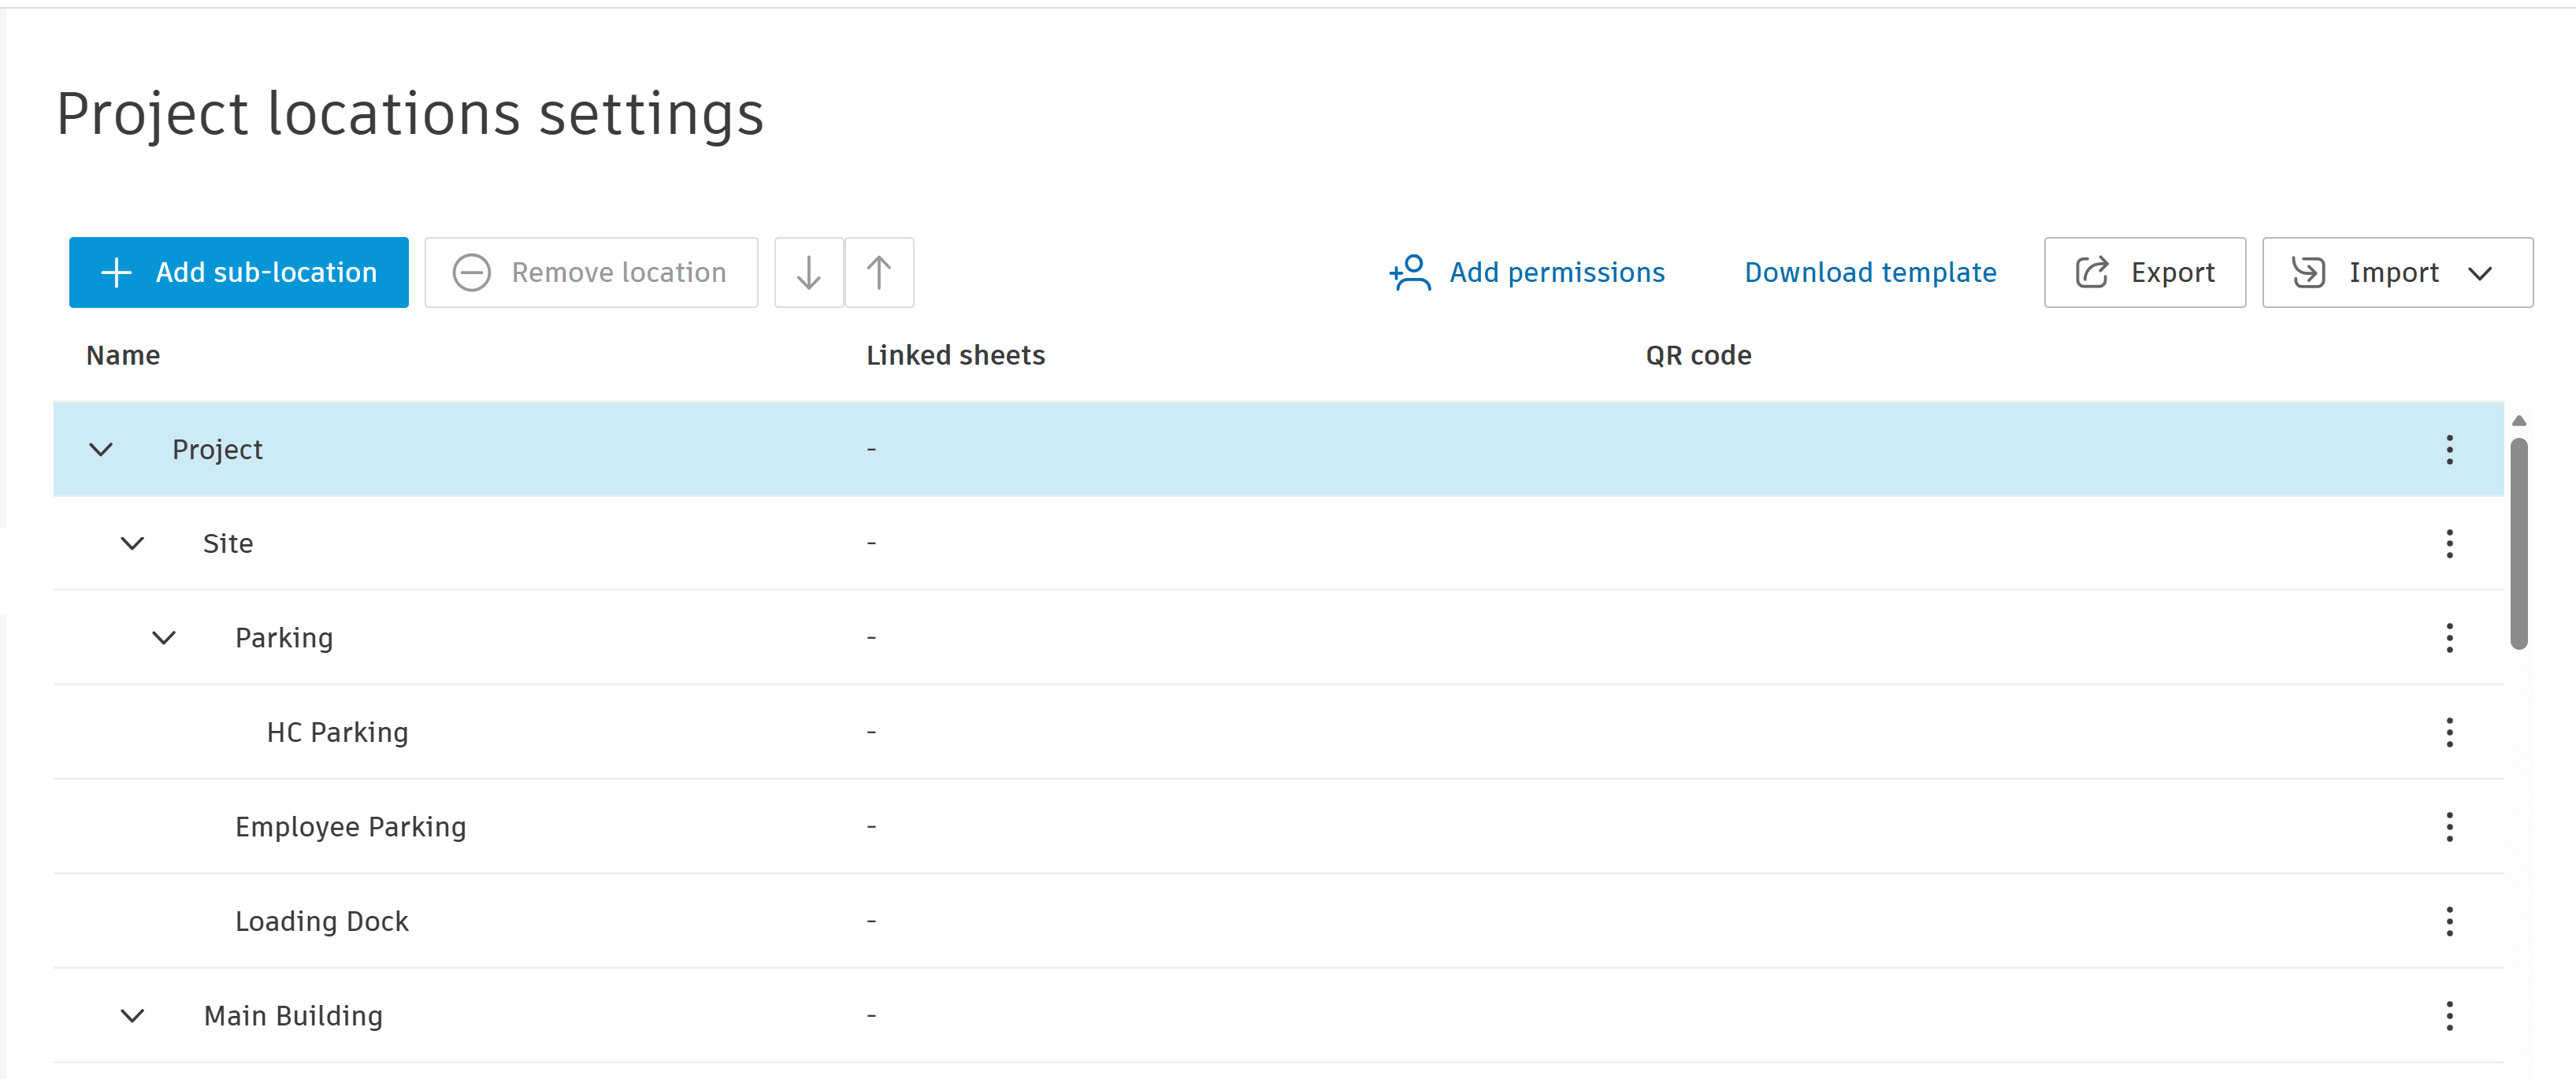
Select Locations tab
-
Click Export. This downloads an Excel file containing every location currently in the project.
-
Open that exported file in Excel. You will see your existing locations already filled out in the rows. Leave these alone.
-
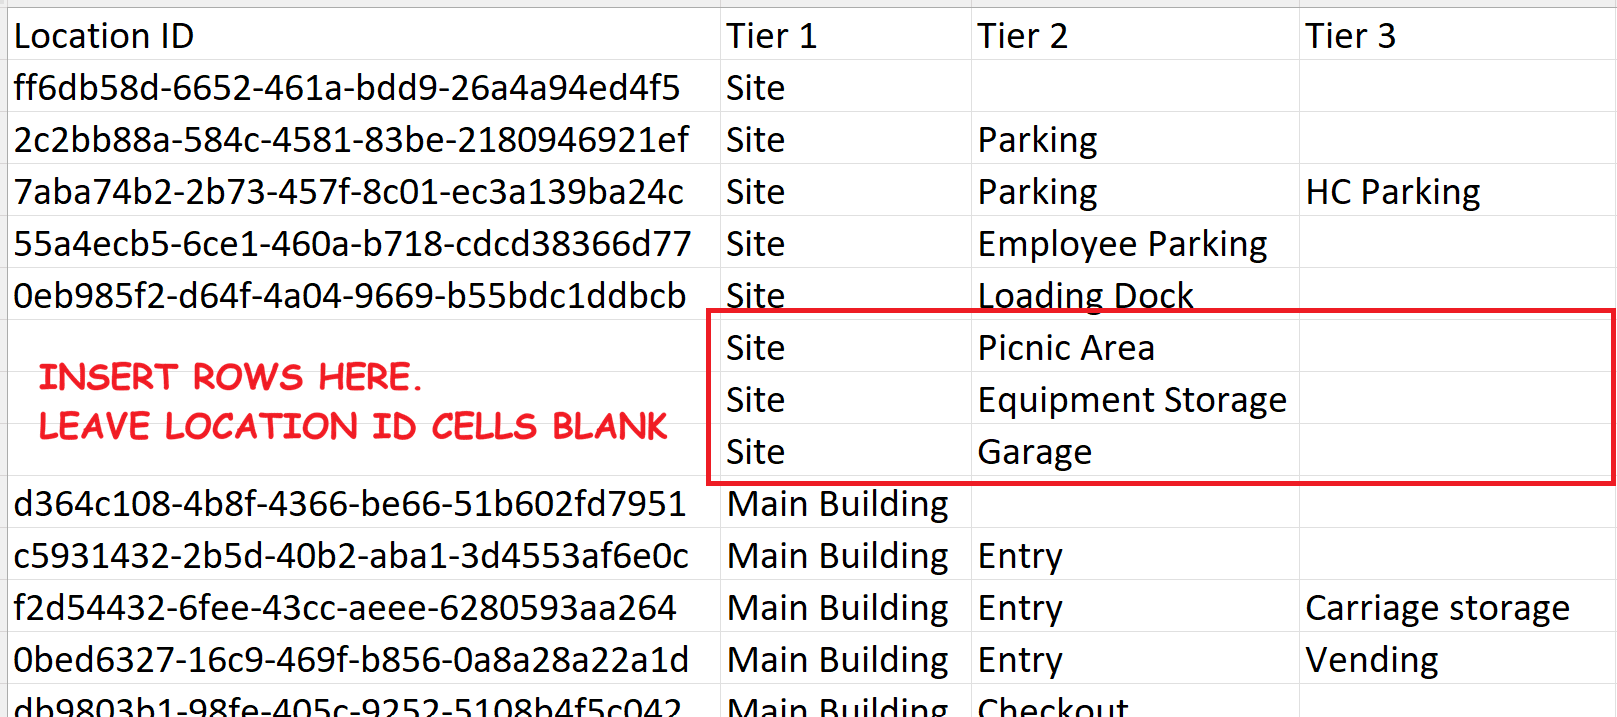
To add new Tier 1 (Building) locations, simply go to the first empty row at the bottom and start typing your new locations. Leave the Location ID in the new rows blank. Forma will generate a unique ID when the locations are imported.
- To add new areas to an existing main Tier 1 location, insert new rows in the Tier 1 section. Leave the Location ID blank. Copy down the Tier 1 name, and type in the new area (Tier 2) names.
-
To add rooms or other sub-rooms to existing locations (Tiers 3-7), follow the same principle steps as described in Step 6.
-
Save the file and use the Import button from Project Admin > Locations to upload it back into Forma.
- Review the updated list of Locations to verify accuracy.
Note the following actions and results that occur in Forma during import:
| Action in Excel | Result in Forma |
| Keep row exactly the same | No change |
| Add a brand new row | New location created |
| Change a name | Creates a new location (does not rename the old one) |
| Delete a row | Nothing. Importing a list cannot delete existing locations |
About the Author
More Content by Jeremy Smith