Welcome back to my ongoing series on IMAGINiT’s Utilities for Revit! Today, we’ll take a closer look at the Grid Select utility, a handy tool designed to help users streamline their workflow when working with Revit grid systems. The Grid Select tool allows users to isolate elements on specific grid lines quickly and efficiently, ensuring they have greater control over their views and selections. This utility is perfect for large projects where managing and aligning elements on or near grids manually can be tedious. Let’s dive into the details and explore how this tool can make your day-to-day Revit work easier.
Overview of the Grid Select Utility
The Grid Select utility provides a way to quickly filter, highlight, and work with specific grids and elements in your Revit model. Instead of sifting through complex grid systems in crowded views, this tool enables you to focus on the grids you need without distractions. Whether you’re aligning elements, troubleshooting grid visibility issues, or preparing sheets, Grid Select gives you precise control over grid interactions.
Key Features of Grid Select
- Targeted Grid Selection:
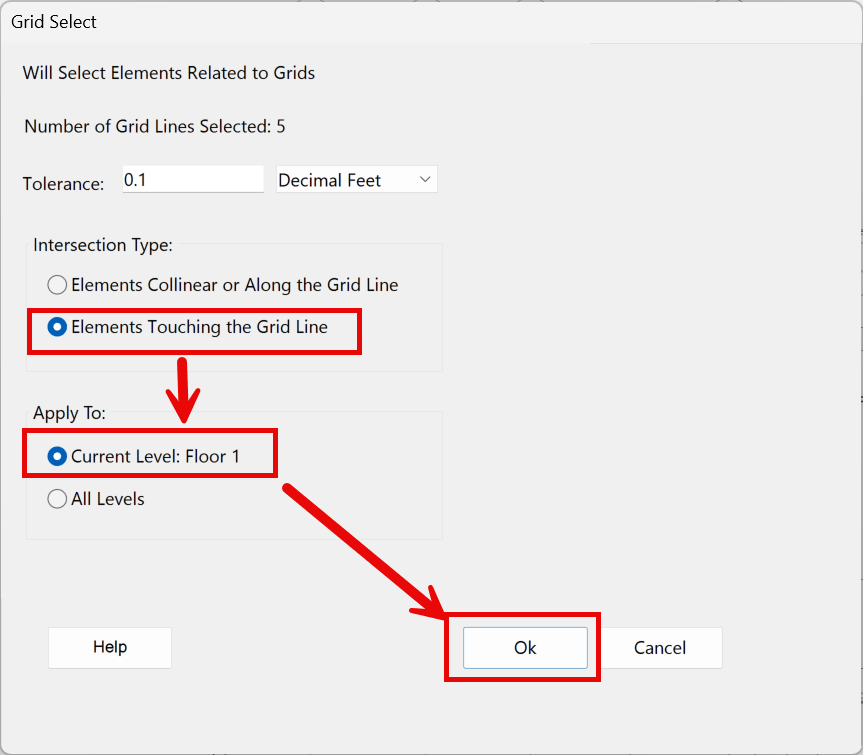
- Grid Select allows Revit users to set which elements will be selected that are near the grid such as elements that are collinear or along the gridline with a specific set tolerance to how close those elements are to the gridline, or elements that are directly touching the gridline.
- View Isolation:
- Temporarily isolate the set elements that are along the gridline or touching the gridline either by the currently selected level or on all levels within the model.
- Quick Filtering:
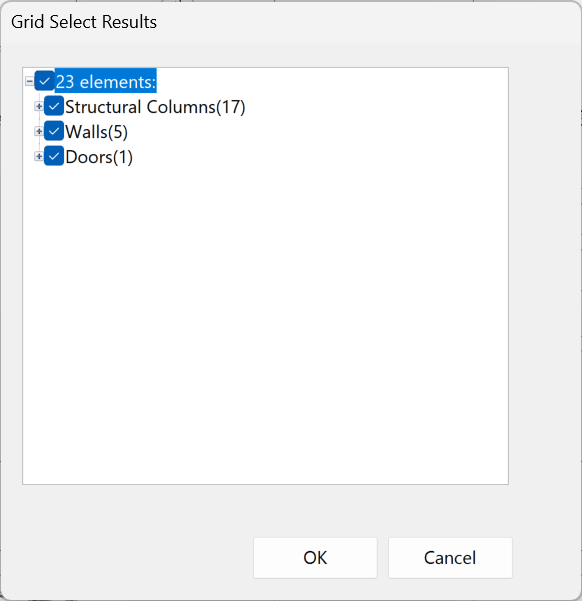
- Filter elements per intersection type by family (examples: Structural Columns, Walls, or Doors).
- Improved Productivity:
- Streamline grid management tasks to save time and reduce errors.
Grid Select Workflow
Using the Grid Select utility is straightforward. Here’s a step-by-step guide:
- Access the Utility:
- Open your Revit project and navigate to the IMAGINiT Utilities tab. Select the Grid Select tool from the menu.

- Select the Desired Grids:
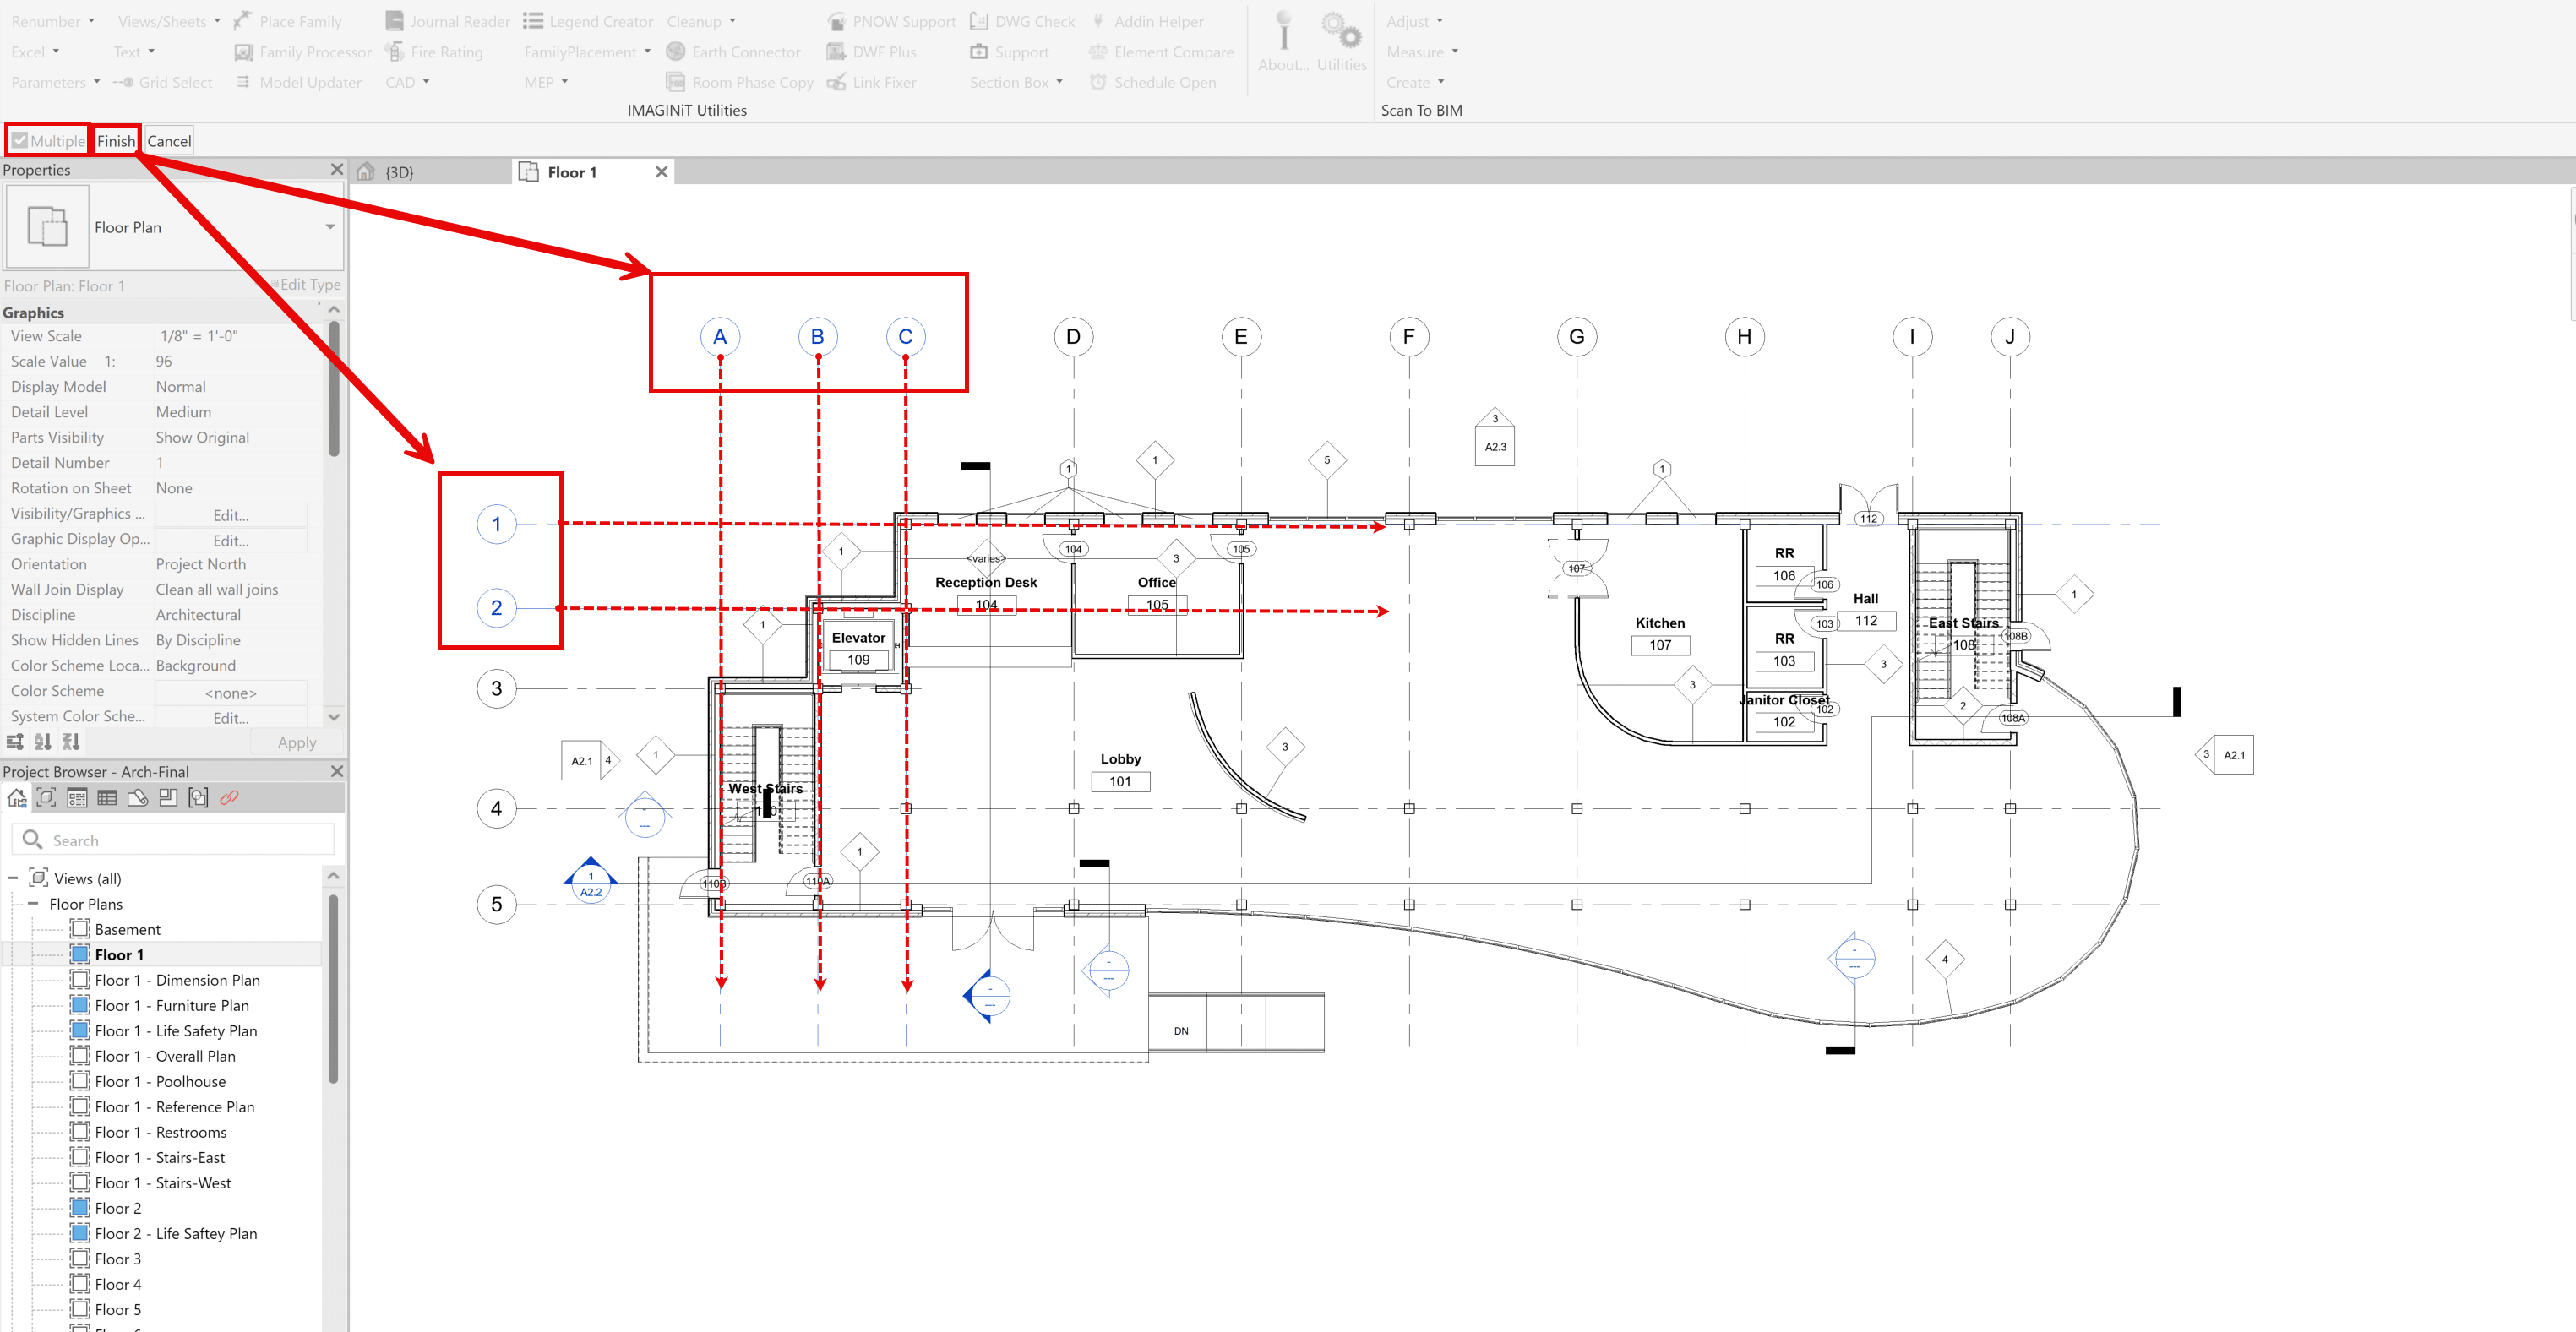
- After clicking on ‘Grid Select’ you will see a ‘+’ mouse icon appear, click on the grid line(s) you wish to select. Note, to select multiple gridlines, you must have the ‘multiple’ option box checked. Also note that this tool will only work on 2D views.

- Set Selection Criteria:
- Set how elements will be selected from the grid, allowing you to select based on if the elements are collinear to the grid (and how close to the grid), or touching the gridline directly. Then Select where you wish the selection to be applied – either by current floor or to all floors.

- Set Element Types for Selection:
- Select which elements by family (matching your intersection settings) will be selected.

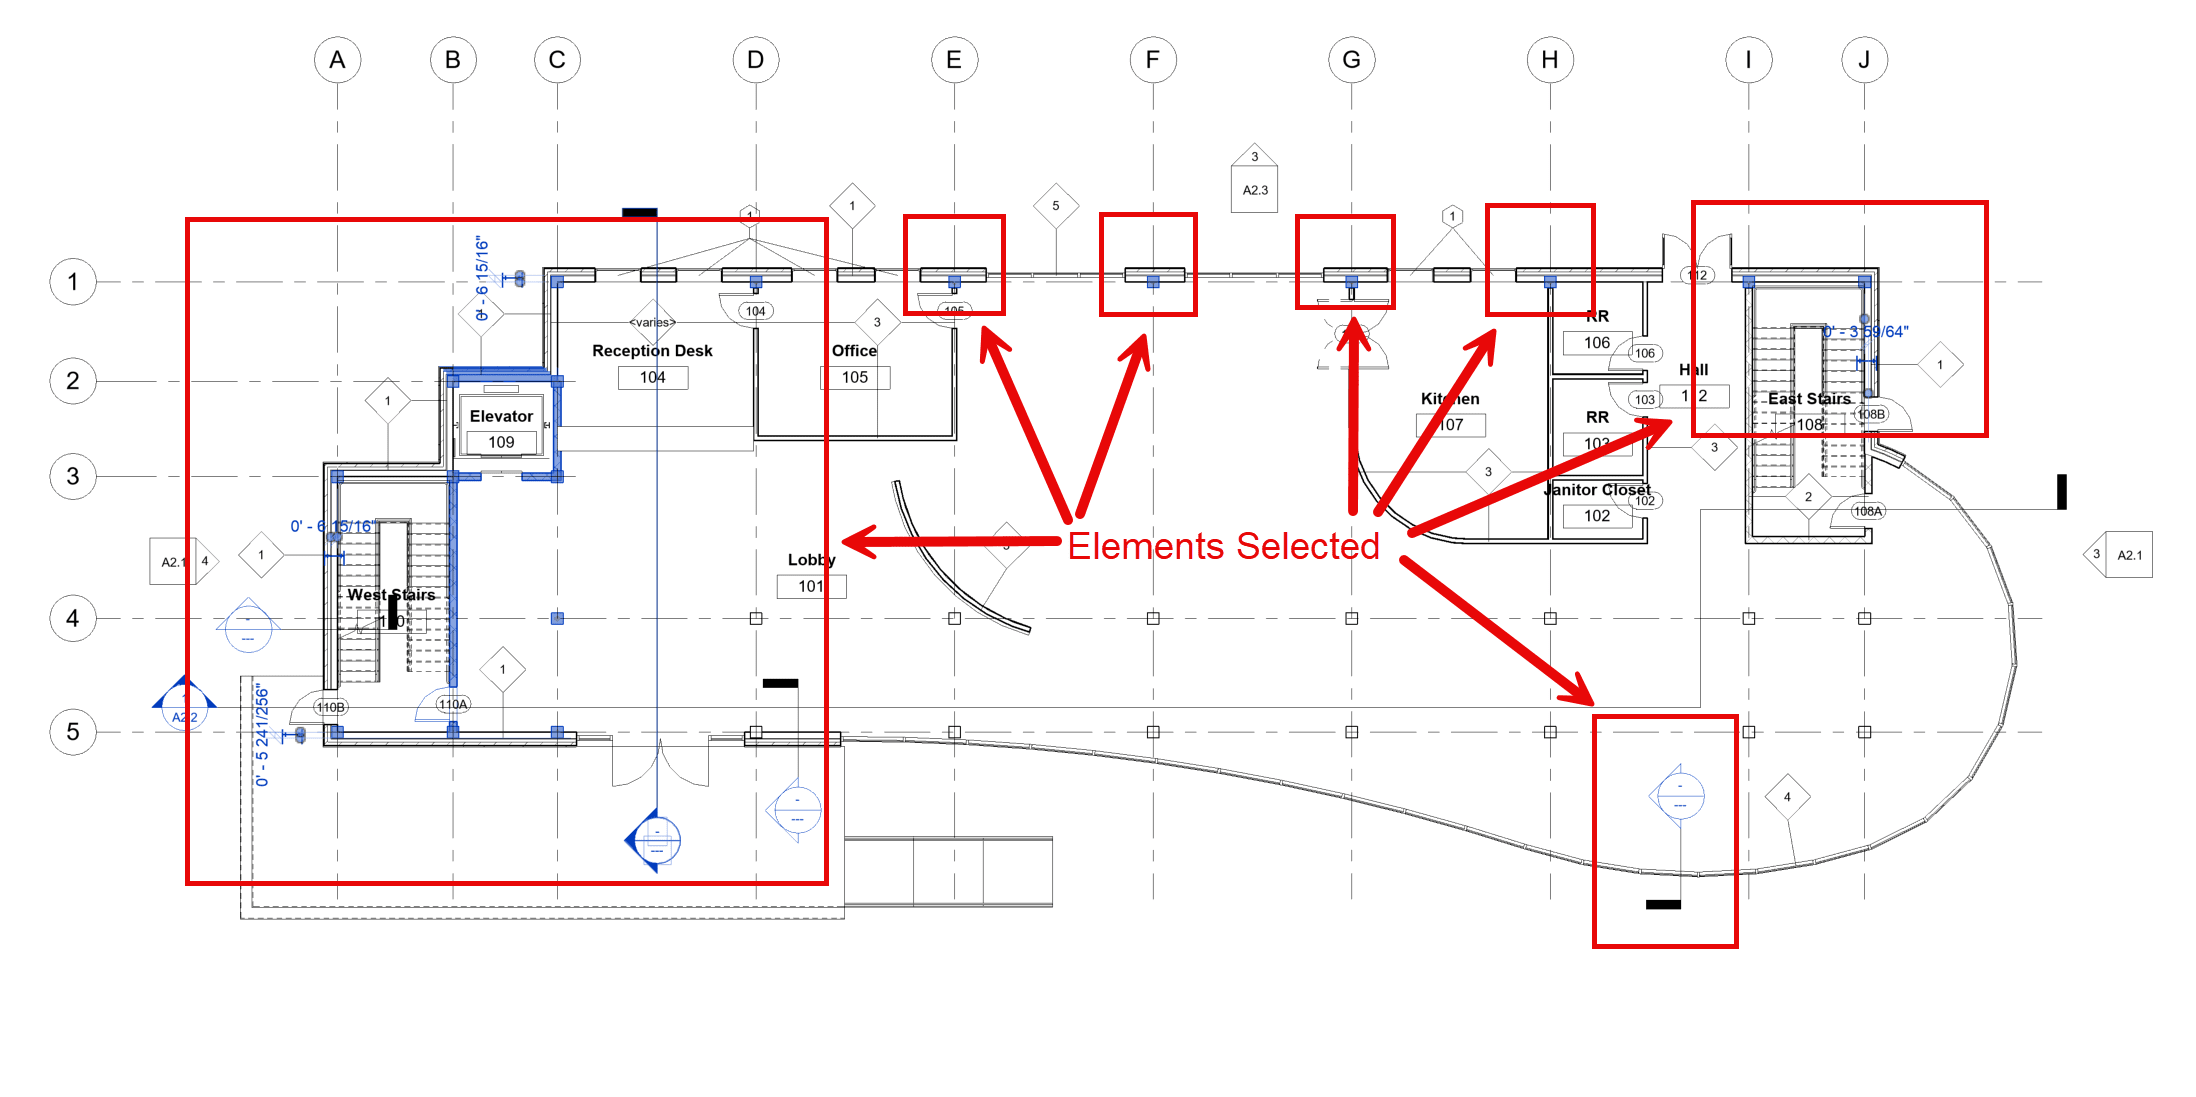
Once ‘OK’ is selected from the final dialog, grid select will select those elements based on your setup criteria.

Benefits of Using Grid Select
- Enhanced Efficiency:
- Quickly identify and work with the elements near or on the grid that you need, saving valuable time.
- Reduced Clutter:
- Simplify views by isolating or filtering out irrelevant grids or elements.
- Improved Accuracy:
- Eliminate errors caused by accidentally interacting with the incorrect elements.
- Streamlined Workflow:
- Focus on specific grid-related tasks without distraction.
The Grid Select utility provides Revit users working on large-scale or grid-heavy projects with a versatile tool for element selection. By providing a way to focus on specific grids and elements, it eliminates distractions, saves time, and ensures greater accuracy in your work.
Stay tuned for the next installment in this series, where we’ll explore yet another invaluable tool from IMAGINiT’s Utilities for Revit. In the meantime, try out Grid Select and see how it can enhance your workflow!
About the Author
Follow on Linkedin More Content by Scott Green


