
Welcome back to my continuing series on IMAGINiT’s Utilities for Revit! Today, I am thrilled to introduce the Element Compare tool. This utility is designed to help Revit users understand differences between similar elements within their models, offering a streamlined approach to element comparison. Whether you’re comparing view templates, wall types, or other elements, this tool provides the clarity you need to make informed decisions about your design data. Let’s explore the features and applications of this versatile tool!
Overview of the Element Compare Tool
The Element Compare utility is a powerful querying and analysis tool that highlights differences in element properties, parameters, and information visible within the Revit API. By allowing users to compare elements side by side in an easy-to-read grid, it simplifies tasks like identifying unnecessary duplicates or verifying consistency between elements.
Key Features of Element Compare
- Customizable Selection:
- Choose elements to compare by direct selection in your model or filter by category, type, or element using an intuitive list.
- Visual Highlighting of Differences:
- View a detailed grid where properties or parameters with differences are highlighted in yellow, ensuring element differences are easy to spot.
- Show Only Differences:
- Filter the grid to display only elements with property differences.
- Export to Excel:
- Export comparison data to Excel for detailed analysis, reporting, or documentation.
How to Use the Element Compare Tool
Using Element Compare is straightforward and intuitive:
- Launch the Tool:
- Navigate to the IMAGINiT Utilities tab in Revit and select the Element Compare tool.

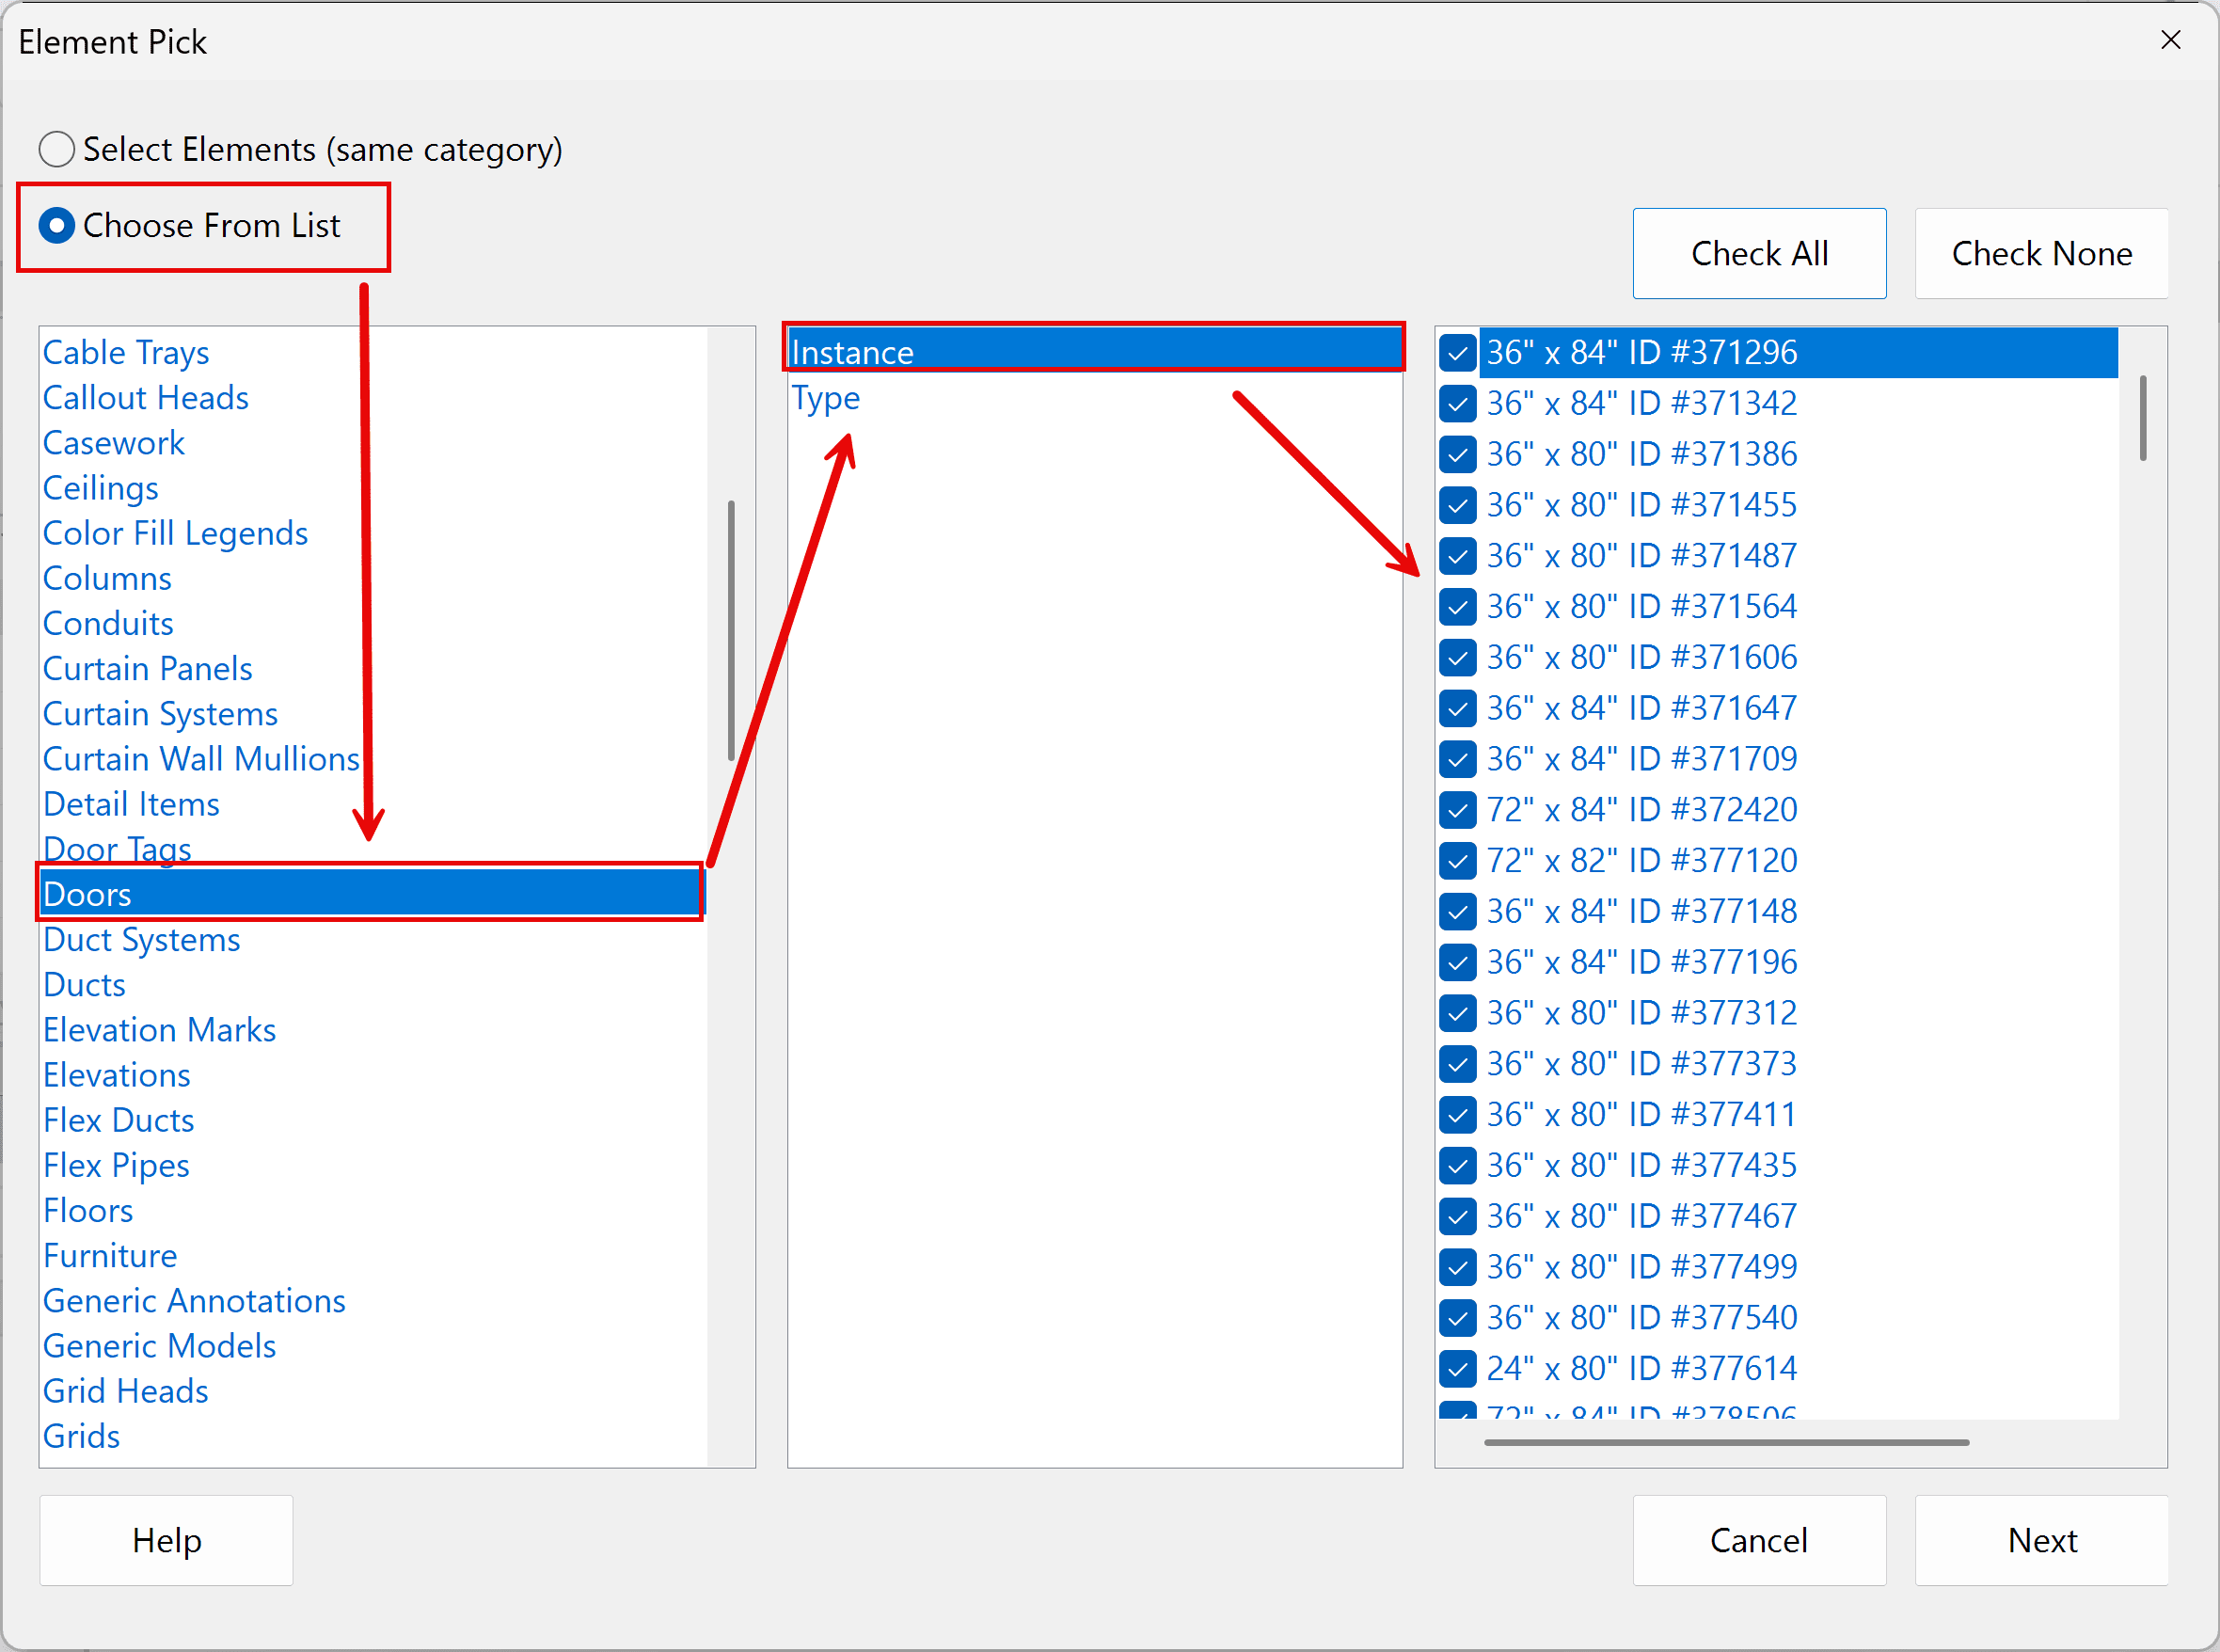
- Select Elements:
- Choose how to select elements:
- Directly select elements in your model.
- Use the tool’s menus to filter by category, type, or specific elements.
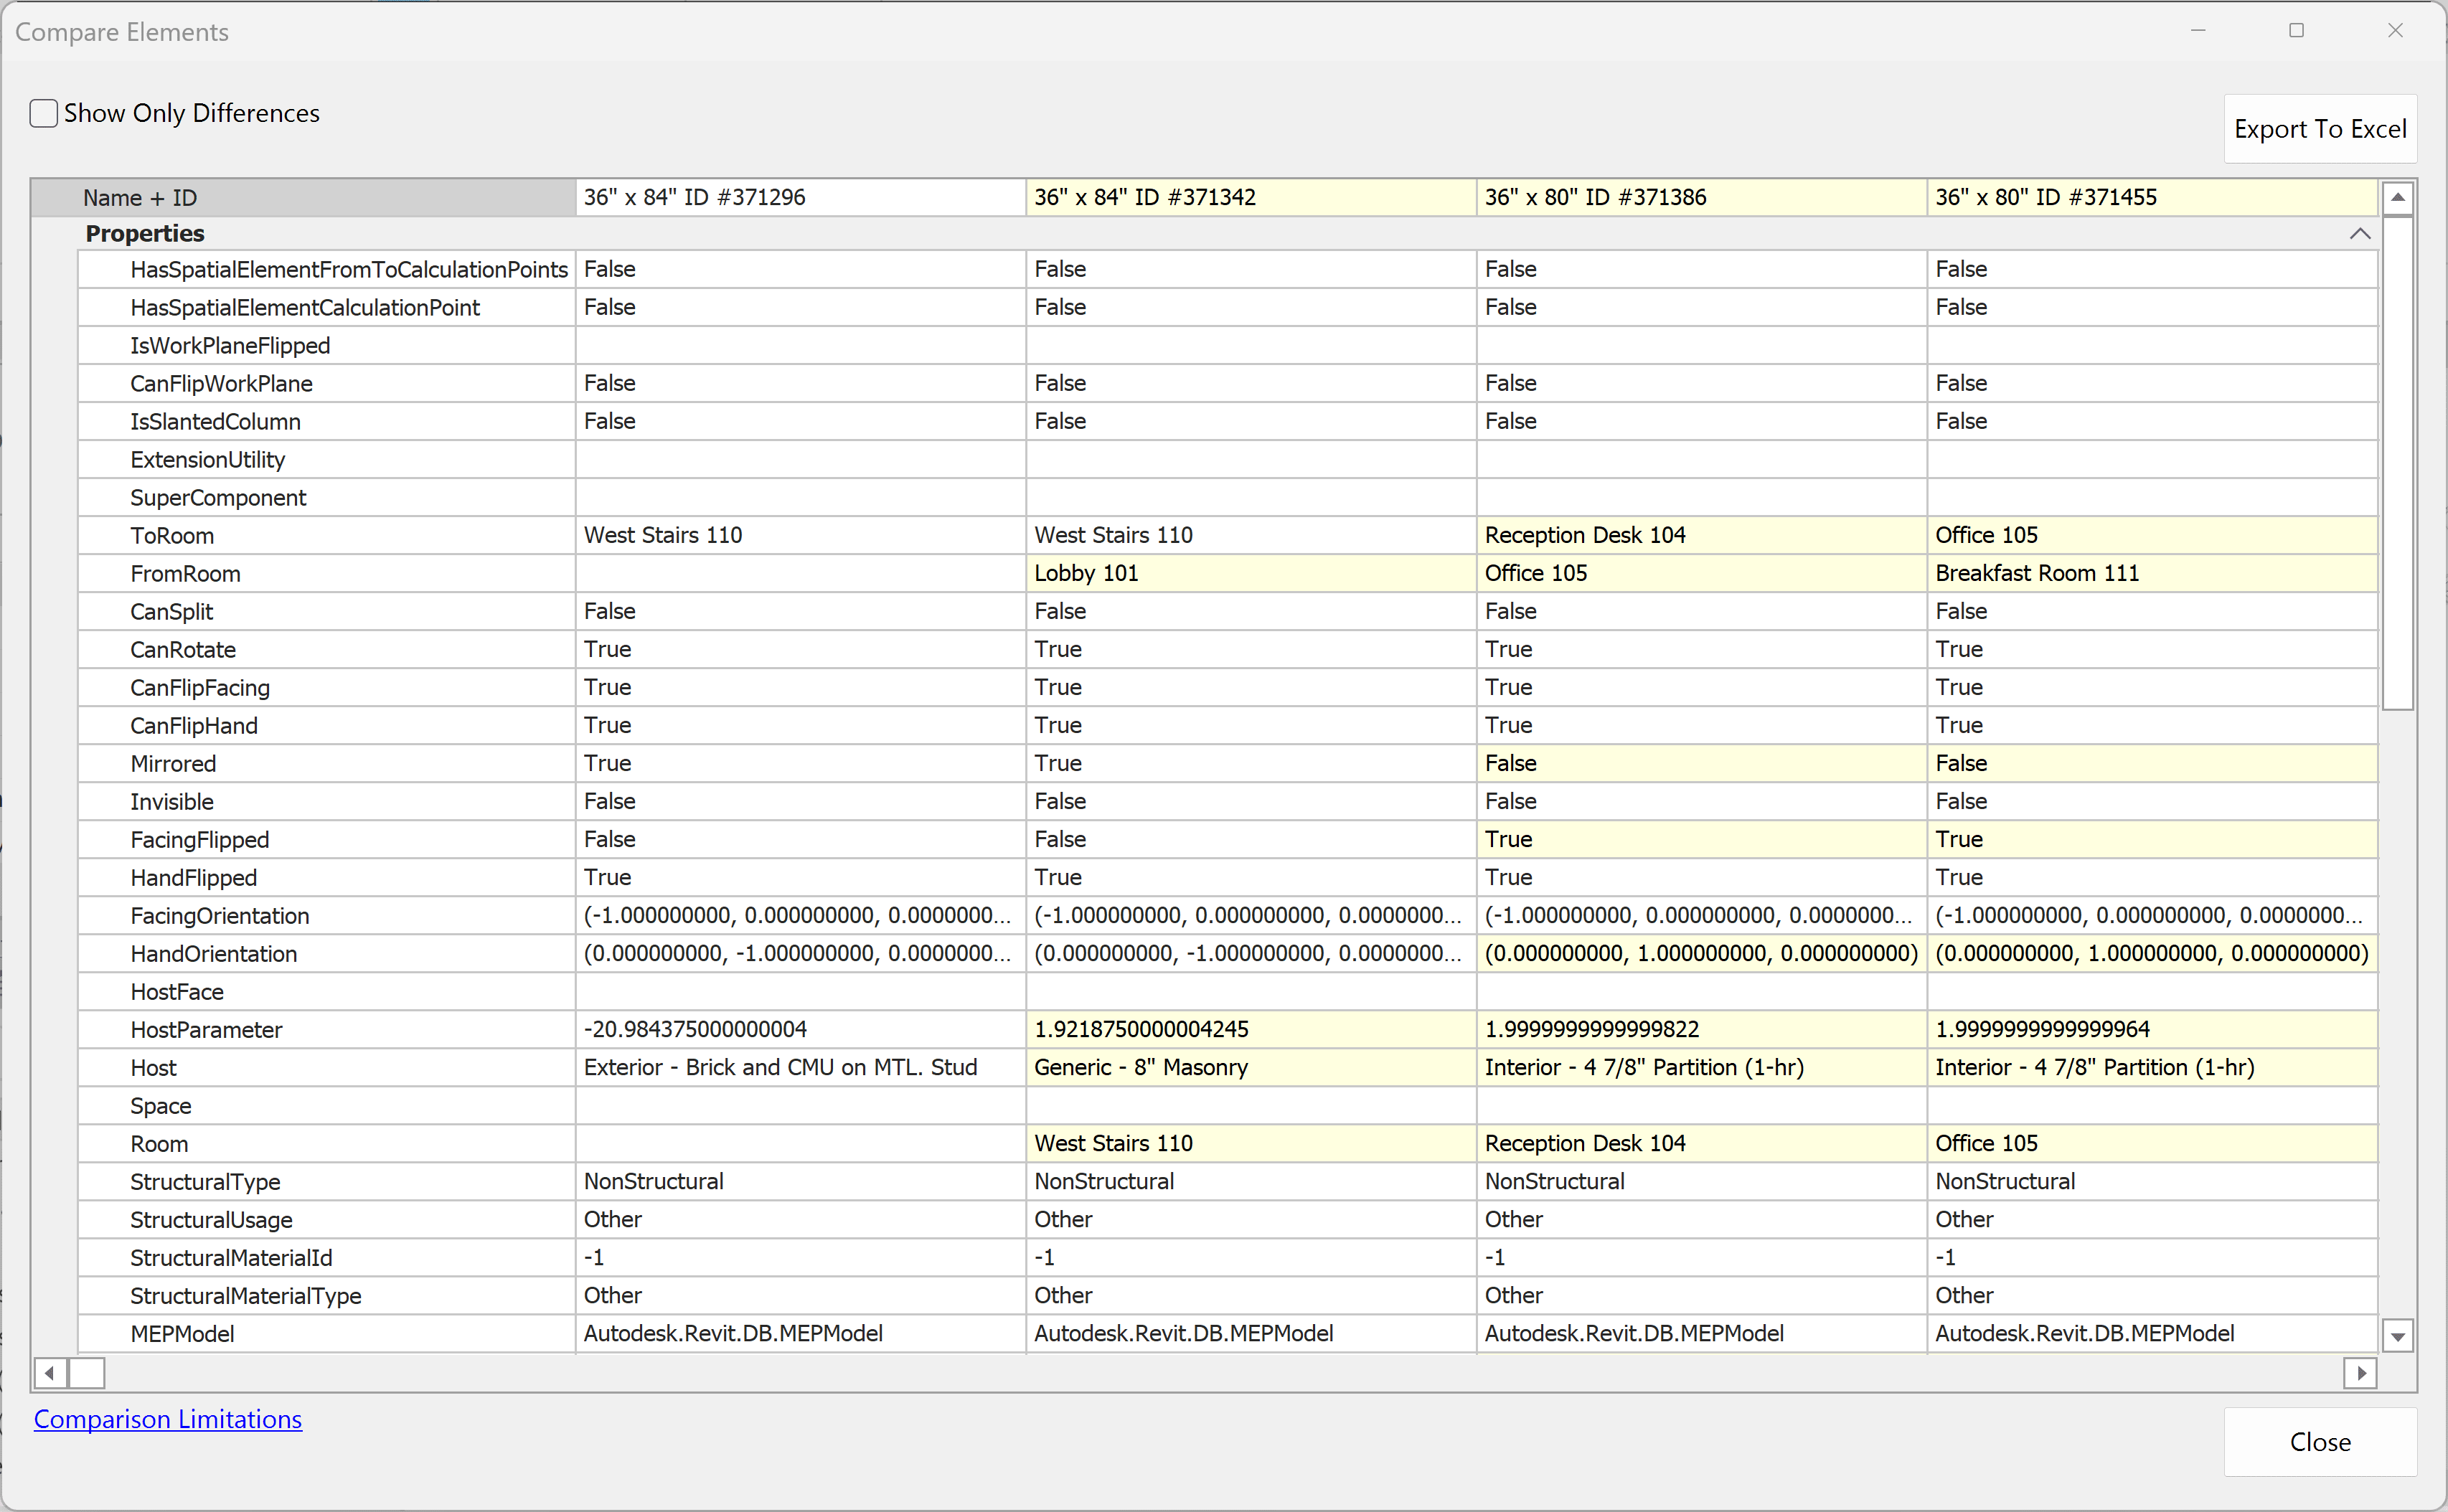
- Review the Comparison Grid:
- A vertical grid displays each selected element as a column, with rows representing properties, parameters, and information.
- Differences are highlighted in yellow, drawing your attention to discrepancies.
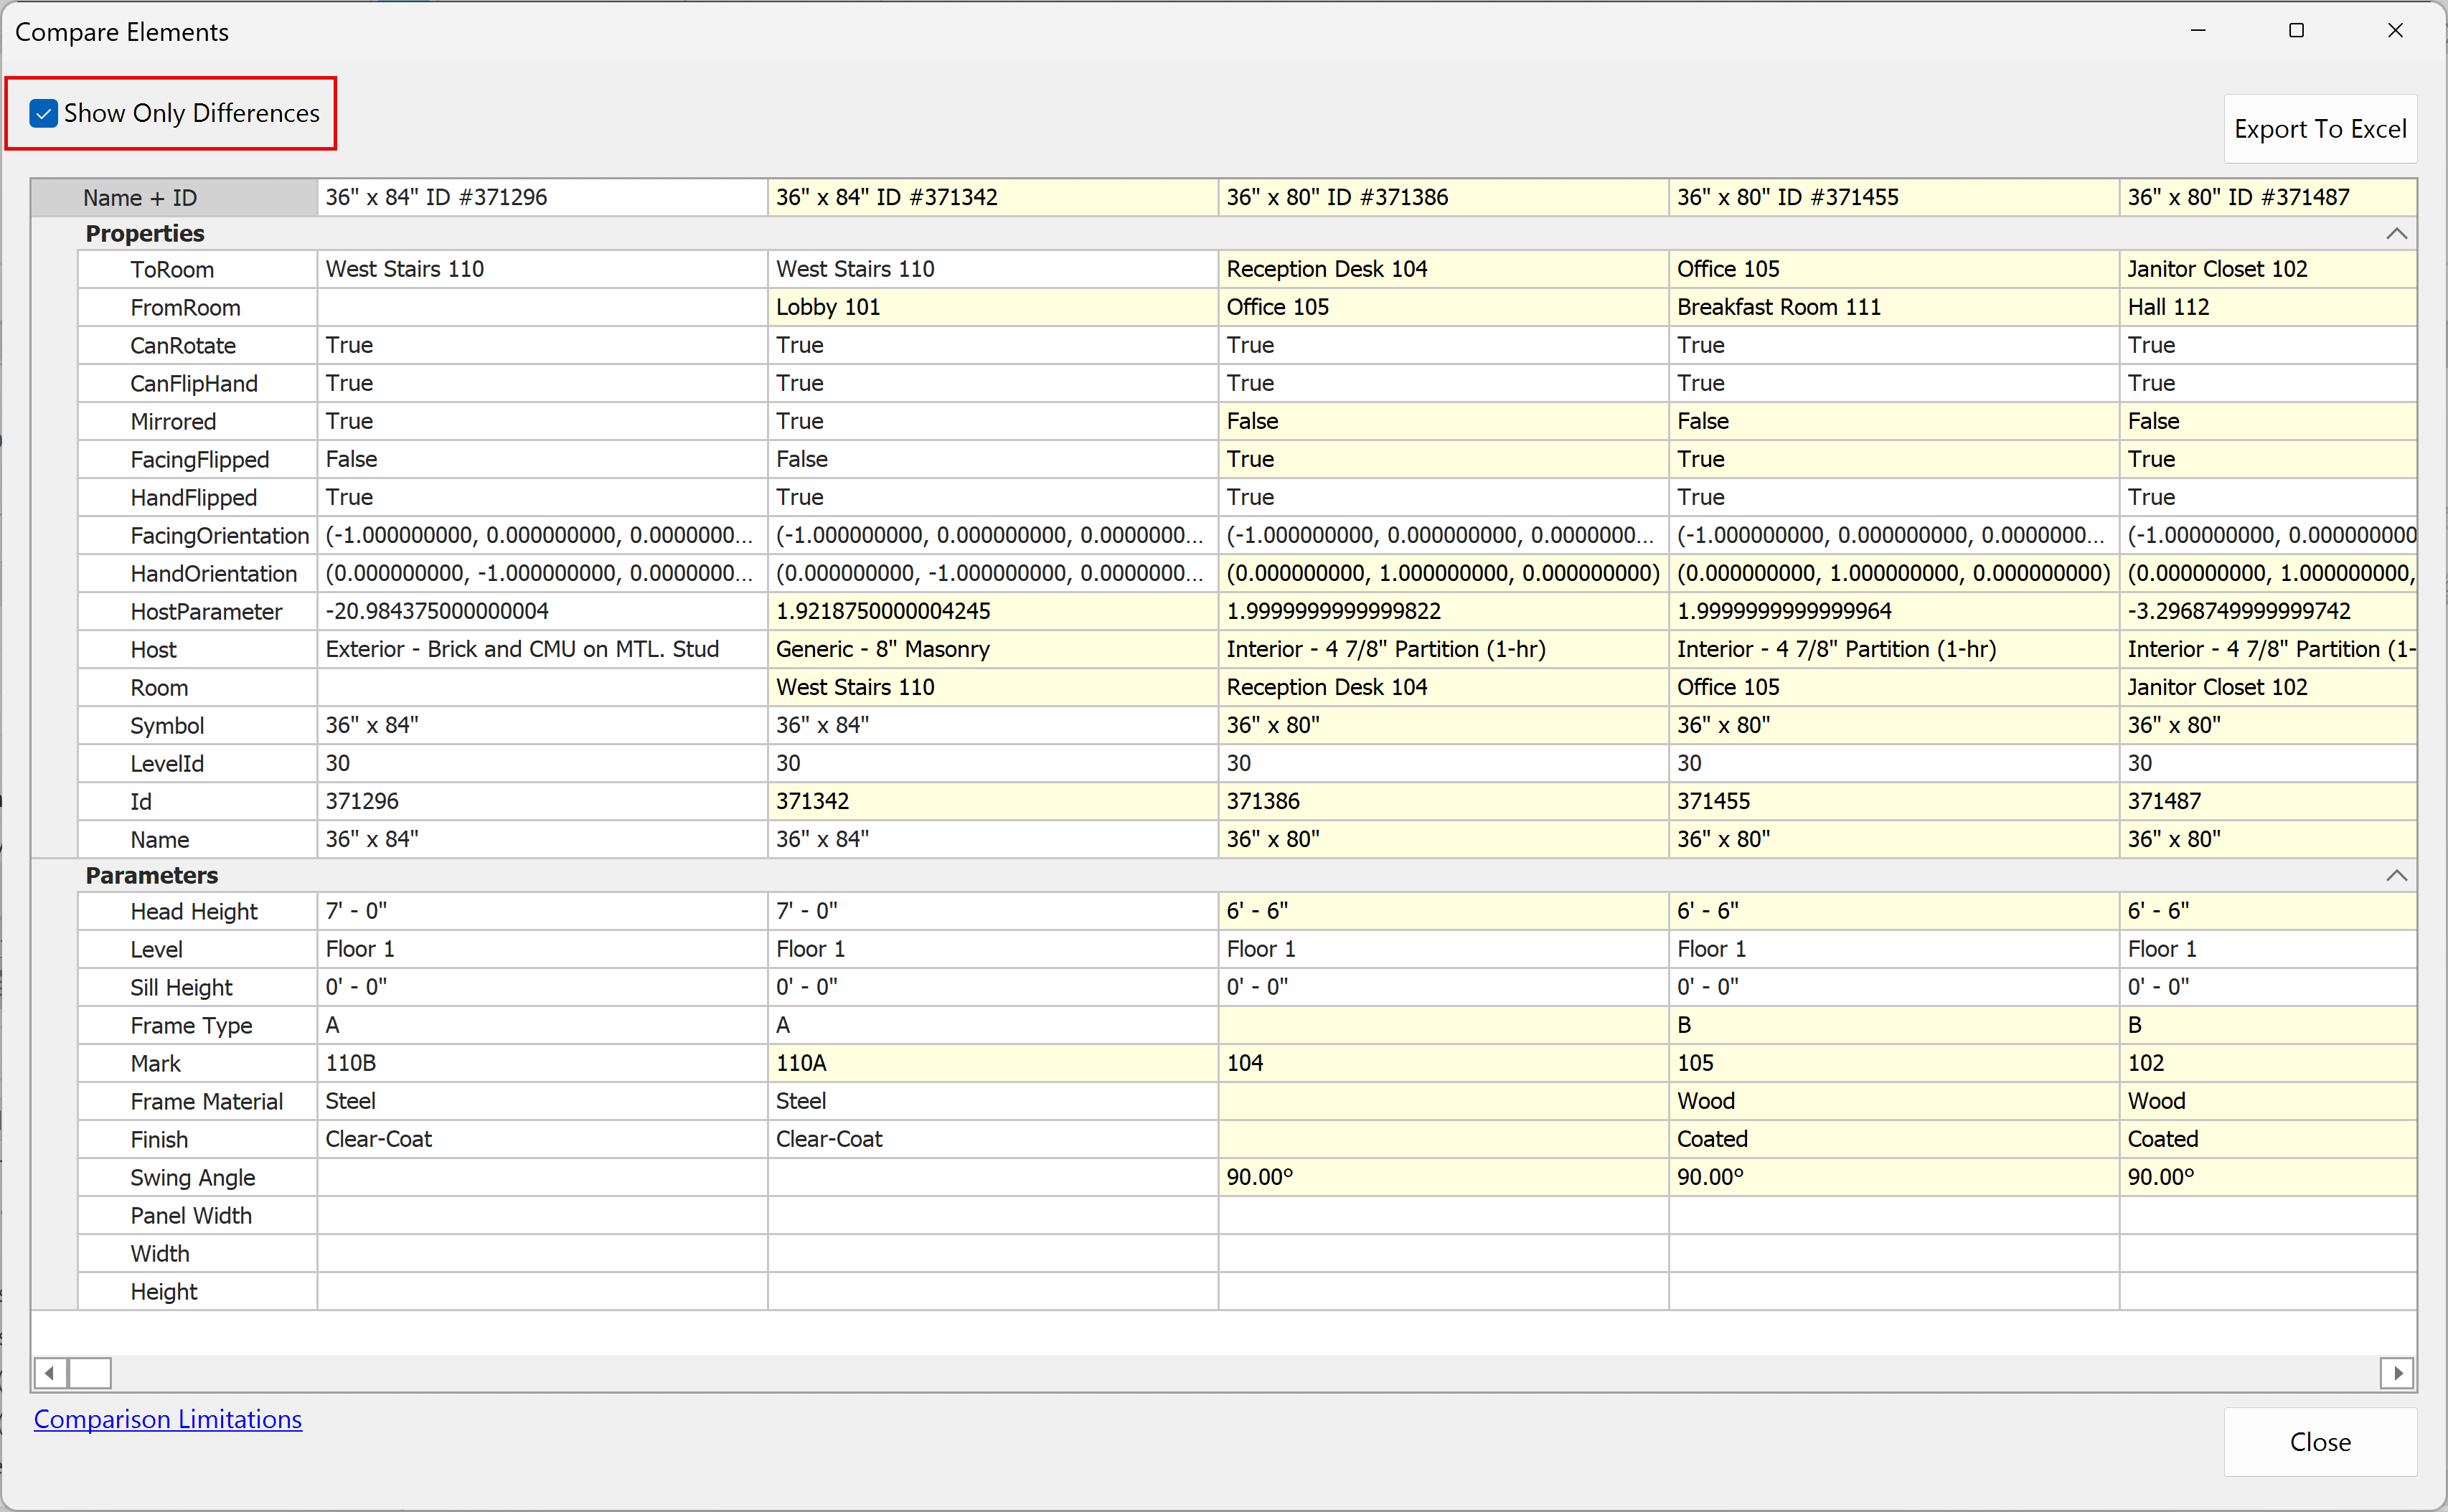
- Focus on Differences (Optional):
- Use the Show Only Differences option to display only rows with highlighted discrepancies, streamlining the review process.
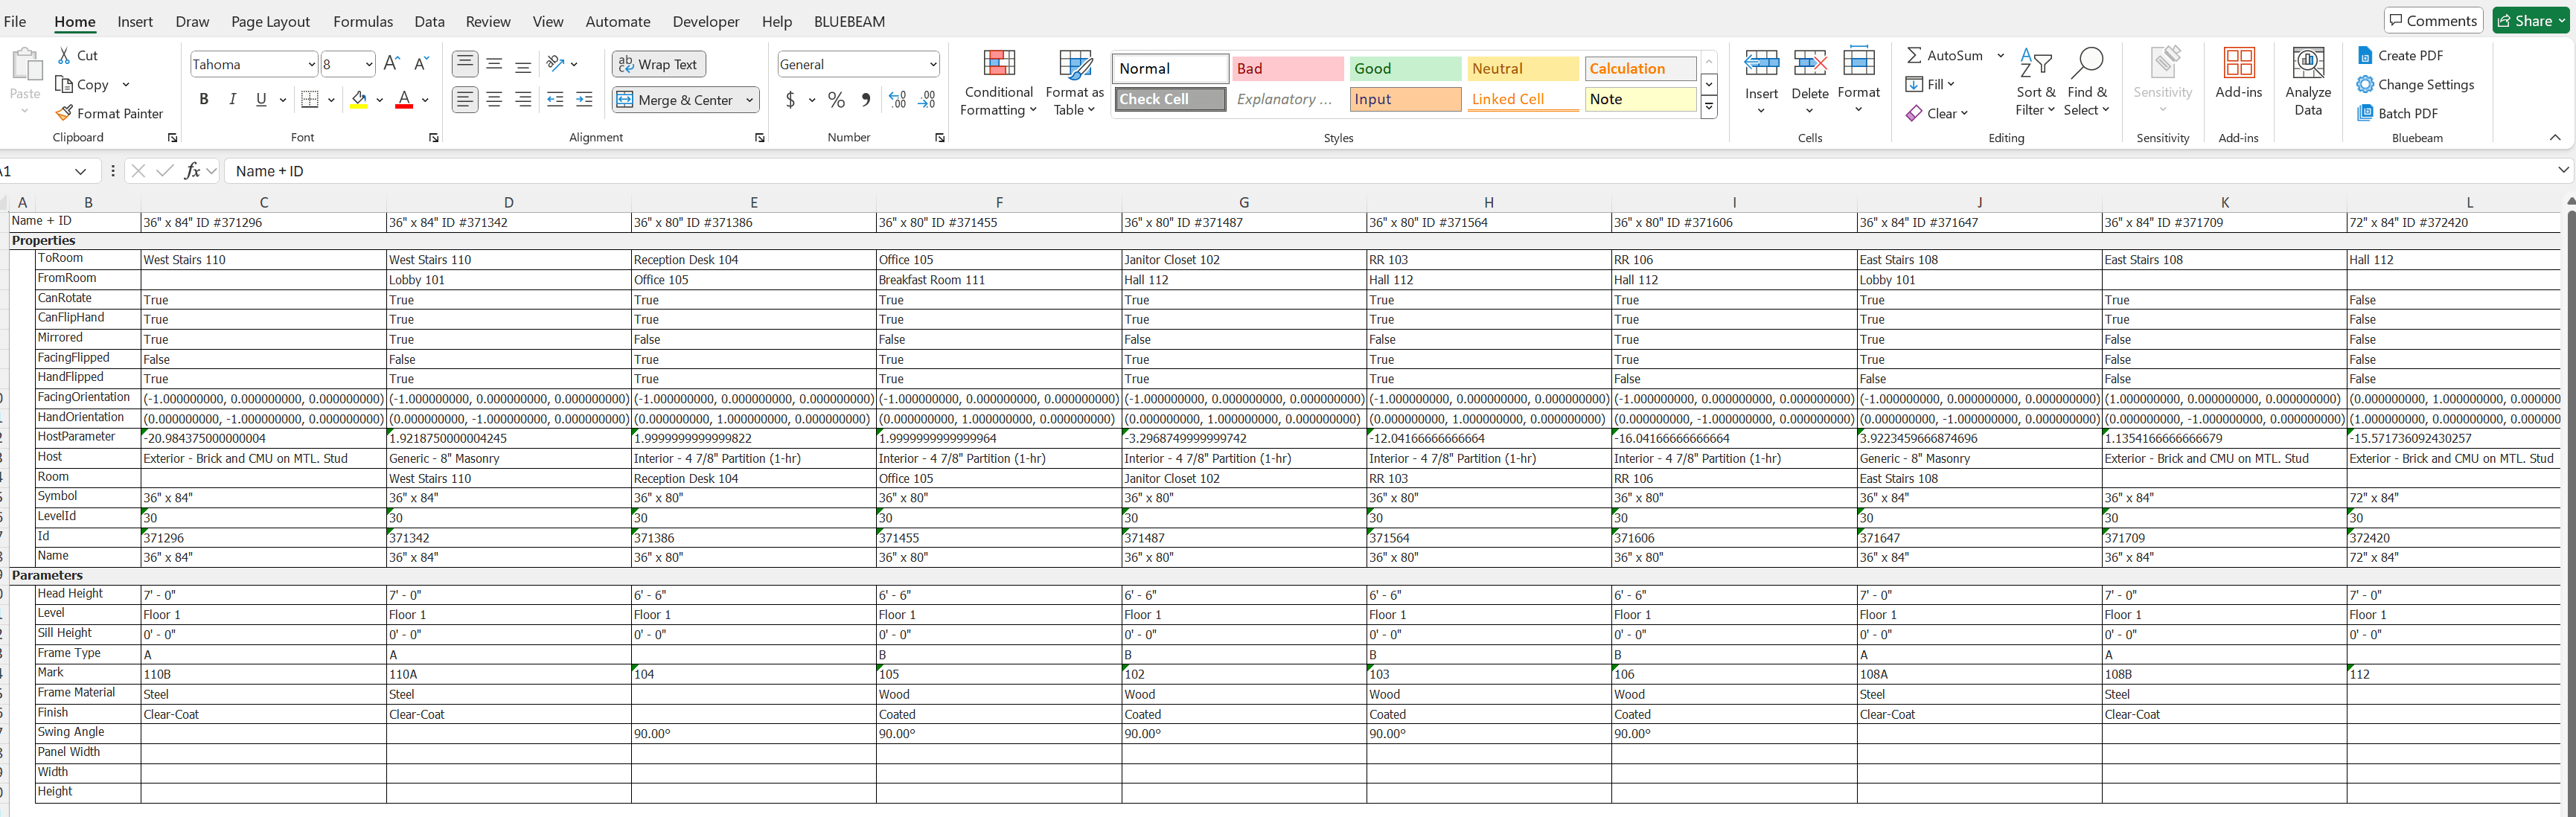
- Export to Excel (Optional):
- Export the comparison grid to Excel for further analysis or to share with your team.
Benefits of Using the Element Compare Tool
- Streamlined Quality Control:
- Quickly identify and address inconsistencies in elements like view templates, wall types, or schedules.
- Enhanced Collaboration:
- Export comparisons to Excel to share findings with team members for discussion or documentation.
- Optimized Model Management:
- Easily determine whether duplicate elements are necessary or redundant, helping to keep your model clean and efficient.
- Time Savings:
- Automate the process of comparing elements, saving time and reducing manual errors.
Limitations to Keep in Mind
- API-Based Data:
- The tool relies on the Revit API, meaning it cannot detect differences in geometry or visibility settings like Visibility/Graphics overrides.
- Focus on Metadata:
- Geometry and certain graphical differences are not considered, as the tool is limited to property and parameter data.
The Element Compare tool is an invaluable resource for Revit users who need to ensure consistency and efficiency in their models. By simplifying the process of comparing elements and providing clear, actionable insights, it allows teams to maintain high-quality models with minimal effort.
Stay tuned for more deep dives into IMAGINiT’s Utilities for Revit. In the meantime, give the Element Compare tool a try and see how it can enhance your Revit workflow!
About the Author
Follow on Linkedin More Content by Scott Green


